Last Updated: March 01, 2015
Paint Net Image Editor Effects will cover the following effects, Artistic, Blurs, Distort, Noise, Photo, Render and Stylize.
Latest News: I have added another link to the menu.
With each Effect there are even more options for you to select. Play around with them until you find what you are looking for. I will be adding more instructions on how to use each effect. Stay tuned.
Paint Net Image Editor Tutorials:
- Paint Net Image Editor
- Paint Net Image Editor Top Menu Tools
- Paint Net Image Editor Top Right Menu
- Paint Net Image Editor Effects
- Paint Net Image Editor Top Right Menu Layers
Paint Net Image Editor Effects Steps
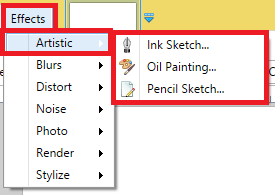
1 ) Click on Effects -> Artistic to manage the following effects.
- Ink Sketch
- Oil Painting
- Pencil Sketch
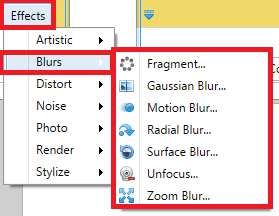
2 ) Click on Effects -> Blurs to manage the following effects.
- Fragment
- Gaussian Blur
- Motion Blur
- Radial Blur
- Surface Blur
- Unfocus
- Zoom Blur
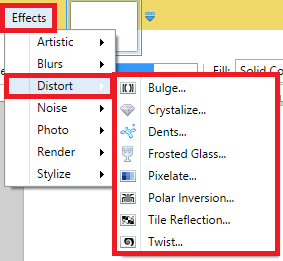
3 ) Click on Effects -> Distort to manage the following effects.
- Bulge
- Crystalize
- Dents
- Frosted Glass
- Pixelate
- Polar Inversion
- Tile Reflection
- Twist
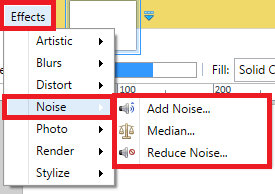
4 ) Click on Effects -> Noise to manage the following effects.
- Add Noise
- Median
- Reduce Noise
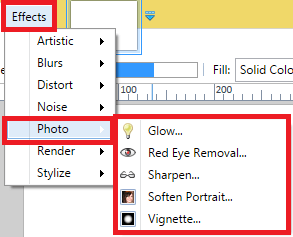
5 ) Click on Effects -> Photo to manage the following effects.
- Glow
- Red Eye Removal
- Sharpen
- Soften Portrait
- Vignette
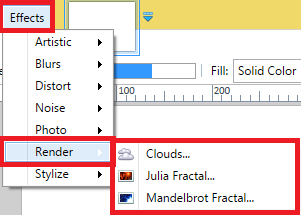
6 ) Click on Effects -> Render to manage the following effects.
- Clouds
- Julia Fractal
- Mandelbrot Fractal
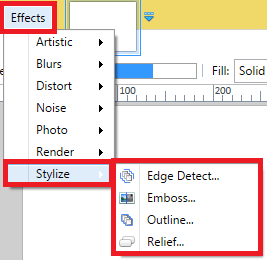
7 ) Click on Effects -> Stylize to manage the following effects.
- Edge Detect
- Emboss
- Outline
- Relief
Click on the following URL Paint Net Image Editor Top Right Menu Layers to learn more.
I will update this tutorial from time to time. So keep coming back for the latest. If you have any questions please let me know.
Enjoy