How to Create PayPal Shopping Cart Button shows you how to create buttons using the Button Factory.
Last Updated: June 17, 2022
Latest News: I have added another link to the menu below.
Remember you must have a PayPal Business or Premier account to use the PayPal Button Factory to create buttons and use the HTML code on your website. The generated code displays a PayPal button that lets your customers use their PayPal account to purchase the goods.
This tutorial concentrates on a Shopping Cart Button but you can also create a Buy Now, donation and subscription buttons.
What you Need:
- A PayPal Business or Premier account
How to Create PayPal Shopping Cart Button Tutorials:
- How to Create PayPal Shopping Cart Button
- Customise Advanced Features
- Add PayPal Shopping Cart Button WordPress
How to Create PayPal Shopping Cart Button Steps
Using the Button Factory, create the HTML code for each PayPal button you need on your website. Then, copy and paste the HTML code to the appropriate spot on your website. It’s as easy as that, PayPal handles all the back-end processing for your business payments.
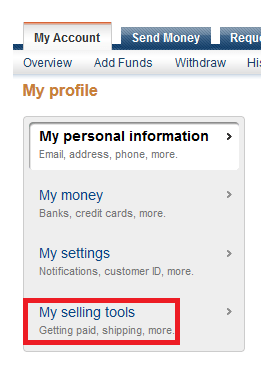
Step 1 ) Log into your PayPal account and click on Profile. See image below.

Step 2 ) Click on My selling tools. See image below.Specify Your Button Details
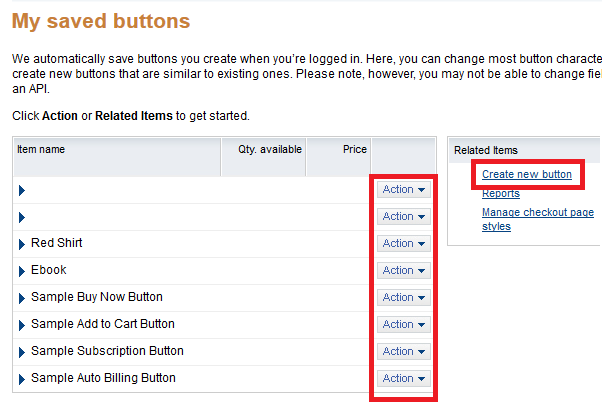
Step 3 ) Go to PayPal buttons and click on Update link. See image below.

Step 4 ) If you have already created some buttons then click on Action link next to the button you wish to edit. If you haven’t created any buttons or wish to create a new button click on Create new button link. See image below.
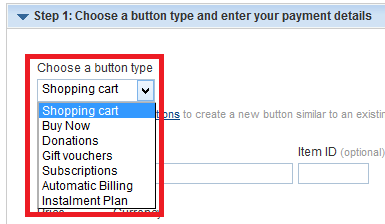
Step 5 ) If you selected to create a new button then you will see the following menu Choose a button type. See image below.
Buttons Type:
- Shopping cart
- Buy Now
- Donations
- Gift vouchers
- Subscriptions
- Automatic Billing
- Installment Plan
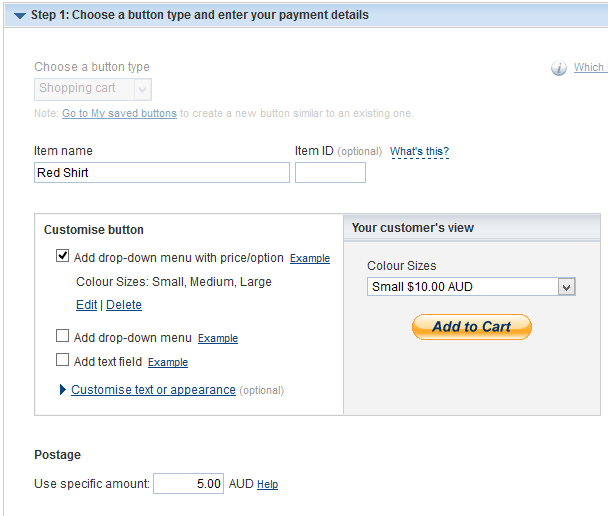
Step 6 ) I selected Shopping cart button. In the following image you can edit the following options.
- Item name
- Item ID (optional)
Customise button
- Add drop-down menu with price/option
- Add drop-down menu
- Add text field
- Your customer’s view
- Postage
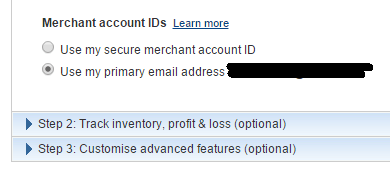
Step 7 ) The following image allows you to select from one of the following options.
- Use my secure merchant account ID
- Use my primary email address
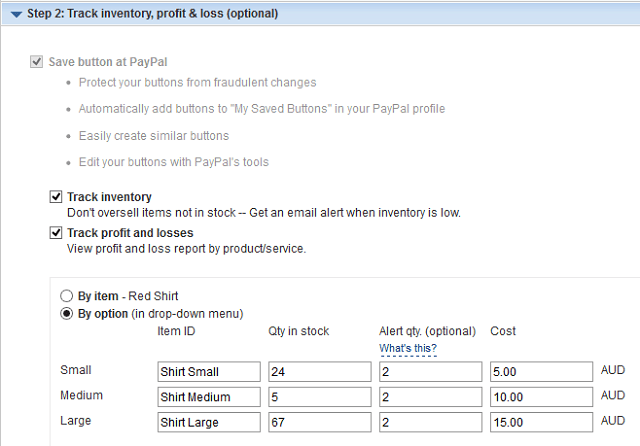
Step 8 ) The following image Step 2: Track inventory, profit & loss (optional) allows you to select the following options.
- Save button at PayPal
- Track inventory
- Track profit and losses
- By item
- By option (in drop-down menu) = Small Medium Large
Drop-down menu
- Item ID
- Qty in stock
- Alert qty (optional)
- Cost
- Currency
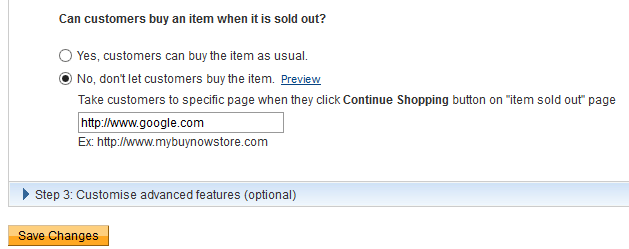
Step 9 ) The following image Can customers buy an item when it is sold out? allows you to select the following options.
- Yes, customers can buy the item as usual
- No, don’t let customers buy the item (This is a great option to set up if you have many items and you don’t want your customers to purchase any item sold out.)
FAQ
Q1 How to secure HTML buttons?
Answer: Check the following link encrypted web payments.
===========================
Click on the following URL Customise Advanced Features to continue with the settings.
I will be updating this post from time to time so come back for the latest. If you have any questions please let me know.
Enjoy
More PayPal Tutorials