PayPal Shopping Cart Customise Advanced Features shows you how to allow customers to send special instructions to you the seller.
Last Updated: August 27, 2017
Latest News: I have fixed a broken link.
There are times when you need to collect some instructions from your buyers. These settings will allow you to carry out that action.
How to Create PayPal Shopping Cart Button Tutorials:
- How to Create PayPal Shopping Cart Button
- Customise Advanced Features
- Add PayPal Shopping Cart Button WordPress
PayPal Shopping Cart Customise Advanced Features Steps
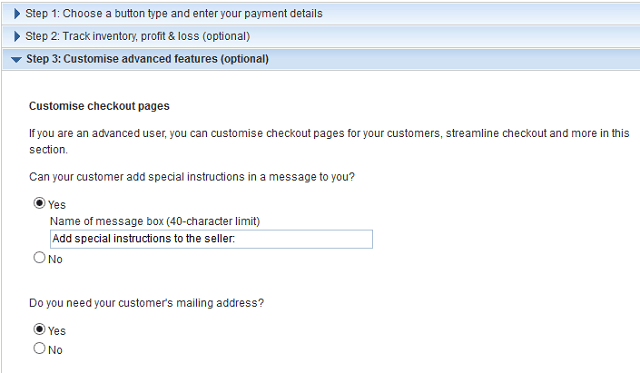
Step 1 ) The following image Step 3: Customise advanced features (optional) allows you to select from the following options.
Customise checkout pages
- Yes = Name of message box (40-character limit)
- No

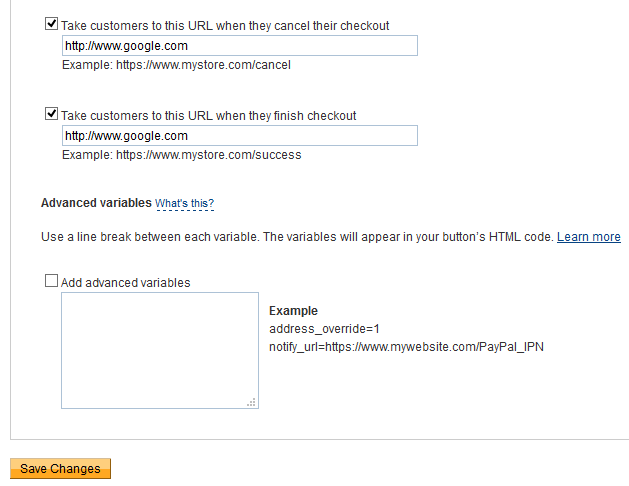
Step 2 ) The following image allows you to select from the following options.
- Take customers to this URL when they cancel their checkout
- Take customers to this URL when they finish checkout
- Add advanced variables
- Click on Save Changes button when you finish

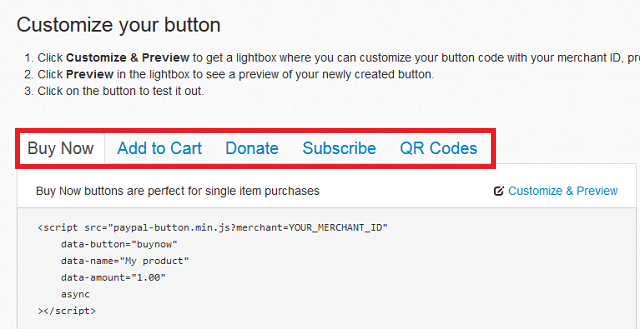
Step 3 ) PayPal has added a site that allows you to use a much simpler method to create your buttons. Go to the following URL paypal.github.io/JavaScriptButtons/ to learn more.

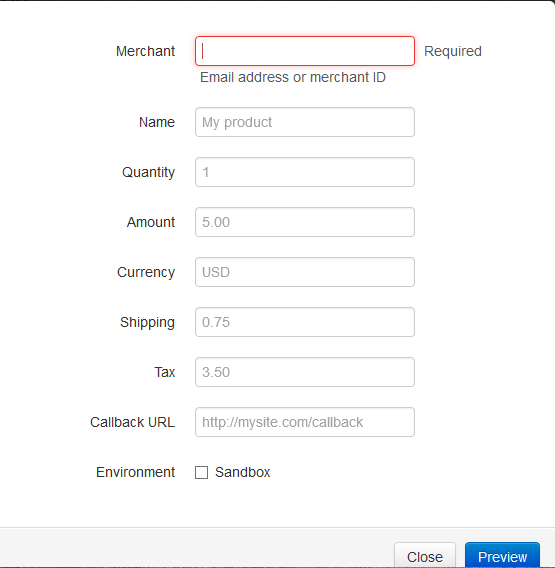
Step 4 ) The following image allows you to set up following fields.
- Merchant (This is Required)
- Name
- Quantity
- Amount
- Currency
- Shipping
- Tax
- Callback URL
- Environment = Sandbox (Important to use this option to test before you go live with your shopping cart)

That is all you need to create a PayPal shopping cart and add it to your website.
Click on the following URL Add PayPal Shopping Cart Button WordPress to add the code manually to your website.
I will be updating this post from time to time so come back for the latest. If you have any questions please let me know.
Enjoy.
More PayPal Tutorials