The following post How To Backup Windows 10 Files shows you how to backup windows files, media etc using the internal tool that comes with windows.
This tutorial will show you how to create backups of your files and more. Everyone knows how important it is to backup your files, especially those important photos from weddings, birthdays etc. There are many ways you can backup your files in windows but in this tutorial we are going to learn about windows own backup system. After all windows have come a long way and has improved their backup system substantially.
How To Backup Windows 10 Files
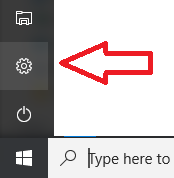
Step 1 ) First go to Start and click on Settings “Cog wheel” as illustrated in the following image.
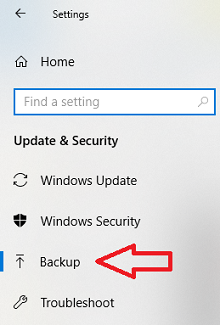
Step 2 ) Next click on Backup as illustrated in the following image.
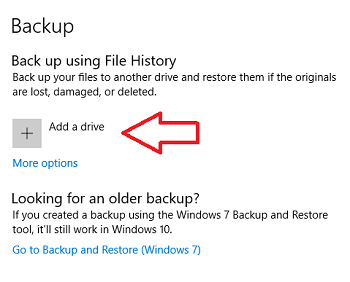
Step 3 ) Next, connect your external drive into your USB port. This can be an external hard disk or a memory stick. It depends on how much you are going to backup, whether it be once or regularly. Once your external drive is plugged into your USB port, click on Add a drive as illustrated in the following image.
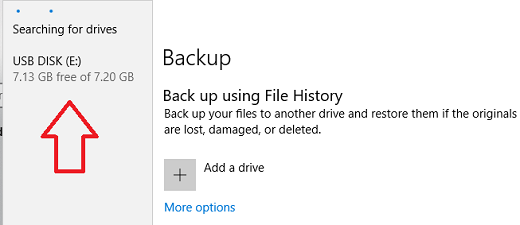
Step 4 ) The following image shows you the USB drive windows found while searching. This drive has 7.13 GB of free space. This is more than enough for this tutorial. Of course if you are going to be backing up photos, programs etc then you probably want to connect an external drive with more space.
Once windows found the drive, I then clicked on USB DISK (E:), as illustrated by the arrow. (Note: Your drive name will be different.)
Step 5 ) Once you selected the external drive an On button is displayed. This tells you that windows found a drive and is able to communicate with the drive. The drive selected is now active and ready for backing up files.
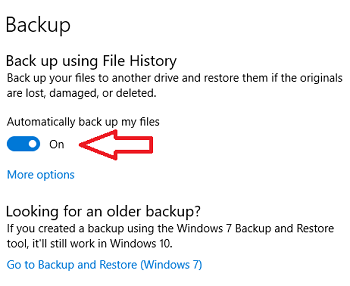
Backup Options
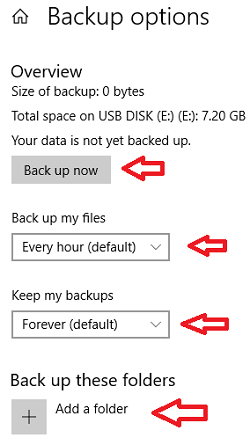
Step 6 ) The following image Backup options allows you to set up the following options.
Backup options
- Click on Back up now button when you are ready to start backing up your files.
- Select to backup your files Every hour (default) or choose another option.
- Select how long you want to keep your files, Forever (default) or choose another option.
- Windows selects a number of folders by default. Click on Add a folder if you want to add your own folder. In your case you might not need some of the default folders selected by windows. Make sure you check this option and decide what to keep and what to remove from the backup list.
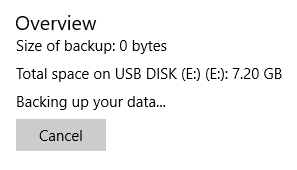
Step 7 ) The following image shows you windows backing up your data.
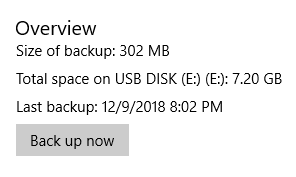
Step 8 ) The following image shows you the following information about the data backed up.
Note: This is an example of what to expect after a successful backup. In your case this information will be different.
Backup Data
- Size of backup: 302 MB
- Total space on USB DISK (E:) (E:): 7.20 GB
- Last backup: 12/9/2018 8:02 PM
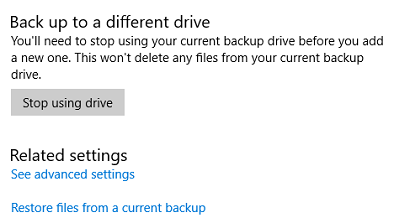
Step 9 ) The following image allows you to manage the following options.
Data Backup Extra Options
- Click on Stop using drive button if you want to stop using the drive. This allows you to later on plug another drive or the same drive into your USB port again. Note: Using this button is the correct way to disconnect the drive from the USB port.
- You can click on See advanced settings link to manage advanced options for your backups.
- Click on Restore files from a current backup link, if you want to restore any of your files. Total space on USB DISK (E:) (E:): 7.20 GB
- Last backup: 12/9/2018 8:02 PM
That is all you have to do to backup your important data, files in your computer using Windows internal backup tool.
I will be updating this tutorial in the future. So keep coming back for the latest updates.
If you have any questions please let me know.
Enjoy.
Windows 10 Tutorials List: