Create Local User Account in Windows 10 shows you how to create a local account in Windows 10 and more.
There has been a lot of changes made in Windows 10 since it came out. This tutorial is base on Windows 10 version 1809.
There are many reasons why you would create a second or more accounts in your computer. It can be related to the members in your family. You might want to have a second account in your computer or you might just want one account but without linking to your Microsoft online account.
In this tutorial you will learn how easy it is to create a local account in a few steps. In this example the local account will not have a password. It will have a user name and that is all.
Note: Creating a local account with out a passwords means you are not worried about the information in your computer. Otherwise you should add a password even if it is a local account and not connected to your Microsoft online account if you have one.
Create Local User Account in Windows 10
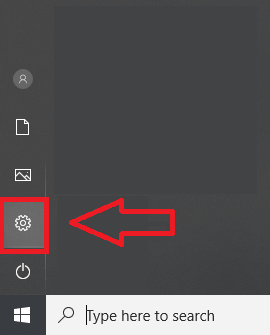
Step 1 ) First you need to access your user account settings. Click on Start -> Settings as illustrated in the image below.
Note: There are other ways to access the account settings for example press Windows+I to bring up the Settings app, and then click Accounts.
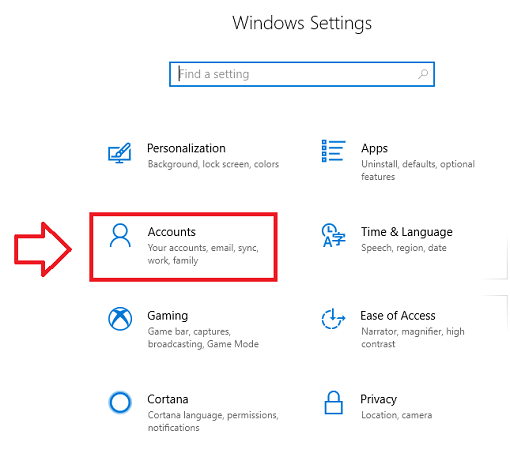
Step 2 ) Click on Accounts as illustrated in the image below.
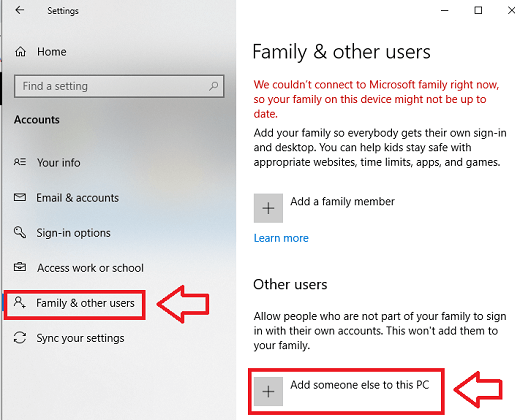
Step 3 ) Click on Family & other users tab and then click the Add someone else to this PC button as illustrated in the image below.
Note: You can also click on Add a family member button, but that feature requires you to set up an online Microsoft account.
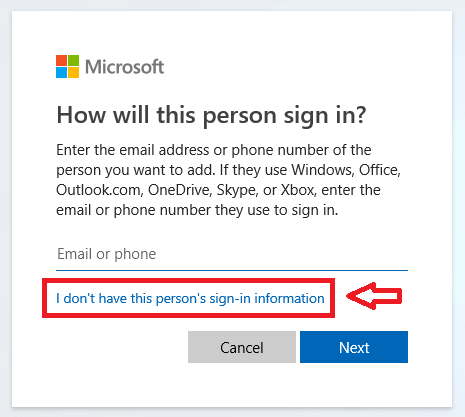
Step 4 ) Click on I don’t have this person’s sign-in information link as illustrated in the image below.
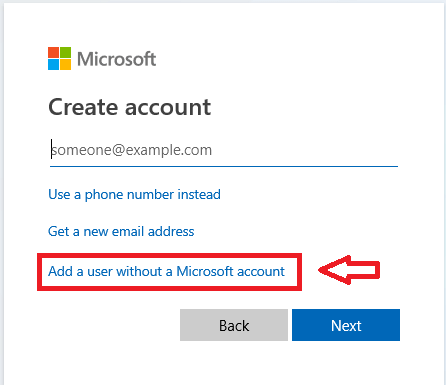
Step 5 ) Click on Add a user without a Microsoft account link as illustrated in the image below.
Note: The other options are related to creating a Microsoft account, ignore them.
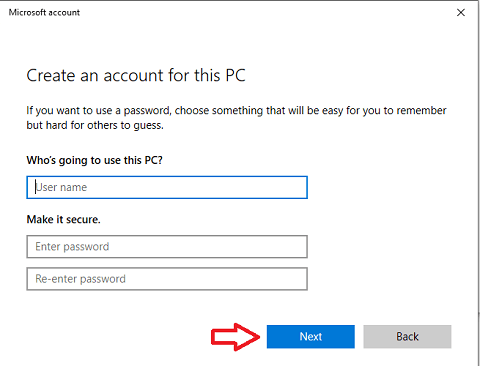
Create an account for this PC
Step 6 ) On the next screen you can enter the following details as illustrated in the image below.
Who’s going to use this PC?
- User name = In this example I will create the famous bob account. And I will not enter a password. This means that when you turn on your computer/ laptop it will log you in without having to enter a password as long as this is the only account. If you have more than one account, when the screen comes up select bob and it will log you in without typing a password.
Make it secure
- Enter password
- Re-enter password
- Click on Next button when you finish creating the account.
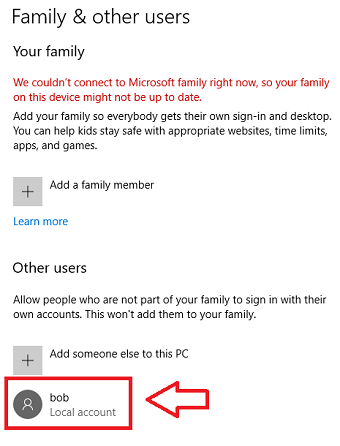
Local account created
Step 7 ) The following image shows you the new local account bob created.
Note: The first time bob logs in, Windows will create the user folders and finish setting up the account.
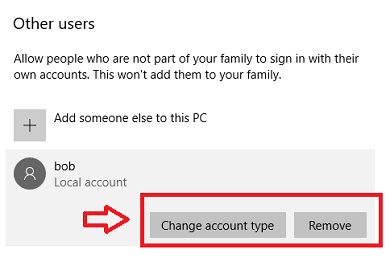
Step 8 ) If you click on the new account bob, you will have the following options.
Local account options
- Click on Change account type button to change the account type.
- Click on Remove button to delete the account.
Note: By default the local account is set up with Standard user privileges. It cannot install applications or make administrative changes to the computer. If you want to change it, click on Change account type button and select administrator.
That is how simple it is to create a local account in Windows 10.
I will be updating this tutorial in the future. So keep coming back for the latest updates.
If you have any questions please let me know.
Enjoy.
Windows 10 Tutorials List: