WP Slideshow SE Plugin Add New Settings tutorial will show you how to add a slideshow to your site and insert images, text or videos and more.
Last Updated: June 21, 2021
Latest News: Updated the documentation.
The following tutorial shows you how to set up a slideshow in your site. You can create a text, image or video slide using Slideshow SE plugin.
Note: Please notice next to each options the default settings. This comes in handy. It will always remind you what was the default settings just in case you need to revert back to the default settings.
What You Need:
WP Slideshow SE Plugin Add New Settings
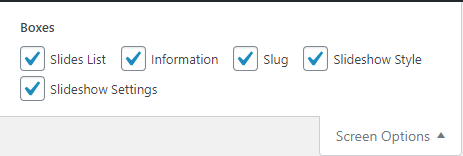
Step 1 ) Go to Slideshows -> Slideshows or Add New to add a slideshow to your site. But first make sure the correct boxes are selected before you begin as illustrated in the following image.
Select Screen Options
- Slides List
- Information
- Slug
- Slideshow Style
- Slideshow Settings
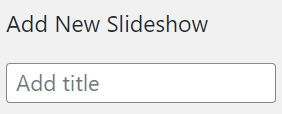
Step 2 ) Type the correct Title for the new slideshow as illustrated in the image below.
Information
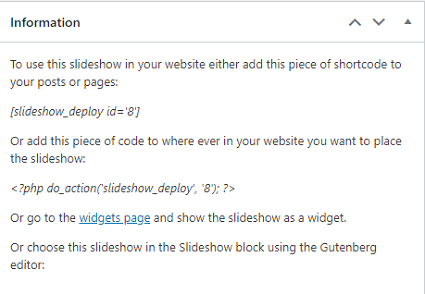
Step 3 ) The following image Information illustrates the information and shortcodes to use for the slideshow.
Information
- [sideshow_deploy id=’8′] remember that your id number will be different.
- < ?php do_action(‘slideshow_deploy’,’8′;? > remember that your id number will be different.
- Or go to the widgets page and show the slideshow as a widget.
- Or choose this slideshow in the Slideshow block using the Gutenberg editor:
Slug
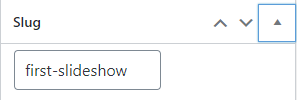
Step 4 ) The following image illustrates the slideshow Slug.
Slideshow Style
Step 5 ) The following image allows you to set up the following options.
Slideshow Style settings
- Light
- Dark
- You can also create or customize the styles.

Animation settings
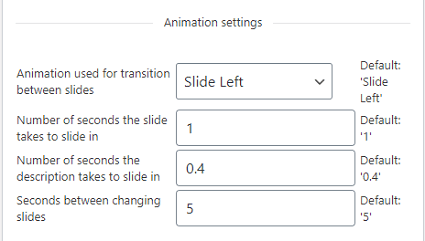
Step 6 ) The following image allows you to set up the following options.
Animation settings
- Animation used for transition between slide
- Number of seconds the slide takes to slide in
- Number of seconds the description takes to slide in
- Seconds between changing slides
Display settings
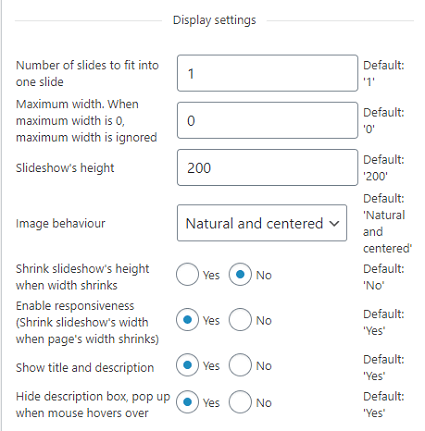
Step 7 ) The following image allows you to set up the following options.
Display settings
- Number of slides to fit into one slide
- Maximum width. When maximum width is 0, maximum width is ignored
- Proportional relationship between slideshow’s width and height (width:height)
- Slideshow’s height
- Image behavior
- Shrink slideshow’s height when width shrinks
- Enable responsiveness (Shrink slideshow’s width when page’s width shrinks)
- Show title and description
- Hide description box, pop up when mouse hovers over
Control settings
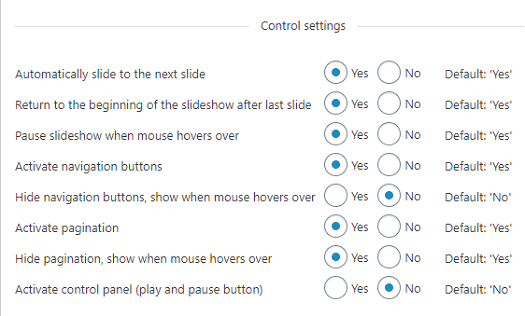
Step 8 ) The following image allows you to set up the following options.
Control settings
- Automatically slide to the next slide
- Return to the beginning of the slideshow after last slide
- Pause slideshow when mouse hovers over
- Activate navigation buttons
- Hide navigation buttons, show when mouse hovers over
- Activate pagination
- Hide pagination, show when mouse hovers over
- Activate control panel (play and pause button)
- Hide control panel, show when mouse hovers over
Miscellaneous settings
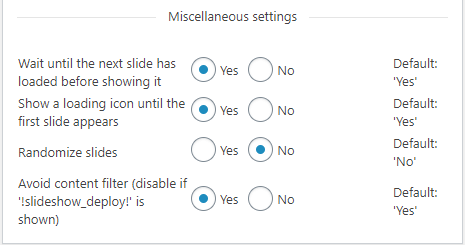
Step 9 ) The following image allows you to set up the following options.
Miscellaneous settings
- Wait until the next slide has loaded before showing it
- Show a loading icon until the first slide appears
- Randomize slides
- Avoid content filter (disable if ‘!slideshow_deploy!’ is shown)
Slides List
Step 10 ) The following image allows you to set up the following options. Add slides to the slideshow by using one of the buttons as illustrate in the image below.
Slides List
- Click on Image slide button to insert an image slideshow.
- Click on Text slide button to insert a text slideshow.
- Click on Video slide button to insert a video slideshow.
- You can Open all or Close all
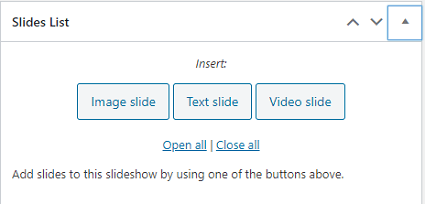
Image slide
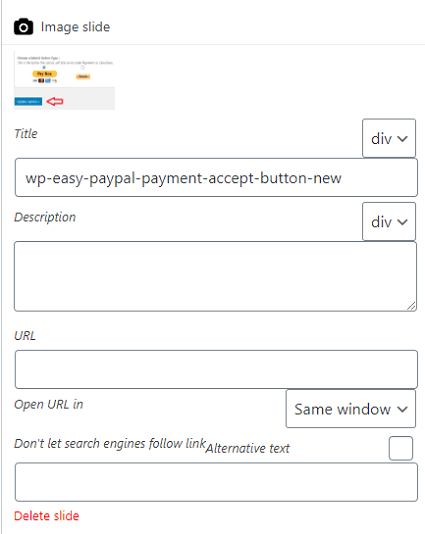
Step 10-a ) The following image allows you to set up the following Image slide options.
- Title
- Description
- URL
- Open URL in
- Don’t let search engine follow link
- Alternative text
- Click on Delete slide if you want to delete the slide.
Text slide
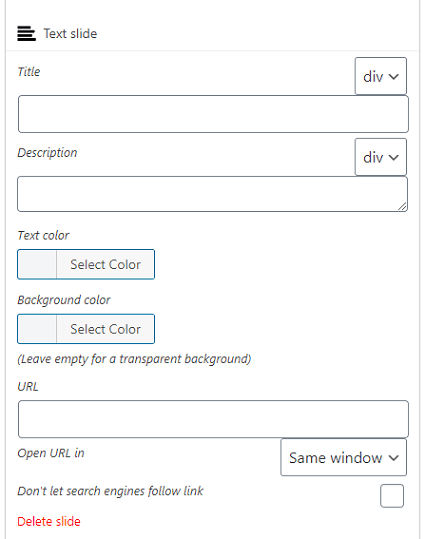
Step 10-b ) The following image allows you to set up the following Text slide options.
- Title
- Description
- Text color
- Background color
- URL
- Open URL in
- Don’t let search engine follow link
- Click on Delete slide if you want to delete the slide.
Video slide
Step 10-c ) The following image allows you to set up the following Video slide options.
- Youtube Video ID
- Show related videos
- Yes
- No
- Click on Delete slide if you want to delete the slide.

Publish
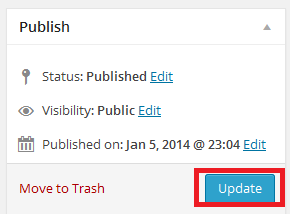
Step 11 ) The following image allows you to set up the following options.
Publish Settings
- Status of the slideshow
- Visibility of the slideshow
- Published the slideshow
- Move to Trash
- Click on Update button once you are finished creating your slideshow
===========================
That is all you need to do to publish a slideshow with this very simple plugin.
Click on the following link Insert Slide Post to continue with the next tutorial.
I will be updating this tutorial from time to time so keep coming back for the latest updates.
If you have a questions send me an e-mail or leave a comment.
Enjoy.
WordPress Slideshow SE Plugin Tutorials:
Hi. Nice plugin you made by the way!
My issue is that when i’m posting something to my facebook page, trough facebook social plugin, the post, right under the image is showing alot of description. Can you help?
Hi Andrei, thank you for your comment. I am not the developer of this great plugin, the developers name is Stefan Boonstra. I am just a helper that from time to time likes to help :) In regards to your question, which social plugin are you currently using? You mentioned facebook social plugin but I can’t find that plugin in wordpress.org.
Kind regards
The Facebook plugin is this https://wordpress.org/plugins/facebook/
But at the moment i’m using SNAP Social Network Auto Poster https://wordpress.org/plugins/social-networks-auto-poster-facebook-twitter-g/ and is happening the same thing. Might me a SNAP issue, not the slider :P … DOHHH
Thanks for the reply.
Hi Andrei, yes it could be a Snap issue. Sometimes plugin conflicts can be a bit tricky to detect. I hope the conflict is resolved soon for you.
Kind regards