WP Slideshow SE Plugin Insert Slide Into Post tutorial shows you how to insert a slideshow into your post or page.
Last Updated: June 21, 2021
Latest News: Updated the documentation.
This plugin is very simple to manage and use. There are three ways you can insert a slideshow into your page or post. One is using the insert button, another is by manually copying and pasting the slideshow shortcode and finally is by hard coding the slideshow into your template.
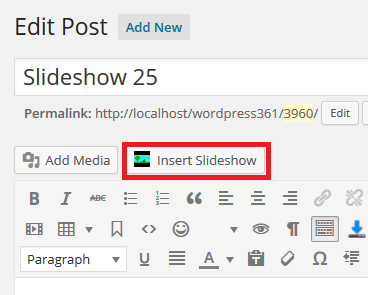
Most will opt to use the easy way which is the insert button found in the WordPress editor menu as illustrated in one of the images below.
What You Need:
WordPress Slideshow Plugin Insert Slide Into Post Steps
Step 1 ) Open one of your Posts or Pages. Click on Insert Slideshow button to insert one of your slideshow. See image below.
Note: Remember you might have more than one slideshow. Make sure you insert the correct slideshow.

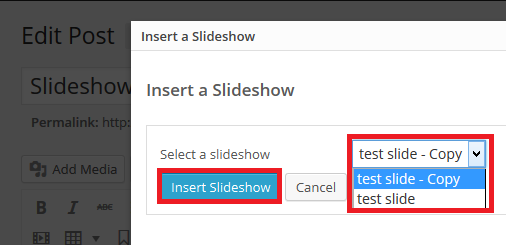
Step 2 ) The following image displays the menu after you click on Insert Slideshow button above in Step 1. You will see a list of slideshows you have created. In this example I created two slideshows test slide – Copy and test slide. If you only have one then you will only see one slideshow displayed. Once you have selected your slideshow click on Insert Slideshow button.

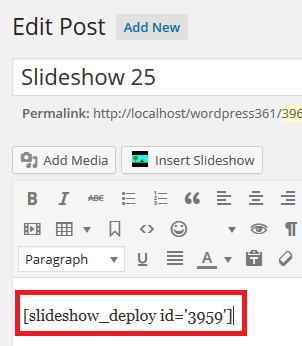
Step 3 ) The following image displays the new inserted shortcode in the post. (Remember your shortcode Id will be different to the one you see in this example)

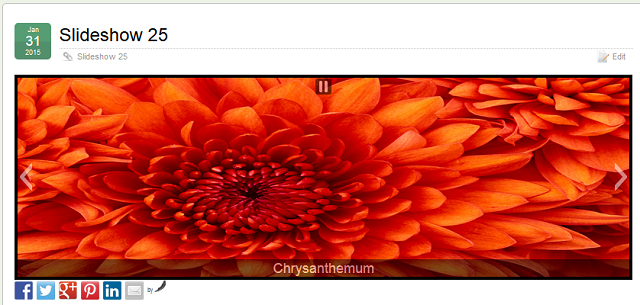
Step 4 ) The following image displays the slideshow in the website.

===========================
That is how simple it is to create and insert a slideshow with this plugin.
Click on the following URL Pagination Bar to continue with the tutorials.
I will be updating this tutorial from time to time so keep coming back for the latest updates.
If you have a questions send me an e-mail or leave a comment.
Enjoy.
WordPress Slideshow SE Plugin Tutorials: