WP eStore Shopping Cart Custom CSS shows you how to customize your grid layout to look better in your website using different css class.
Last Updated: June 5, 2023
Latest News: Updated the information below.
When you use grid display layout for your products, the layout might not appear on your site the way you expected it to. There are many factors that play a part in the layout of your items. Especially in a grid display even if you use a different fancy layout. One of the factors is the theme you use, the other is the page or post wrapper width. This tutorial will guide you and help you to customize the layout using some very simple techniques.
Note: These are simple and basic changes. There are more changes you can carry out from the information displayed below in the images. Remember CSS is very flexible and powerful.
What You Might Need:
- WordPress Custom CSS Plugin (Optional = Some themes have an option for you to add custom code in the theme admin panel. I use Suffusion which has this option).
WP eStore Shopping Cart Basic Custom CSS Steps
- WP eStore Custom Shopping Cart Grid Display
- WP eStore Shopping Cart Custom CSS
To find out more about the backend in your site, you can use the Developer Tools in the most popular browsers like Microsoft Edge, Google Chrome and Firefox.
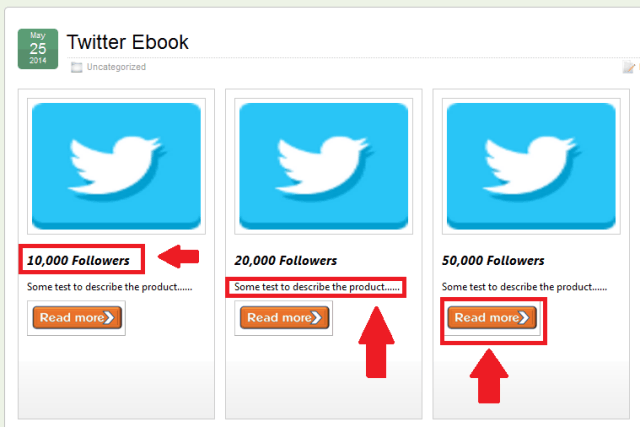
Step 1 ) In the previous tutorial the following shopping cart grid display was created using fancy 5 display. See image below.

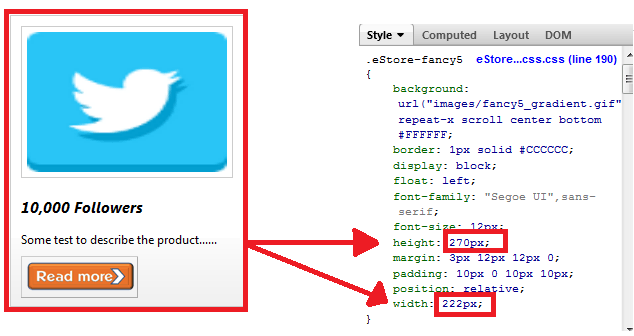
Step 2 ) The following image allows you to control the height and width of the overall layout of the product in the grid. Currently the height is set to 270px and the width is set to 222px. You can change the height and width to display the products correctly on your website.
Note: If you have 3 images displayed horizontally like the above example, increasing the width will expand all the images across. So make sure that you don’t increase the width by too much or else it will push the third image to the next line. Keep checking your settings while you are adjusting the CSS width.
For this customization you need to alter the following class .eStore-fancy5.

Change The Height
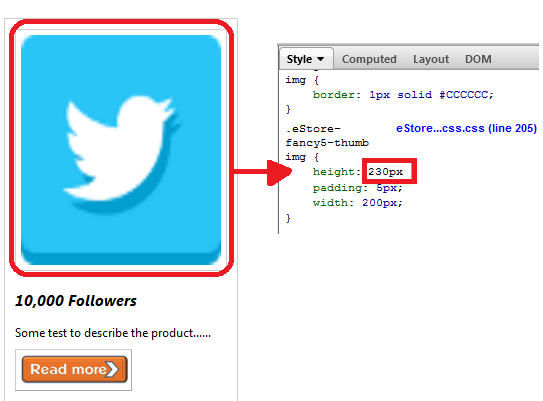
Step 3 ) The following image allows you to change the height of the thumbnail image. In this example I have set it up to 230px which is higher than the above image. I have done this so you can see the difference.
For this customization you need to alter the following class .eStore-fancy5-thumb and the img id.

Control The Description
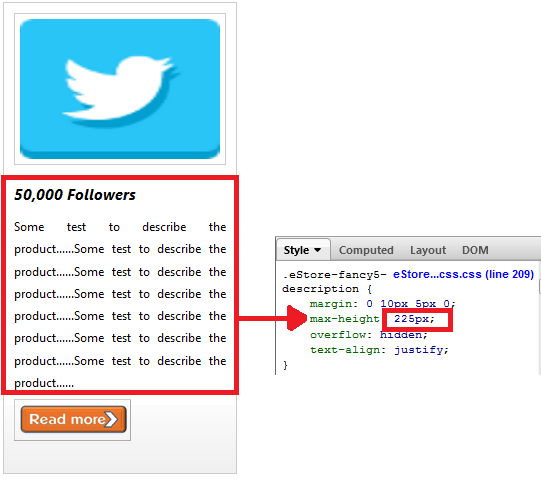
Step 4 ) The following image allows you to control the description box. For this example the description box is set to 225px in height so it will display the whole product description. I added more information in the description for this product so you could see the difference.
For this customization you need to alter the following class .eStore-fancy5-description.

==================================
I hope the above helps you to create your custom products display.
Click on the following URL Troubleshooting to find some solutions to the most common errors and issues.
I will be updating this post from time to time. So keep coming back for more. If you have any questions please let me know.
Enjoy.
WordPress eStore Plugin Tutorial List: