WP eMember Plugin Membership tutorial will show you how to set up new members to your website. It also shows you how to add different levels and more.
Last Updated: October 17, 2019
Latest News: Updated a link.
WP eMember Plugin Membership
Step 1 ) Go to WP eMember -> Members to start setting up the following options. You can also customize your search and display the members according to the members status.
Members Admin Tabs
- Manage Members
- Add/Edit Member
- Member Lists
- Import WP Users
- Manage Blacklist
- Auto Upgrade
Members Status Display
- All
- Active
- Incomplete
- Pending
Members Custom Search
- Account State
- Membership Level

Manage Members
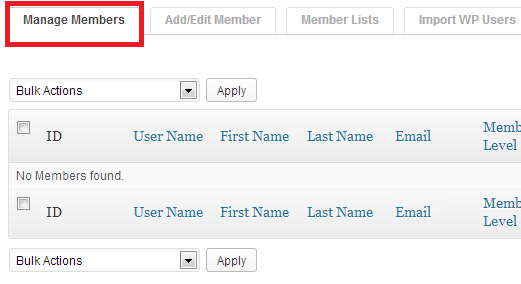
Step 2 ) When you first install the plugin and navigate to WP eMember -> Members -> Manage Members you will see the following image. This is because there are no members added to the websites or have not been imported yet. You can start adding new members and or import WordPress users.
Members Information
- Member ID
- User Name
- First Name
- Last Name
- Membership Level
- Subscription Starts
- Expiry Date
- Account State
- Member Since
- Last Login
- Last Login IP
- Notes
- Actions

Add/Edit Member
Step 3 ) Go to WP eMember -> Members -> Add/Edit Member to set up the following fields for each member.
Members Details
- Username (This will become the Members User Name)
- First Name
- Last Name
- Password
- Retype Password
- Membership Level
- Subscription Starts
- Account State = You can choose from the following options Active, Inactive, Expired, Pending.
- Member Since
- Email Address
- Phone No.
- Company
- Address Street
- Address City
- Address State
- Address Zipcode
- Country
- Gender = You can choose from the following options Male, Female, Not Specified.
- After Login Page URL
- Auto Upgrade Starts
- Admin Notes
Member Lists
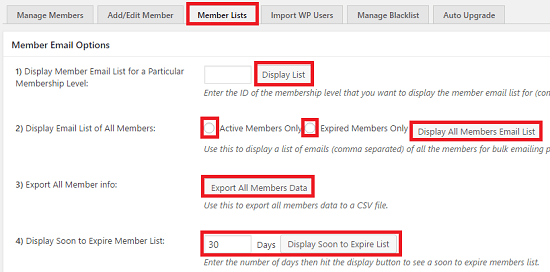
Step 4 ) The following image Members List allows you to set up the following options.
Member Email Options
- Display Member Email List for a Particular Membership Level
- Display Email List of All Members and
- Export All Member info
- Display Soon to Expire Member List

Import WP Users
Step 5 ) When you first install the plugin and you click on Import WP Users, if you have not created at least One Membership Level you will see the following red message.

Step 5-a ) Once you have some users to Import you will have the following options available.
- Import All WordPress Users
- Import WordPress Users Selectively
Manage Blacklist
Step 6 ) The following image Manage Blacklist allows you to add entries as per the following.
Manage Blacklist Options
- IP Black List
- Email Address Blacklist
- Email Address Pattern Blacklist
- Remember to click on Update Blacklist button once you have completed adding entries to the above mentioned fields.
![]()
Auto Upgrade
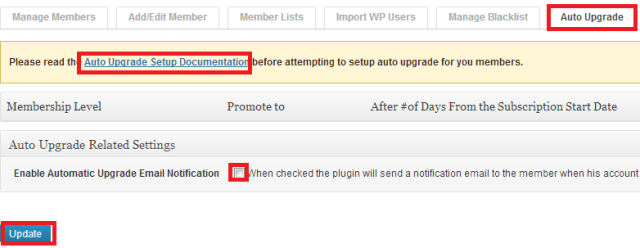
Step 7 ) First read the Auto Upgrade Setup Documentation before you begin.
If you have not created any Membership Level, the first time you click on Auto Upgrade tab you will see the following screen.

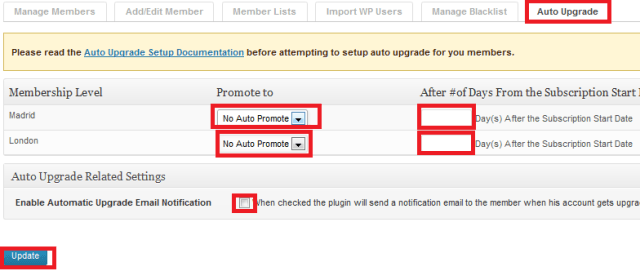
Step 8 ) I have created two Membership Levels for you to see how it works. You can manage the following Membership Level’s and Promote them to what ever level you select from the drop down list. You also have the option to promote to a different level after a certain number of days after the Subscription starts.
It also allows you to Enable Automatic Upgrade Email Notification. This will send an e-mail to your members letting them know that you have changed their Membership Level.
Remember to click on Update once you have completed your task.

Step 9 ) The following image Membership Level / Promote to shows you a drop down menu under Promote to, with all the Membership Level’s you have created.

Click on the following link Membership Levels to complete the next tutorial.
I will be updating this post from time to time. So keep coming back for more.
Enjoy.
eMember Plugin Tutorial List: