WP eMember Plugin General Settings Part 2 tutorial will show you how to set up Account Upgrade and Renewal, Bookmark Features, WordPress User Integration and more.
Last Updated: September 25, 2020
Latest News: Updated the documentation.
In this post you will learn how to configure the following options. This continues from General Settings Part 1.
WP eMember Plugin General Settings Part 2
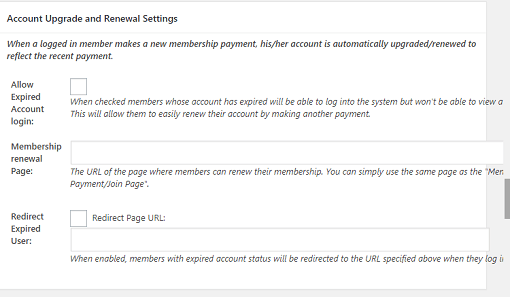
Account Upgrade and Renewal Settings
Step 1 ) In the following image Account Upgrade and Renewal Settings allows you to enable and adjust the following options.
- Allow Expired Account login:
- Membership renewal Page:
- Redirect Expired User:
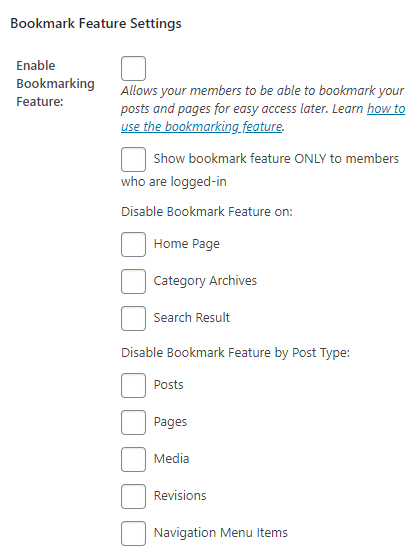
Bookmark Feature Settings
Step 2 ) In the following image Bookmark Features Settings allows you to enable the following options.
Bookmark Features Settings
- Enable Bookmarking Feature = Allows your members to be able to bookmark your posts and pages for easy access later. Learn how to use the bookmarking feature.
- Show bookmark feature ONLY to members who are logged-in
- Disable Bookmark Feature on:
- Home Page
- Category Archives
- Search Result
- Disable Bookmark Feature by Post Type:
- Posts
- Pages
- Media
- Revisions
- Navigation Menu Items
- and more.
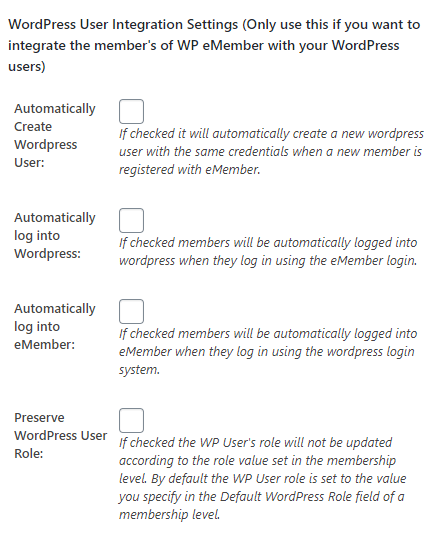
WordPress User Integration Settings
(Only use this if you want to integrate the member’s from WP eMember with your WordPress Users)
Step 3 ) In the following image allows you to enable the following options.
WordPress User Integration Settings
- Automatically Create WordPress User:
- Automatically log into WordPress:
- Automatically log into eMember:
- Preserve WordPress User Role:
Site Wide/Domain Level Page Protection Settings
Note: Read the site wide protection feature documentation before using this feature.
Step 4 ) In the following image Disabled or Enable Site Wide/Domain Level Page Protection Settings allows you to enable and exclude URLs in the following options.
Site Wide/Domain Level Page Protection Settings
- Add URLs (separated by comma)
- Add URL patterns (example, /category1/sub-category/) separated by comma

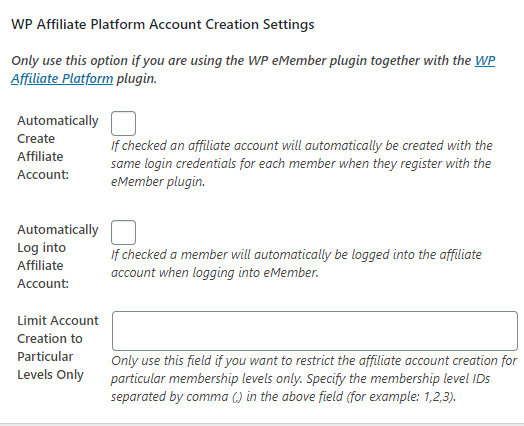
WP Affiliated Platform Account Creation Settings
Step 5 ) In the following image WP Affiliated Platform Account Creation Settings you can select from the following options.
Only use this option if you are using the WP eMember plugin together with the WP Affiliate Platform plugin.
WP Affiliated Platform Account Creation Settings
- Automatically Create Affiliate Account:
- Automatically Log into Affiliate Account:
- Limit Account Creation to Particular Levels Only
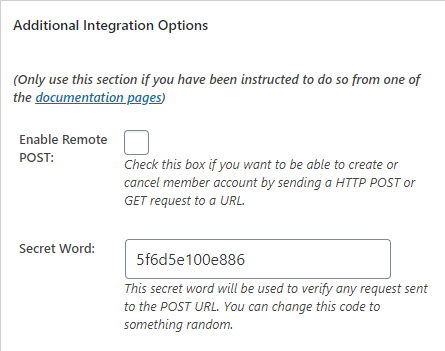
Additional Integration Options
Step 6 ) In the following image Additional Integration Options you can select from the following options.
(Only use this section if you have been instructed to do so from one of the documentation pages)
Additional Integration Options
- Enable Remote POST:
- Secret Word:
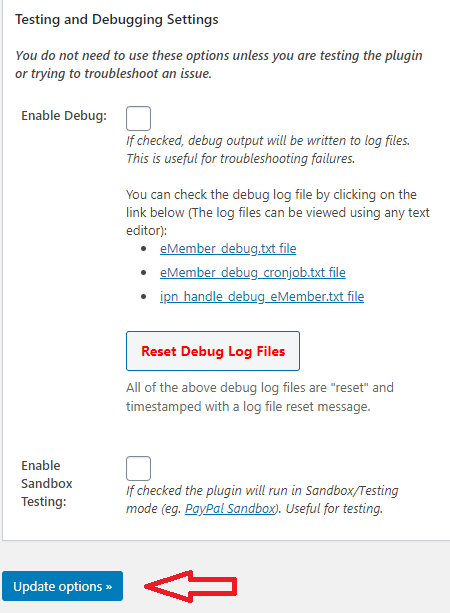
Testing and Debugging Settings
Step 7 ) The following image Testing and Debugging Settings allows you to select from the following options.
Testing and Debugging Settings
- Enable Debug:
- Enable Sandbox Testing:
- You can check the debug log file by clicking on the link below (The log files can be viewed using any text editor):
- eMember_debug.txt file
- eMember_debug_cronjob.txt file
- ipn_handle_debug_eMember.txt file
- If all of the above fails you can click on Reset Debug Log Files button.
Click on the following link Pages Forms Settings to complete the next tutorial.
I will be updating this post from time to time. So keep coming back for more.
Enjoy.
eMember Plugin Tutorial List: