WordPress WPForms Lite Plugin Form Settings post shows you how to set up and personalize the notifications and confirmation messages for your forms.
Last Updated: January 3, 2021
Latest News: Updated the changelog.
This post shows you how to enable and customize the messages displayed after the form is submitted. You can create a personal page, redirect the person to an external page after submitting the form or display a simple message.
What you need:
- WPForms Lite plugin
- WPForms Features & Addons (Note: This is an affiliated link. I get a small commission if you purchase any product including the plugins pro version.)
Forms Notifications Messages
- General
- Notifications
- Confirmation
WPForms Lite Plugin Tutorials:
- Settings
- Create Simple Form
- Fields
- Form Settings
- Tools
- Troubleshooting
WordPress WPForms Lite Plugin Form Settings
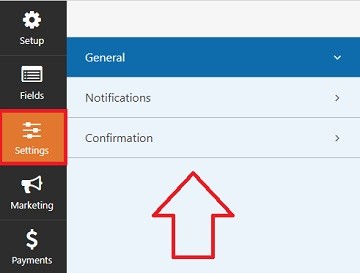
Step 1 ) Go to WPForms -> All Forms tab, then click on Settings as illustrated in the image below. The following list shows you the 3 form options to set up.
Form Settings Options
- General
- Notifications
- Confirmation
Form General
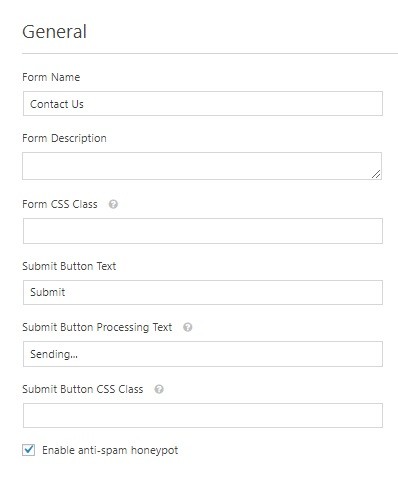
Step 2 ) The following image General allows you to customize the following form fields.
General Form Fields
- Form Name
- Form Description
- Form CSS Class
- Submit Button Text
- Submit Button Processing Text
- Submit Button CSS Class
- Enable anti-spam honeypot
Notifications
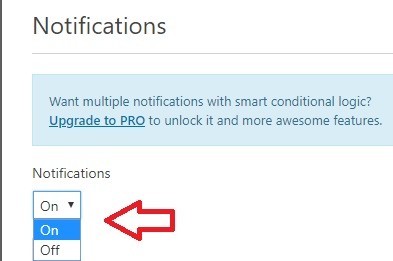
Step 3 ) The following image Notifications allows you to enable the notifications for the form.
Form Notification Switch
- On
- Off
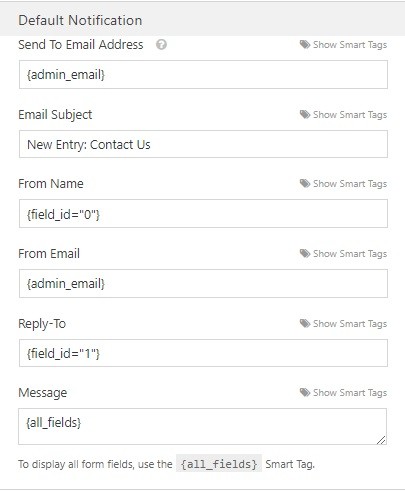
Step 3-a ) The following image Default Notifications allows you to enable the notifications for the form.
Form Default Notification
- Send To Email Address
- Email Subject
- From Name
- From Email
- Reply-To
- Message
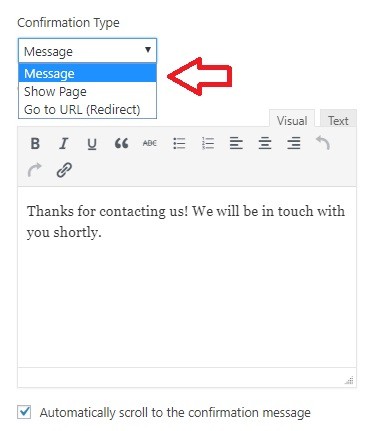
Confirmation Type: Message
Step 4 ) The following image Confirmation Type: Message allows you to customize the confirmation message. You can even enable the following feature Automatically scroll to the confirmation message.
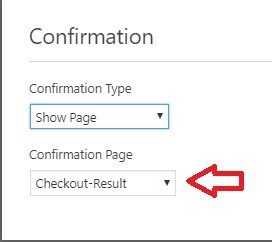
Step 5 ) The following image Confirmation Type: Show Page allows you to select one of the pages you have created from the dropdown menu as illustrated in the following image.
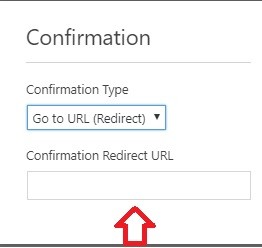
Step 6 ) The following image Confirmation Type: Go to URL (Redirect) allows you to type the URL address as illustrated in the following image. After the form is submitted the person will be redirected to a web page or a URL in a different site.
==============================
If you have any questions please let me know.
Enjoy.