WordPress Affiliates Manager Advanced Settings shows you how to setup the advanced settings in the plugin and more.
Last Updated: July 24, 2024
Latest News: Updated the documentation.
The following tutorial shows you how to add a default landing page and more. The advanced settings tab is slowly growing with more features added by the developers. While it only has a few features now, the developers keep adding more features based on the number of requests made by the users.
What You Need:
- Affiliates Manager plugin.
- You can also purchase the Affiliate Manager premium version. (Optional)
WordPress Affiliates Manager Advanced Settings
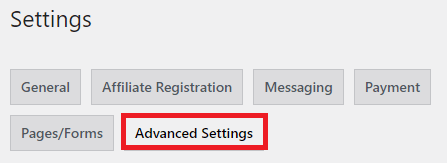
Step 1 ) Go to Affiliates -> Settings -> Advanced Settings as illustrated in the following image to set up the advanced options.
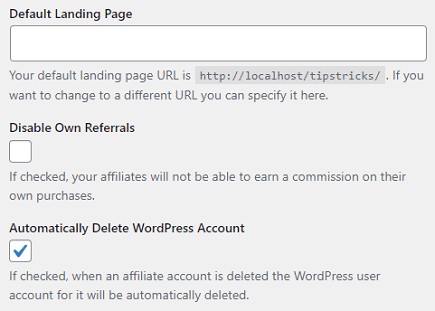
Step 2 ) The following image allows you to set up the following options.
Advanced Settings Part 1
- Default landing page
- Disable Own Referrals
- Automatically Delete WordPress Account
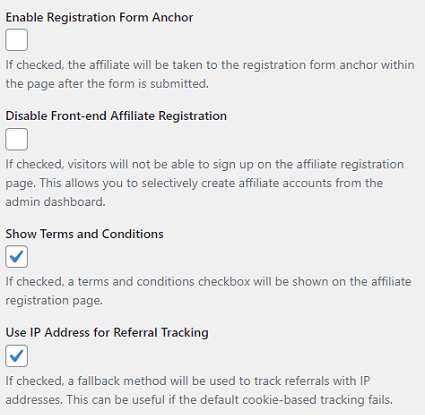
Step 3 ) The following image allows you to set up the following options.
Advanced Settings Part 2
- Enable Registration Form Anchor = Note: Upon reloading of the page, there is an anchor tag that automatically scrolls the webpage to where the form is located. This way users can instantly see a success or failure response from the form or any other important message shown to the user so that the user won’t be left wondering whether their submission went through or not.
- Disable Front-end Affiliate Registration
- Show Terms and Conditions
- Use IP Address for Referral Tracking = Note: Enabling this option will try to find a click record linked to the purchase especially for those using WooCommerce plugin. Disable this option if you only want cookie based tracking. See the following forum post for more information.
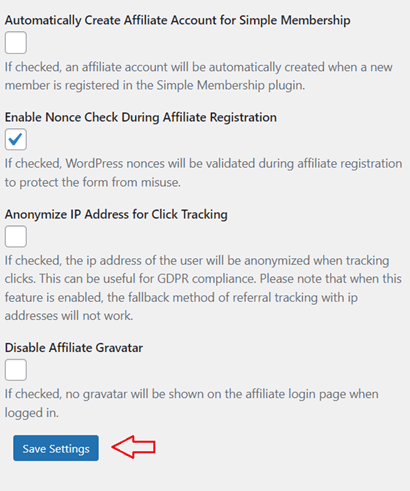
Step 4 ) The following image allows you to set up the following options.
Advanced Settings Part 3
- Automatically Create Affiliate Account for Simple Membership
- Enable Nonce Check During Affiliate Registration
- Anonymize IP Address for Click Tracking
- Disable Affiliate Gravatar
- Click on Save Settings button when you finish setting up the advanced settings.
==================================
That’s how simple it is to implement the advanced settings in the plugin.
If you have any questions please let me know.
Enjoy.
WP Affiliates Manager Tutorials List