The following Suffusion Theme Skinning Header tutorial shows you how to set up the header section in your site and much more.
Last Updated: December 2, 2023
Latest News: I have changed the documentation below.
This post covers the header section of your site. This is important because it helps you set up your header correctly. You don’t want your visitors to land on your site front page with a bad header. There are a few options available below that manage the customization of the header.
For Example:
- Do you want a background image added?
- Do you want to add some color or gradient colors?
- Do you want a logo or text?
- How are you going to position the image?
What you need:
Suffusion Theme Skinning Header Steps
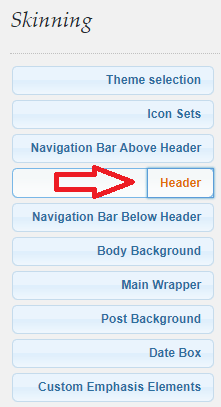
Step 1 ) Go to Appearance -> Suffusion Options -> Skinning -> Header menu as illustrated in the image below. This allows you to customize the colors / text styles for your header.

Step 2 ) For the Header section you have the following options to set up.
Default Styles or custom styles for header?
- Theme styles
- Custom styles (If you are going to customize the header section then you must select this option or else your settings will not be implemented.)
Header Background Image Type
- Use a predefined image
- Use a custom gradient
- Use a rotating set of images from a folder
- No image
Header Background Image
Step 3 ) Enter the full image path to the Header Background Image. Remember if you select the wrong image or are not happy just click on Reset button and start again.
Note: The image path must be absolute and not relative. If it’s not the correct path the image will not show up.
Header Background Image Tiling
Step 4 ) For the following area Header Background Image Tiling, select from one of the following options.
- Repeat both horizontally and vertically
- Repeat horizontally only
- Repeat vertically only
- Do not repeat – show background once only
Header Background Image Position
Step 5 ) For the following area Header Background Image Position, select from the following options.
- Top left
- Top center
- Top right
- Center left
- Middle of the page
- Center right
- Bottom left
- Bottom center
- Bottom right
Step 6 ) The following area Folder For Rotating Header Background, type in the full path of the folder with all the images you would like to show on your header section. This is a good option to set up if you would like to set up a slideshow effect on your header.
Header Background Gradient Style
Step 7 ) For the following area Header Background Gradient Style, select from one of the following options.
- Top to Bottom
- Bottom to Top
- Left to Right
- Right to Left
Step 8 ) For the following area Header Background Gradient Start Color, Header Background Gradient End Color, select the starting color and the end color.
(Info: This only applies if you choose gradient colors.)
Step 9 ) For the following Header Foreground Image Type, choose from one of the following options.
- Use a predefined image or logo
- Use text
Header Foreground Image
Step 10 ) For the following area Header Foreground Image, enter the image path if you selected Use a predefined image or logo in Step 9 ) above.
Step 11 ) The following area Blog Title/ Header Color, select the color of your blog title.
Step 12 ) For the following area Blog Title/ Header Decoration, select one of the following options.
- Underlined
- None
Step 13 ) For the following area Blog Title/ Header Hover Color, select the color of your blog title when you hover over with your mouse.
Step 14 ) For the following area Blog Title/ Header Hover Decoration, select one of the following options.
- Underlined
- None
Step 15 ) For the following area Blog Description / Sub-header Color, select the color of your blog description sub header.
Step 16 ) For the following area Empty Space Between Top of Page and Header option choose the height or leave as the default 20.
Height Of The Header Image
Step 17 ) For the following area Height of the Header image. I option choose the image height or leave as default 55.
======================================
That is all you have to do to set up the Skinning -> Header section of Suffusion. There are other areas of the theme framework that also customizes and controls the header section. You might be interested in the following tutorial Add A Header Image Suffusion.
Click on the following URL Skinning Tutorials for more skinning tutorials.
If you have any questions please let me know. I will be updating this from time to time. So keep coming back for the latest.
Enjoy.
More Suffusion Tutorials: