Photonic Lightboxes Options Settings post shows you how to configure all the different lightboxes settings under one tab and more.
Last Updated: October 30, 2019
Latest News: Updated a link in the footer.
Photonic comes with a variety of lightboxes for you to choose from. Each lightbox has a number of settings for you to configure. This provides you with a lot of flexibility for your sites slideshows. The good option about this plugin, is that it keeps growing and more lightboxes are added by the developer.
This is the list of the lightboxes available for you to configure and enable in your site.
Lighboxes List
- Common
- Colorbox
- Fancybox 1 / 2 / 3
- Lightcase
- LightGallery
- PrettyPhoto
- Swipebox
What You Need:
- Photonic
- Suffusion Theme (Optional = I added this theme because it is developed by Sayontan Sinha. Both plugin and theme work flawlessly together.)
Photonic Lightboxes Options Settings
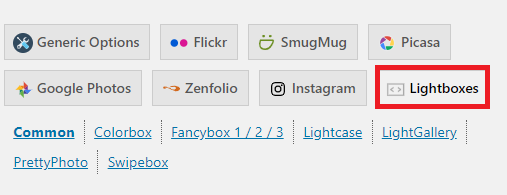
Step 1 ) Go to Photonic -> Settings -> Lightboxes to set up and configure all the lightboxes available for you to choose from as illustrated in the image below.
Lighboxes Options Settings
- Common
- Colorbox
- Fancybox 1 / 2 / 3
- Lightcase
- LightGallery
- PrettyPhoto
- Swipebox
Common Settings
Step 2 ) Go to Photonic -> Settings -> Lightboxes -> Common to set up the following options.
Common Settings
- Autoplay mode
- Autoplay mode interval
- Position of title in FancyBox slideshow
- No Looping
- Deep Linking
- Social media integration
Step 2-a ) At the end of the settings you have three buttons to choose from.
- Save Page Common
- Reset Page Common
- Delete all options
Colorbox Settings
Step 3 ) Go to Photonic -> Settings -> Lightboxes -> Colorbox to set up the following options.
Colorbox Settings
- Colorbox Theme
- Transition effect
- Transition speed
Step 3-a ) At the end of the settings you have three buttons to choose from.
- Save Page Colorbox
- Reset Page Colorbox
- Delete all options
Fancybox 1 / 2 / 3 Settings
Step 4 ) Go to Photonic -> Settings -> Lightboxes -> Fancybox 1 / 2 / 3 to set up the following options.
Facybox 1 / 2 / 3 Settings
- Position of title in FancyBox slideshow
- Fancybox3 Transition effect
- Fancybox3 Transition duration
- Fancybox3 – Hide Zoom Button
- Fancybox3 – Hide Slideshow Button
- Fancybox3 – Show FullScreen Button
- Fancybox3 – auto-start FullScreen
- Fancybox3 – Show Download Button
- Fancybox3 – Hide Thumbnails Button
- Fancybox3 – auto-open Thumbnails
- Fancybox3 – Disable Right Click
Step 4-a ) At the end of the settings you have three buttons to choose from.
- Save Page Facybox 1 / 2 / 3
- Reset Page Facybox 1 / 2 / 3
- Delete all options
Lightcase Settings
Step 5 ) Go to Photonic -> Settings -> Lightboxes -> Lightcase to set up the following options.
Lightcase Settings
- Transition effect
- Transition speed-in
- Transition speed-out
- Flexible Sizes
Step 5-a ) At the end of the settings you have three buttons to choose from.
- Save Page Lightcase
- Reset Page Lightcase
- Delete all options
LightGallery Settings
Step 6 ) Go to Photonic -> Settings -> Lightboxes -> LightGallery to set up the following options.
LightGallery Settings
- Add Additional Transitions
- Transition effect
- Transition speed
- Add Autoplay
- Add Fullscreen
- Add Thumbnail
- Add Zoom
- Disable download
- Delay before hiding lightbox bars
Step 6-a ) At the end of the settings you have three buttons to choose from.
- Save Page LightGallery
- Reset Page LightGallery
- Delete all options
PrettyPhoto Settings
Step 7 ) Go to Photonic -> Settings -> Lightboxes -> PrettyPhoto to set up the following options.
PrettyPhoto Settings
- PrettyPhoto Theme
- Transition speed
Step 7-a ) At the end of the settings you have three buttons to choose from.
- Save Page PrettyPhoto Theme
- Reset Page PrettyPhoto Theme
- Delete all options
Swipebox Settings
Step 8 ) Go to Photonic -> Settings -> Lightboxes -> Swipebox to set up the following options.
Swipebox Settings
- Bars on Mobile
- Close button on Mobile
- Delay before hiding bars on Desktop
Step 8-a ) At the end of the settings you have three buttons to choose from.
- Save Page Swipebox Theme
- Reset Page Swipebox Theme
- Delete all options
=====================================
That is how simple it is to set up and configure all the lighboxes in Photonic.
Click on the following URL Photonic Generic Options Popup Panel.
This tutorial will be updated from time to time when new changes are made by the developer.
If you have any questions please let me know.
Enjoy.
Photonic Plugin Tutorial List: