MailPoet Emails and Newsletters Advanced Settings shows you how to set up the advanced features like bounce email address and much more.
Last Updated: August 4, 2022
Latest News: I have updated the documentation to reflect MailPoet version 3.
This tutorial shows you how to customize the advanced plugin settings. Below is a small list of what you will configure in the advanced settings tab.
- Bounce email address
- Engagement analytics tracking
- Recalculate Subscriber Scores
- Load 3rd-party libraries
What you need:
- MailPoet plugin
- (Optional) This is an e-mail testing tool Mail Tester.
MailPoet Emails and Newsletters Advanced Settings
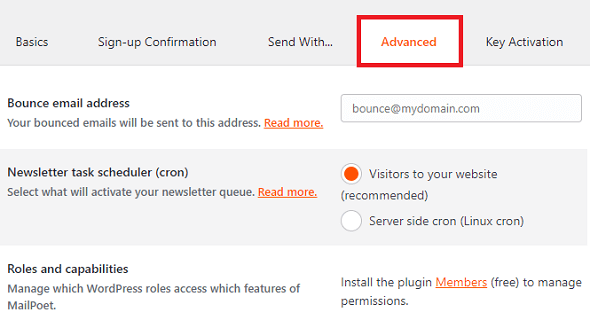
Step 1 ) Go to MailPoet -> Settings -> Advanced tab to set up the following options as illustrated in the image below.
Advanced Settings Part 1
- Bounce email address
- Newsletter task scheduler (cron)
- Visitors to your website (recommended)
- Server side cron (Linux cron)
- Roles and capabilities
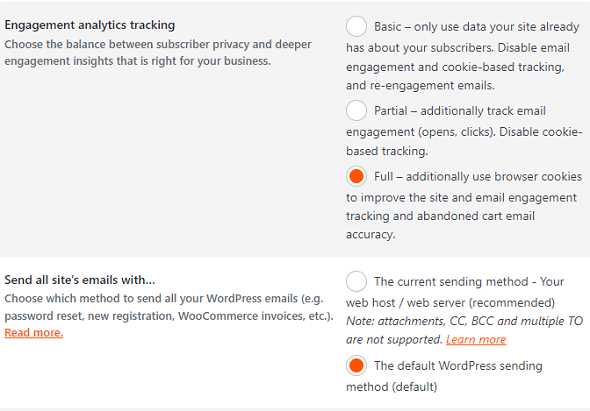
Step 2 ) The following image allows you to set up the following options as illustrated in the image below.
Advanced Settings Part 2
- Engagement analytics tracking
- Basic – only use data your site already has about your subscribers. Disable email engagement and cookie-based tracking, and re-engagement emails.
- Partial – additionally track email engagement (opens, clicks). Disable cookie-based tracking.
- Full – additionally use browser cookies to improve the site and email engagement tracking and abandoned cart email accuracy.
- Send all site’s emails with…
- The current sending method – Your web host / web server (recommended) Note: attachments, CC, BCC and multiple TO are not supported. Learn more
- The default WordPress sending method (default)
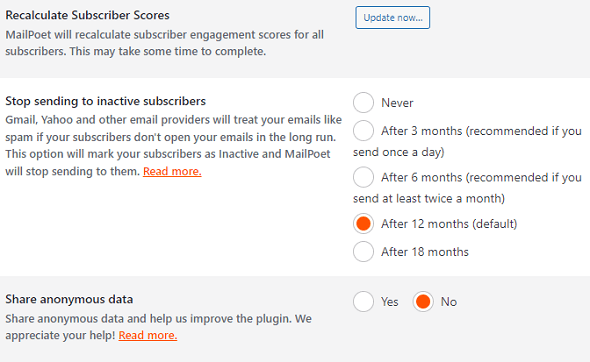
Step 3 ) The following image allows you to set up the following options as illustrated in the image below.
Advanced Settings Part 3
- Recalculate Subscriber Scores
- Stop sending to inactive subscribers
- Never
- After 3 months (recommended if you send once a day)
- After 6 months (recommended if you send at least twice a month)
- After 12 months (default)
- After 18 months
- Share anonymous data
- Yes
- No
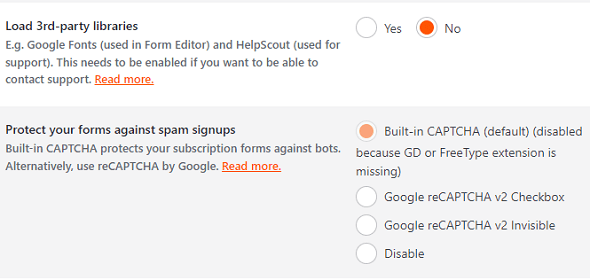
Step 4 ) The following image allows you to set up the following options as illustrated in the image below.
Advanced Settings Part 4
- Load 3rd-party libraries
- Yes
- No
- Protect your forms against spam signups
- Built-in CAPTCHA (default) (disabled because GD or FreeType extension is missing)
- Google reCAPTCHA v2 Checkbox
- Google reCAPTCHA v2 Invisible
- Disable
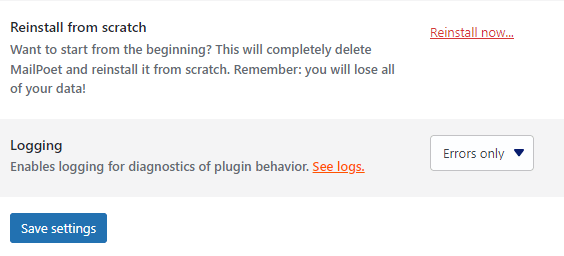
Step 5 ) The following image allows you to set up the following options as illustrated in the image below.
Advanced Settings Part 5
- Reinstall from scratch
- Logging
- Everything
- Errors only
- Nothing
- Click on Save settings button once you have completed your settings.
=============================
I will be updating this tutorial from time to time so keep coming back for the latest. If you have any questions please let me know.
Enjoy.
Go Back To MailPoet Tutorial List.