Create MySQL Database Locally Using Xampp shows you how to create a new database locally using phpMyAdmin and assigned a new user with all privileges.
In this tutorial you will learn how to create a new database and add a user with all the privileges assigned. Assigning all the privileges to a database user is very important or else you will run into issue when you start installing WordPress.
Create MySQL Database Locally Using Xampp
Step 1 ) It is time to start creating the database for WordPress. Type the following URL http://localhost/ on the browser address bar. This will take you to http://localhost/dashboard/. Then click on phpMyAdmin found on the top right hand corner. See image below.

Step 2 ) Click on New on the left hand side to start creating your database. The following image Databases displays the name wordptest given to the database and the following collation utf8_unicode_ci selected. Click on Create button when you are ready to proceed.

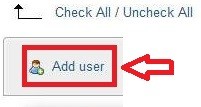
Step 3 ) Click on Add user link. See image below.
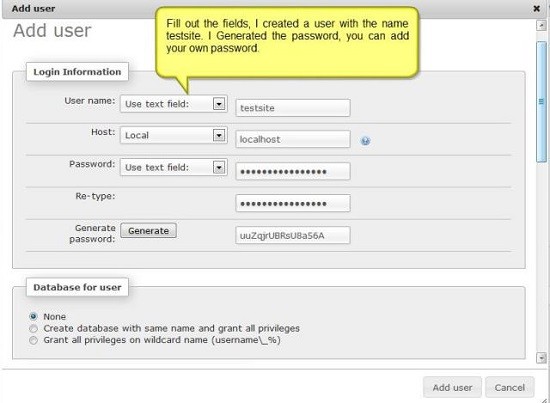
Step 4 ) Fill out the following fields. For this tutorial the username added is testsite. See image below.
Add User Fields
- User name:
- Host: = Always select localhost.
- Password: = You can type a manual password or generate the password using the button below.
- Re-type:
- Generate password:
MySQL Privileges
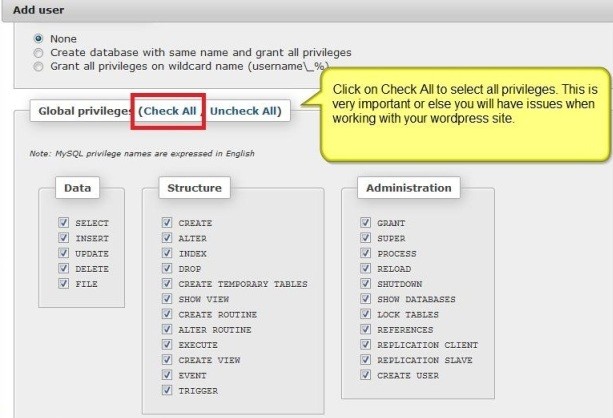
Step 5 ) Click on Check All link to give all privileges to the new user. This is very important or else you will have issues when you start installing WordPress. The following image shows you all the privileges assigned to the new user created.
MySQL Privileges:
- Data
- Structure
- Administration
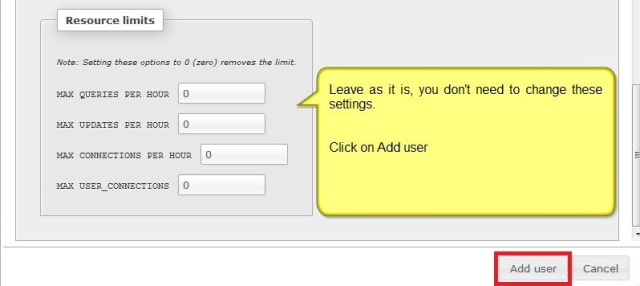
Step 6 ) Leave the default settings as they are, you don’t need to make any changes to these settings. Click on Add user. See image below.
Step 7 ) You can see the new user testsite added to the list. In this example I added the user to “wordptest” database and I made sure all privileges are given. Click on Edit Privileges to edit the user. See image below.
Note: Adding all privileges are added to the user to access the database will prevent errors appearing on your browser when you try to run your website.

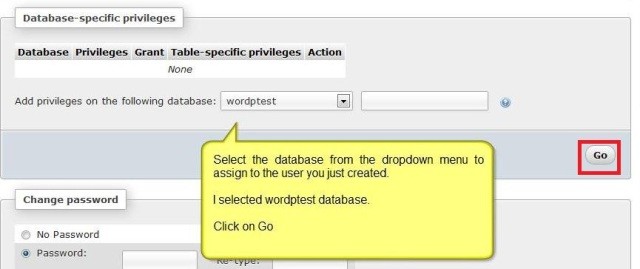
Step 8 ) Select the database from the dropdown menu and assign the database to the user you just created. I selected wordptest database, Click on Go. See image below.
In this tutorial you have learned how to create a WordPress database, add a new user and assign all the privileges to the new user.
Next tutorial install-wordpress-locally-page-two will show you how to install WordPress.
I hope this tutorial has helped you.
Enjoy.
Xampp Tutorial List: