Create Google Client ID For Photonic post shows you how to set up and allow Photonic to display Google Photos in your site.
Please remember before you read this tutorial make sure you are familiar with Photonic configuration settings and you know how to add a shortcode to your post or page.
This tutorial shows you how to create a new Google Client ID and Google Client Secret code using Google API Manager. You will also learn how to check to make sure Photos Library API is enabled in your Google account. Once you complete these steps you should be able to display your Google Photos in your site.
Important: If you are reading this tutorial is because you have a Google account.
What You Need:
Create Google Client ID For Photonic
Step 1 ) Click on API Manager link to start setting up your new project and to create the following ID’s.
Google API Manager
- Google Client ID
- Google Client Secret
Note: This area is different to your normal Google login account.
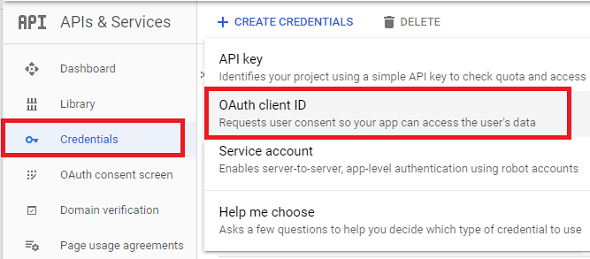
Step 2 ) Click on Credentials -> Create Credentials -> OAuth client ID as illustrated in the image below. These steps shows you how to view and set up your OAuth client ID in your google account.
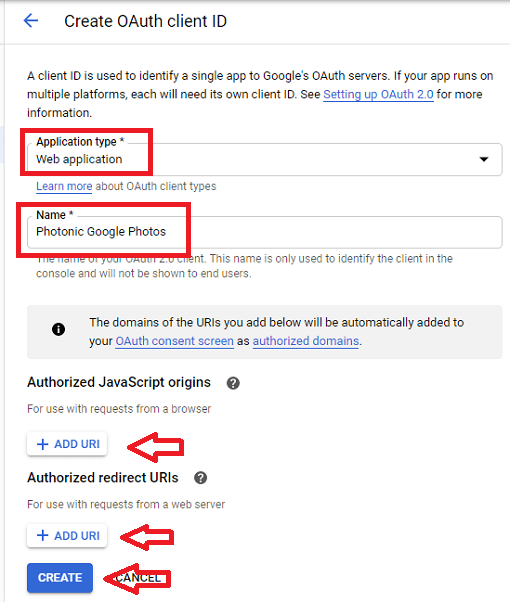
Step 3 ) Once you clicked on OAuth client ID above, under Application type* select Web application as illustrated in the image below. Then complete the following fields.
Fields you need to complete:
- Application type*
- Name
- Authorized Javascript origins = Note: This URI is found in Photonic -> Settings -> Google Photos -> Google Photos Settings.
- Authorized redirect URIs = Note: This URI is found in Photonic -> Settings -> Google Photos -> Google Photos Settings. The following link WP Photonic Plugin Google Photo Settings can help you.
- Click on Create button once you are ready to proceed.
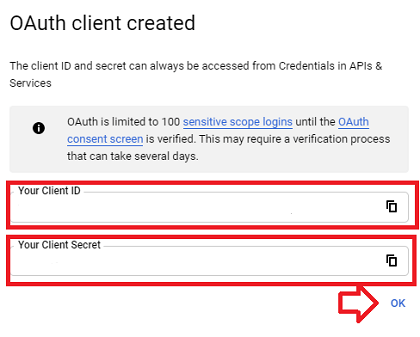
Step 4 ) The following image illustrates the following information. You need to copy these ID’s into Photonic.
OAuth client created:
- Your Client ID
- Your Client Secret
- Click on OK link to proceed.
Google Photos Library API
You need to make sure Google Photos Library API is enabled in your Google account or else Photonic will not be able to communicate between your site and your Google account. The following steps shows you how to enable Google Photos Library API.
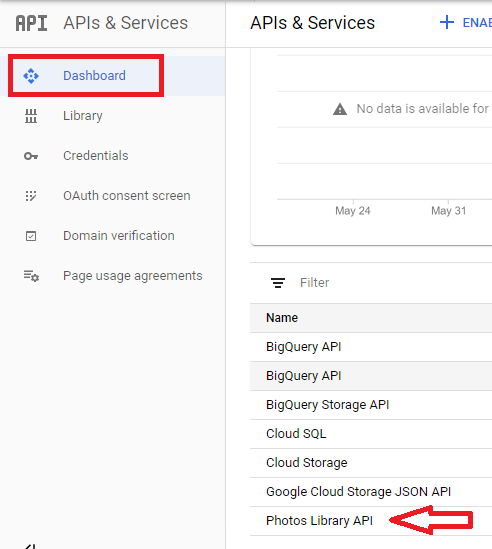
Step 5 ) While you are logged into your Google account, go to Dashboard. Check to make sure you see the following Photos Library API at the bottom of the page as illustrated in the image below.
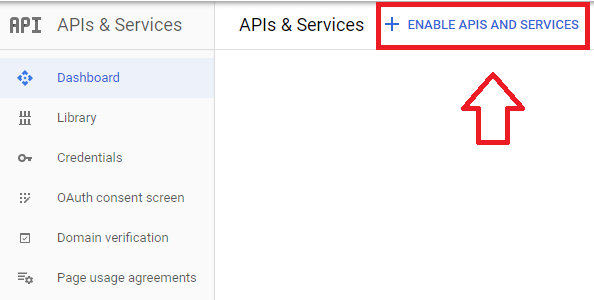
Step 5-a ) If you don’t see Photos Library API at the bottom of the page, click on Enable Apis And Services as illustrated in the image below.
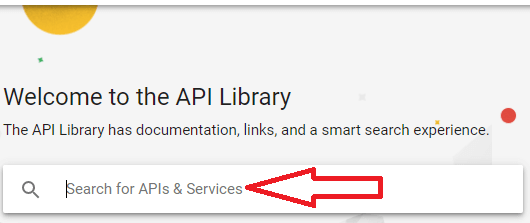
Step 5-b ) Type Google Photos in the search field as illustrated in the image below.
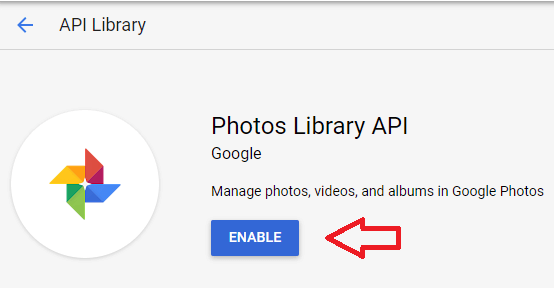
Step 5-c ) The following screen will appear. Click on Enable button to enable Photos Library API.
Photonic Authenticate
You are almost ready. There are a few more steps you need to complete before you can display your Google Photos in your site. Please continue.
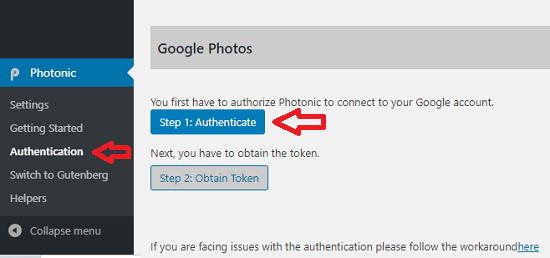
Step 6 ) Go to Photonic -> Authentication as illustrated in the image below to make sure your new API credentials are connecting to your site.
Photonic Google Photos Authentication Steps:
- First Click on Step 1: Authenticate button as illustrated below. If everything goes well you should be redirected to your Google account without any errors.
- Your Client Secret = Note: This button is greyed out until the previous step is completed.
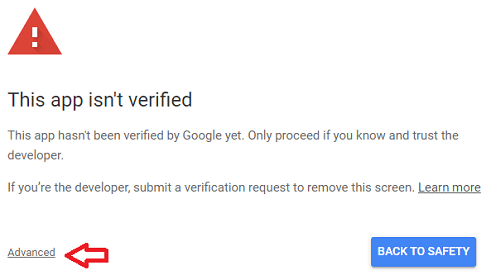
Step 6-a ) You might see an error message. If you do, simply ignore the error message and click on Advanced link as illustrated in the image.
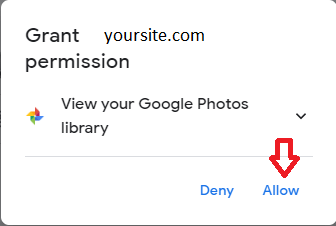
Step 6-b ) You will then see a window granting your site permission. Click on Allow link as illustrated in the image below to grant your site permission to access Google API.
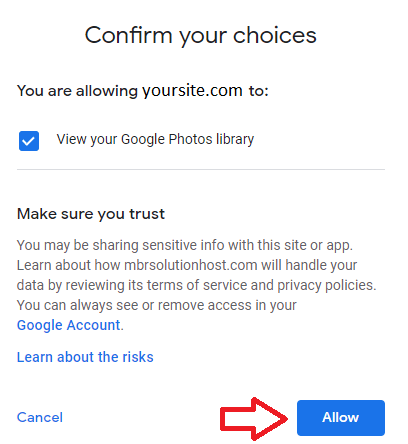
Step 6-c ) You will then see another window to confirm your decision to grant permission to your site, as illustrated in the image below. Click on Allow button to confirm.
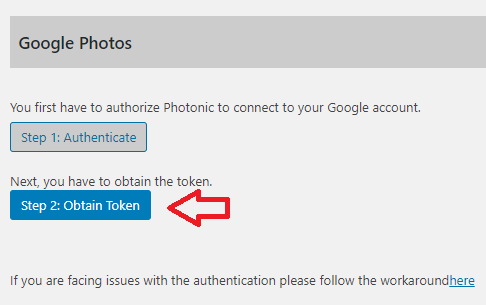
Step 6-d ) You will then be taken back to your site to obtain the token as illustrated in the image below. Click on Step 2: Obtain Token button.
Note: Step 1: Authenticate button is greyed out because this step has been completed.
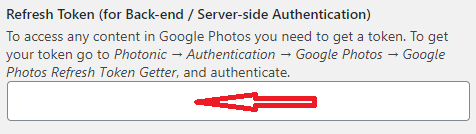
Step 6-e ) Your new token will be added to the following field Refresh Token (for Back-end / Server-side Authentication) as illustrated in the image below.
If you followed all the steps above correctly, you will see your Google Photos displayed in your site using Photonic shortcode.
I will be updating this tutorial from time to time. So keep coming back for the latest update.
If you have any question please let me know.
Enjoy.
Photonic Plugin Tutorial List: