Last Updated: June 18, 2016
KompoZer Template Header shows you how to add a header to the template. Add some css style, place the header div tag in the correct location.
Latest News: I have added another link to the menu.
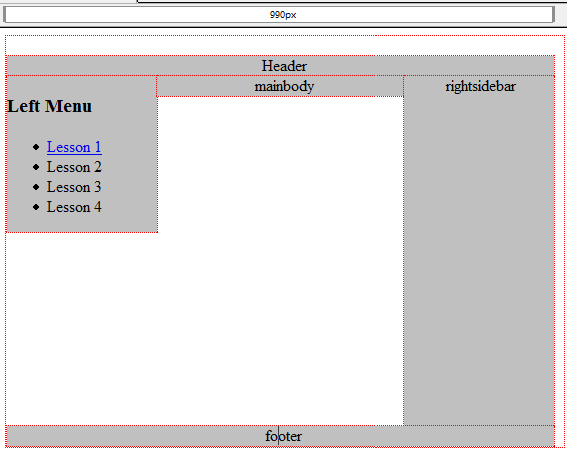
In this lesson you will learn to add the final div tag of the template. You should now have 6 div tags, wrapper, header, leftmenu, mainbody, rightsidebar and footer. This is what you call a simple web design template.
KompoZer Template Header Steps
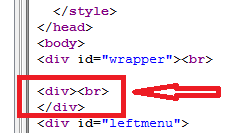
Step 1 ) The following image shows you a new div tag added, header. You should now have six div tags in total.
Note: This div tag has been added below the id=”wrapper” as illustrated in the image below. This is very important.
- wrapper
- header
- leftmenu
- mainbody
- rightsidebar
- footer
Note: Refer to KompoZer Div Tag Container if you need help adding div tags.
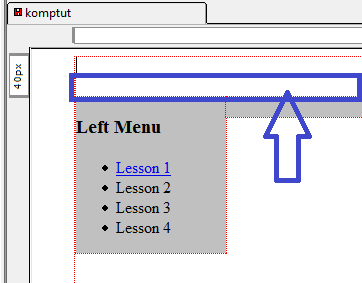
Step 2 ) The following image shows you the new div tag marked in blue, shown in designed view. Make sure your div tag is located in the same place as showing below or else you will have issues controlling the div tag, when following these instructions.
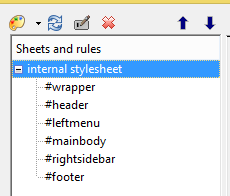
Step 3 ) The following image shows you a new id added, #header. You should now have the following id’s.
- wrapper
- header
- leftmenu
- mainbody
- rightsidebar
- footer
Note: Refer to KompoZer Div Tag Container if you need help adding div tags.
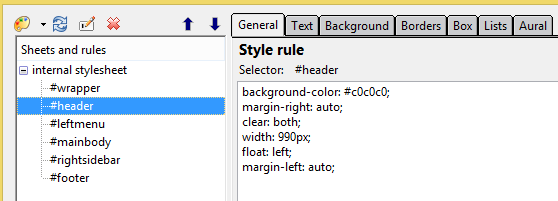
Step 4 ) In the following image #header id, I have added the following CSS code.
background-color: #c0c0c0;

margin-right: auto;

clear: both;

width: 990px;

float: left;

margin-left: auto;
Note: Refer to kompozer Left Menu Code if you need help adding CSS style.
Step 5 ) The following image shows you the new template design completed. I have added the appropriate headers to each div tag for you to see.
Note: This is a basic design, you can add as many div tags as you feel necessary for your website.
Click on the following URL Insert Header Image to continue.