Last Updated: June 18, 2016
KompoZer Add Footer Settings shows you how to add a footer and right sidebar to your website front end structure “Template”.
Latest News: I have added a menu.
So far we have added the following top, leftmenu and mainbody div tags. Now we are going add a rightsidebar and a footer. This is starting to look like a template. The only part left to add is the header, which is coming soon.
KompoZer Add Footer Settings Steps
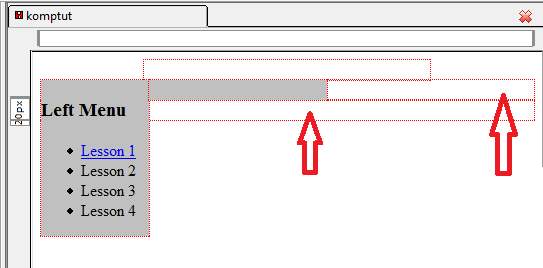
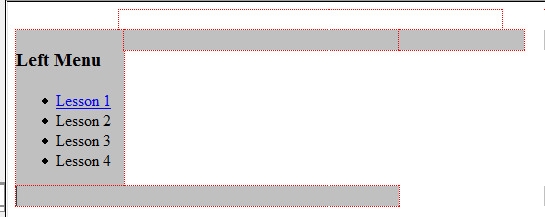
Step 1 ) The following image shows you two more div tags added a rightsidebar and a footer. So far there are five div tags added.
Note: Refer to KompoZer Div Tag Container if you need help adding div tags.
- top
- leftmenu
- mainbody
- rightsidebar
- footer
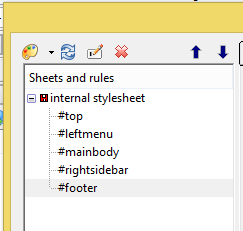
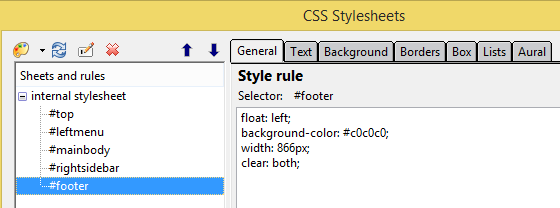
Step 2 ) The following image shows you two more id added, #rightsidebar and #footer.
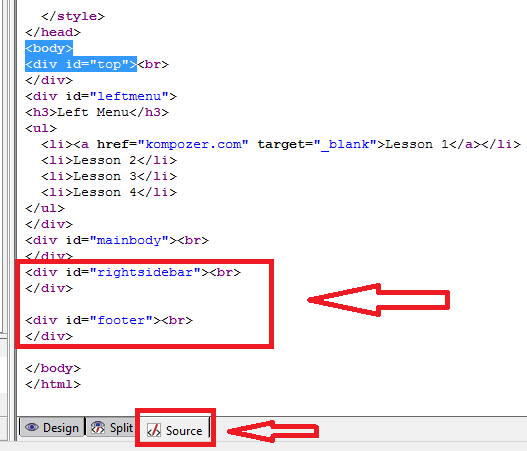
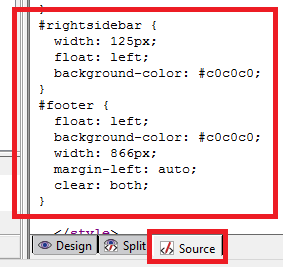
Step 3 ) Click on Source tab to make sure the id’s have been added to the two new div tags rightsidebar and footer.
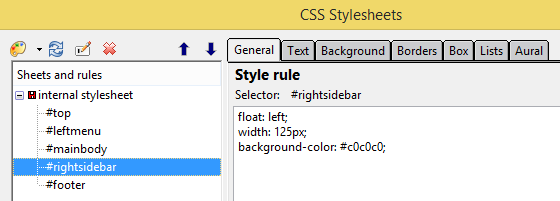
Step 4 ) In the following image #rightsidebar id, I have added the following CSS code. To add the following you need to click on Background and Box tab.
Note: Refer to kompozer Left Menu Code if you need help adding CSS style.
width: 125px;

float: left;

background-color: #c0c0c0;
Step 5 ) In the following image #footer id, I have added the following CSS code.
float: left;

background-color: #c0c0c0;

width: 866px;

clear: both;
Step 6 ) The following image shows you the new template layout. You can start to see how it taking shape the new layout.
Step 7 ) The following image shows you the CSS Source code assigned to the two div tags added.
So far you have learned how to add CSS style, div tags, id’s, view the source code and understand the overall structure. However the image above in Step 6 ) is not really formatted correctly and does not look like a Template yet.
Click on the following URL Front Page Template Layout to continue.