Add New ClassiPress WordPress Theme Ads post shows you how to ad new ads to your classipress site. This is similar to adding a new post or page.
Last Updated: January 12, 2019
Latest Update: I have changed a link.
In this post you will learn how to add new ads to your site. Adding a new ad is similar to adding a post or a page in WordPress. The only difference is the extra options you can choose from for each ad.
Note: Remember once you are finish setting up the ad click on Publish button.
Add New ClassiPress WordPress Theme Ads
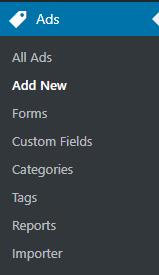
Step 1 ) Go to Ads -> Add New to start adding new classipress ads in your site.
Step 2 ) Enter a Title and Description including images for each new ad for your site just like you do when you add a new post or page.
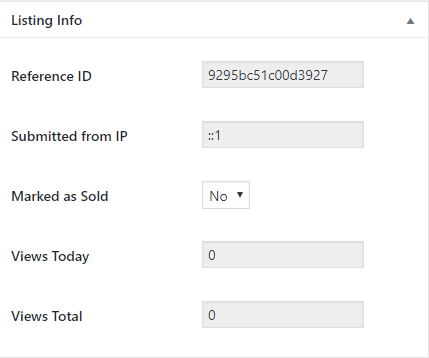
Listings Info
Step 3 ) The following image Listings Info allows you to enter the following information per ad as illustrated in the following image.
Listings Info Settings
- Reference ID
- Submitted from IP
- Marked as Sold
- Views Today
- Views Total
Listings Details
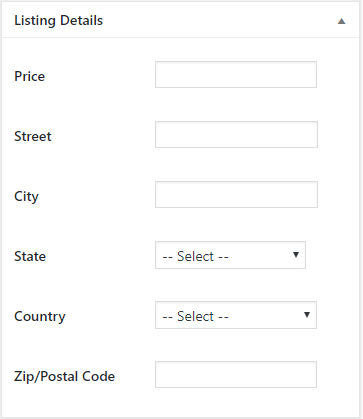
Step 4 ) The following image Listings Details allows you to set up the following options.
Listings Details
- Price
- Street
- City
- State
- Country
- Zip/Postal Code
Pricing Information
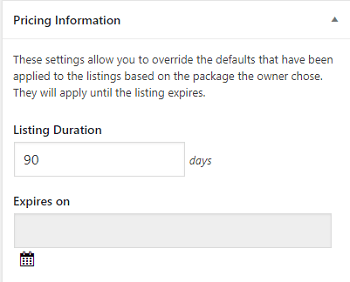
Step 5 ) The following image Pricing Information allows you to set up the following options.
Pricing Information Settings
- Listing Duration
- Expires on
Reports and Attachments
Step 6 ) The following image Reports and Attachments shows you a report about each ad. You can also Add Media to your ads.
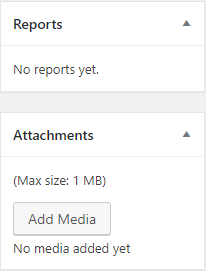
Step 7 ) Select Categories, Tags and a Featured Image if you want your ad to have one. Once you are ready to publish the ad, click on the Publish button.
That is how simple it is to add new classipress ads to your site.
If you have any questions or suggestions please leave a comment.
Enjoy.
ClassiPress Theme Tutorial List: