WP Photo Seller Price List Management tutorial will show you how to set up and configure the price list management and more.
Last Updated: September 8, 2021
Latest News: Updated the documentation.
What you need:
- WP Photo Seller (Note: This is an affiliated link = I get a small commission if you make a purchase.)
WP Photo Seller Price List Management
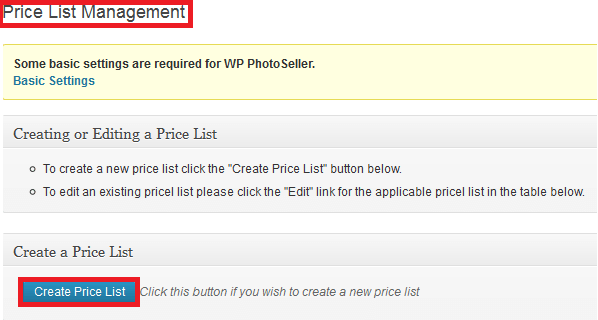
Step 1 ) Click on WP Photo Seller -> Price List to set up the following Create or Editing a Price List and Create a Price List. Click on Create Price List button to begin creating a price list.
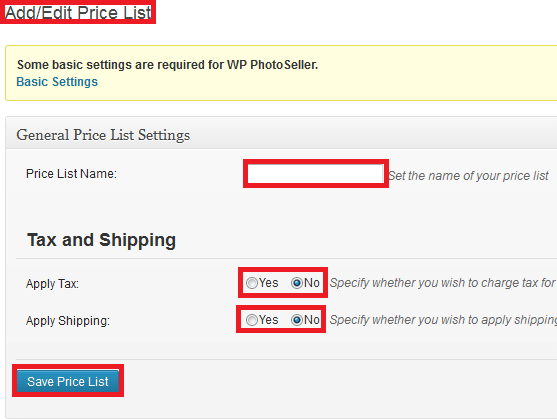
Step 2 ) The following image allows you to enter a Price List Name, Apply Tax and Apply Shipping. When you click on Save Price List button you will be provided with two more options to add more settings. See images below.
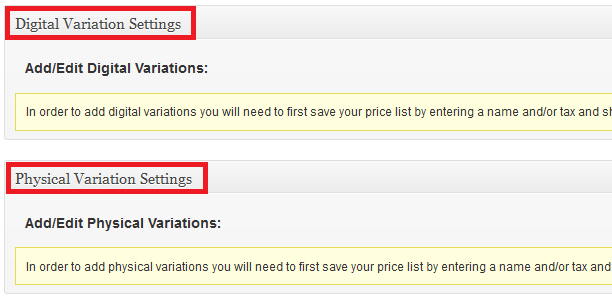
Step 3 ) The following image reminds you to create a price list or else you will not be able to configure the following settings.
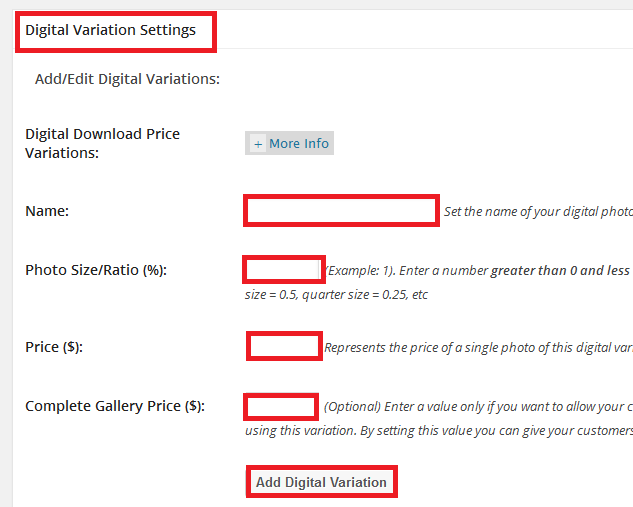
Step 4 ) The following image allows you to set up the Digital Variation Settings. Once you have completed the settings click on Add Digital Variation button. See the following options:
- Name
- Photo Size/Ratio (%)
- Price ($)
- Complete Gallery Price ($)
- Click on Add Digital Variation button

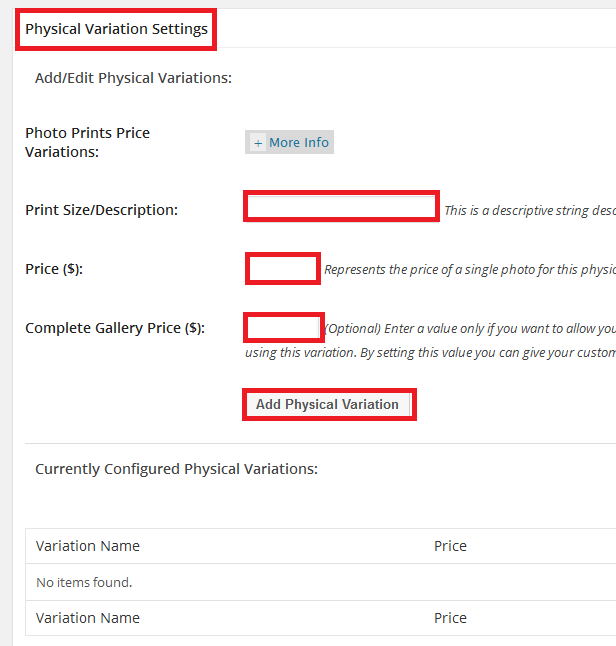
Step 5 ) The following image allows you to set up the Physical Variation Settings. Once you have completed the settings click on Add Physical Variation button. See the following options:
- Print Size/Description
- Price (%)
- Complete Gallery Price ($)
- Click on Add Physical Variation button
Click on the following link Gallery Settings to complete the tutorial.
I will be updating this post from time to time. So keep coming back for more.
Enjoy.
WP Photo Seller Tutorials