The following WP Express Checkout General Settings tutorial shows you how to set up the general settings in the plugin and more.
Last Updated: April 3, 2025
Latest News: Updated the funding options in the documentation.
The following tutorial shows you how to set up and configure the general settings for WP Express Checkout. These are straightforward and simple instructions for anyone to follow.
What You Need:
WP Express Checkout General Settings
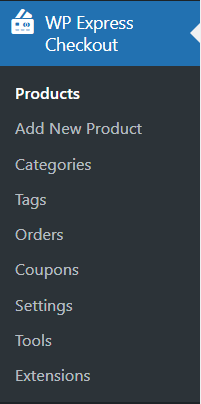
Step 1 ) Go to WP Express Checkout in your site admin panel to start setting up the general settings in the plugin. The following image shows you the admin menu options.
WP Express Checkout Admin Menu
- Products
- Add New Product
- Categories
- Tags
- Orders
- Coupons
- Settings
- Tools
- Extensions
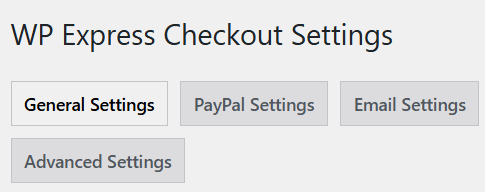
Step 2 ) Go to WP Express Checkout -> Settings -> General Settings as illustrated in the following image. From this point you have access to the following 4 tabs.
Settings Admin Tabs
- General Settings
- PayPal Settings
- Email Settings
- Advanced Settings
Note: You can also read the plugins documentation by clicking on the following link WP Express Checkout.
Global Settings
Step 3 ) The following image Global Settings allows you to set up the following options in the plugin.
Global Settings
- Currency Code
- Currency Symbol
- Thank You Page URL = Note: This page is automatically created when you install and activate the plugin for the first time.
- Shop Page URL = Note: This page is automatically created when you install and activate the plugin for the first time.
Note: If you need to recreate both pages above, read the following documentation recreating-the-required-express-checkout-plugin-pages.

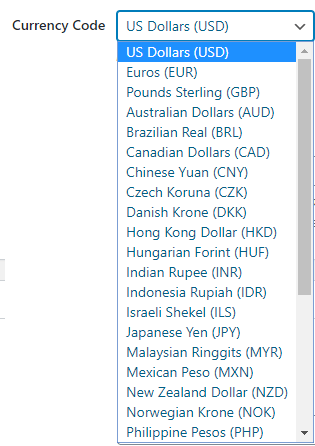
Step 3-a ) The following image Currency Code allows you to select the default WP Express Checkout language for your site.
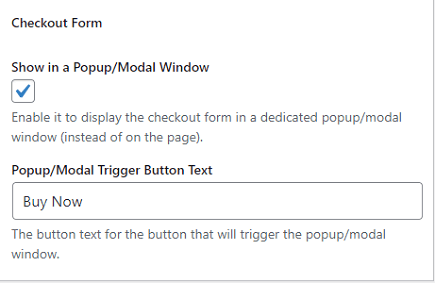
Checkout Form
Step 4 ) The following image Checkout Form allows you to set up the following options.
Checkout Form Settings
- Show in a Popup/Modal Window
- Popup/Modal Trigger Button Text
Shipping & Tax Settings
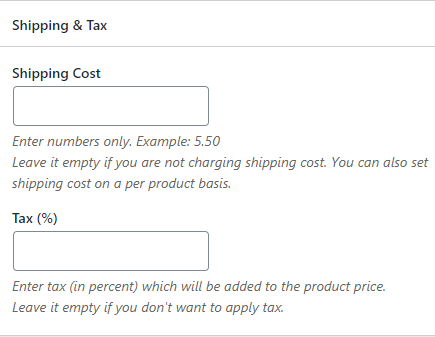
Step 5 ) The following image Shipping & Tax allows you to set up the following options.
Shipping & Tax Options
- Shipping Cost
- Tax (%)
Debug Logging Settings
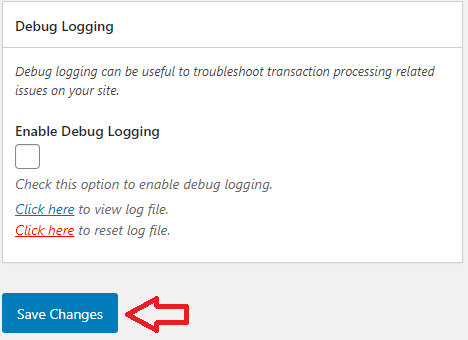
Step 6 ) The following image Debug Logging allows you to enable the following option. You can also click on the log links to view and reset the logs.
Debug Logging
- Enable Debug Logging
- View Log
- Reset Log
- Finally when you are happy with your settings click on Save Changes button.
FAQ
Q1 Is it possible to use Simple Sopping Cart shortcodes to create products directly like echo do_shortcode (“[wp_cart_button name = ‘something’ price = ‘”. $ Price. “‘]);?
Answer: Unfortunately no. Check the following link support thread to learn more.
============================
That is all you need to do to set up the general settings in the plugin.
I will be updating this post from time to time. So keep coming back for more.
Enjoy.
WP Express Checkout Plugin Tutorial List: