WordPress TinyMCE Advanced Plugin Settings post shows you the different options and buttons you can enable in the plugin to improve the tinymce editor.
Last Updated: August 18, 2023
Latest News: I updated the changelog.
Most people nowadays have used a word processor to type emails or documents. WordPress visual and html editors works in the same way as a word processor. The visual editor works like a WYSIWYG “What You See Is What You Get” editor. The html editor works in raw plain text format. No visual formatting is displayed when using the html editor. Everything you type is displayed in plain raw text format.
In this post you will learn about the different buttons available in the plugin to improve TinyMCE. Enabling the buttons will improve the visual and html editor. To enable the buttons or remove them, all you have to do is drag them between the rows.
Note: These tutorials are based on version 5.6.0.
TinyMCE Advanced changelog version 5.9.2
- Fixed a typo in the plugin header version string.
Note: You might like to check the following URL TinyMCE to learn more about WordPress TinyMCE editor.
What You Need:
- TinyMCE Advanced plugin.
- Advanced TinyMCE Configuration plugin. (Optional)
WordPress TinyMCE Advanced Plugin Settings
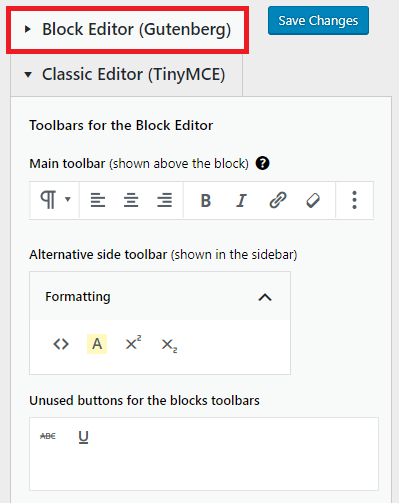
Step 1 ) The following image Block Editor (Gutenberg) allows you to manage the following options.
Toolbars for the Block Editor
- Main toolbar (shown above the block)
- Alternative side toolbar (shown in the sidebar)
- Unused buttons for the blocks toolbars
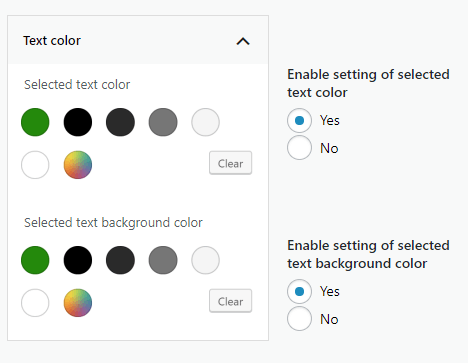
Step 2 ) The following image Text color allows you to manage the following options.
Text color
- Enable setting of selected text color
- Enable setting of selected text background color
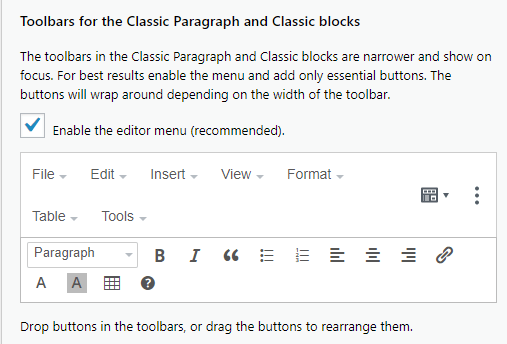
Step 3 ) The following image Toolbars for the Classic Paragraph and Classic Block allows you to manage the following options.
Toolbars for the Classic Paragraph and Classic Block
- Enable the editor menu (recommended).
Top Menu
- File
- Edit
- Insert
- View
- Format
- Table
- Tools
First Row
- Paragraph
- Bold
- Italic
- Blockquotes
- Bulleted List
- Numbered List
- Align left
- Align center
- Align right
- Insert/edit link
- Text color
- Background color
- Table
- Keyboard Shortcuts
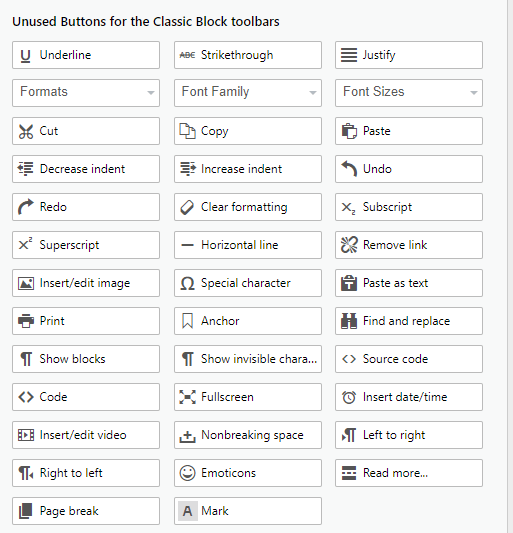
Classic Block Unused Buttons
Step 4 ) The following image Classic Block Unused Buttons illustrates all the buttons currently not used. You can see there are plenty of buttons for you to choose from to help you edit your posts and pages. All you have to do is drag these buttons into the editor.
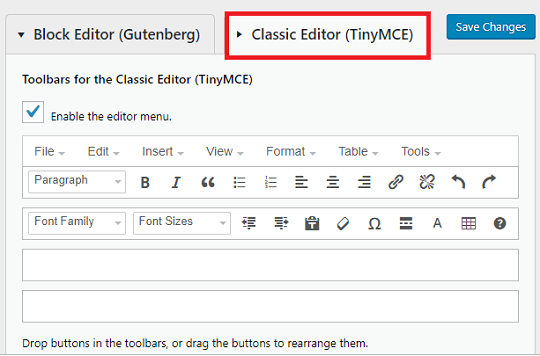
Step 5 ) The following image Classic Editor (TinyMCE) displays the default TinyMCE Advanced buttons added to the editor when you first install the plugin.
Toolbars for the Classic Editor (TinyMCE)
- Enable the editor menu.
Top Menu
- File
- Edit
- View
- Insert
- Format
- Tools
- Table
First Row
- Paragraph
- Bold
- Italic
- Bulleted List
- Numbered List
- Blockquotes
- Align left
- Align center
- Align right
- Insert/edit link
- Remove link
- Undo
- Redo
Second Row
- Font Family
- Font Sizes
- Decrease indent
- Increase indent
- Paste as text
- Clear formatting
- Special character
- Insert Read More tag
- Text color
- Table
- Keyboard Shortcuts
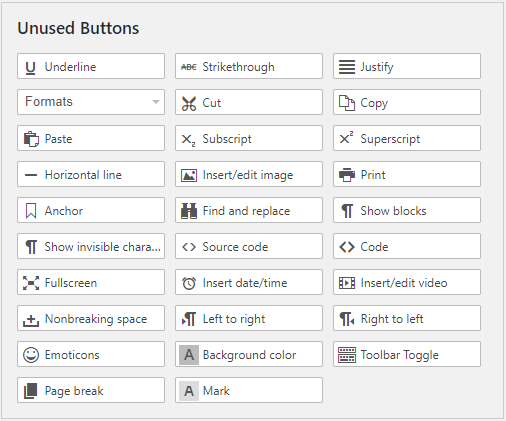
Unused Buttons
Step 6 ) The following image Unused Buttons illustrates all the buttons currently not used. You can see there are plenty of buttons for you to choose from to help you edit your posts and pages. All you have to do is drag these buttons into the editor.
Options
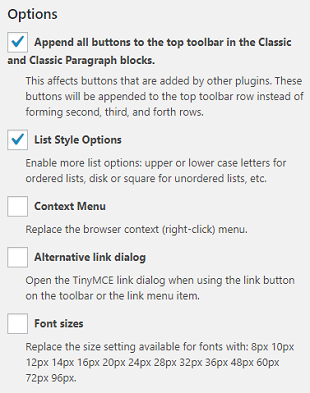
Step 7 ) The following image Options allows you to enable the following options.
Options
- Approved all buttons to the top toolbar in the Classic and Classic Paragraph blocks.
- List Style Options
- Context Menu
- Alternative link dialog
- Font sizes
Advanced Options
Step 8 ) The following options Advanced Options allows you to enable the following options. Please make sure that you read carefully what each option does. If you run into issue, come back to this options and disable the option that crashed or caused an issue in your site.
Advanced Options
- Hybrid Block Editor Mode
- Add “Classic Paragraph” Block.
- Replace the Block Editor with the Classic Editor
- Keep paragraph tags
- Create CSS classes menu
- Enable pasting of image source
Administration
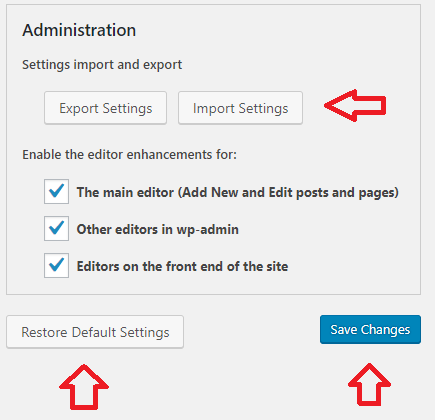
Step 9 ) The following image Administration allows you to enable the following options.
Settings import and export
- Click on Export Settings button to export your settings.
- Click on Import Settings button to import your settings.
Enable the editor enhancements for:
- The main editor (Add New and Edit posts and pages)
- Other editors in wp-admin
- Editors on the front end of the site
Administration
- Click on Restore Default Settings button to revert back to the default settings.
- Click on Save Changes button to save your settings when you are finish configuring the plugin.
==========================
That is how simple it is to set up TinyMCE Advanced plugin.
To learn more about the visual editor, click on the following URL WordPress Posts Text Formatting Alignment.
If you have any questions please let me know.
Enjoy.