WordPress eStore Plugin Payment Gateway tutorial shows you how to set up additional payment gateways for your shopping cart.
Last Updated: September 28, 2021
Latest News: Updated the documentation.
WP eStore plugin allows you to integrate with a few payment gateways. The following tutorial shows you the different settings you can enable for the following payment gateways.
- PayPal
- Manual / Off-line Checkout
- 2Checkout
- Authorize.net
What You Need:
- WordPress eStore (Note: This is an affiliated link = I get a small commission if you make a purchase.)
WordPress eStore Plugin Payment Gateway
Remember: Check all your options before you save them. Run the sandbox settings for further testing before you publish your shopping cart. This plugin has many features to setup.
General Payment Gateway Settings
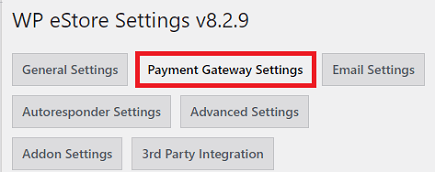
Step 1 ) Go to WP eStore -> Settings -> Payment Gateway Settings tab to set up the payment gateway settings as illustrated in the image below.
General Payment Gateway Settings
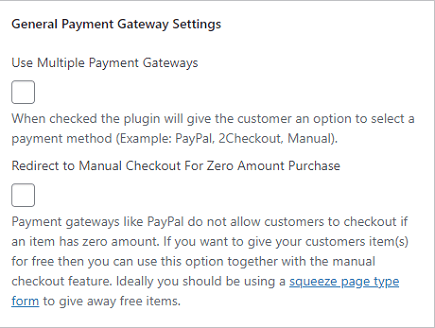
Step 2 ) The following image General Payment Gateway Settings tab to set up the payment gateway settings as illustrated in the image below.
General Payment Gateway Settings Options
- Use Multiple Payment Gateways
- Redirect to Manual Checkout For Zero Amount Purchase
PayPal Settings
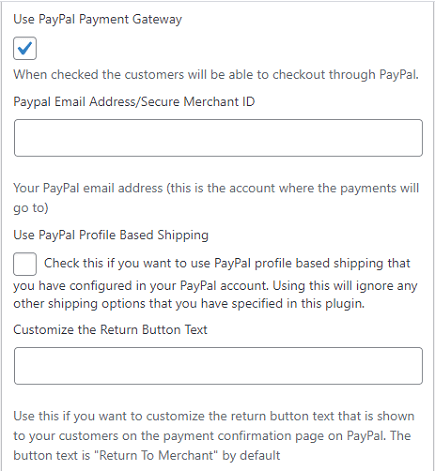
Step 3 ) The following image PayPal Settings allows you to set up the following options.
PayPal Settings Options Part 1
- Use PayPal Payment Gateway
- PayPal Email Address/Secure Merchant ID
- Use PayPal Profile Based Shipping
- Customize the Return Button Text
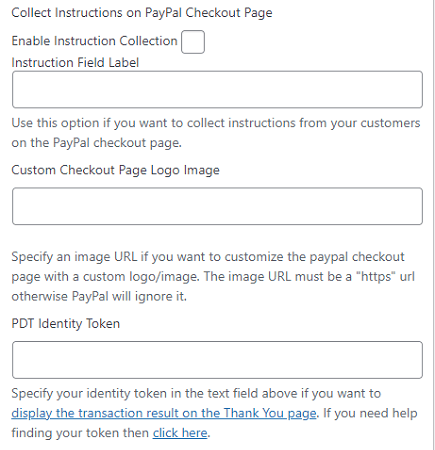
Step 3-a ) The following image allows you to set up the following options.
PayPal Settings Options Part 2
- Enable Instruction Collection
- Instruction Field Label
- Custom Checkout Page Logo Image
- PDT Identity Token
- Disable IPN Validation
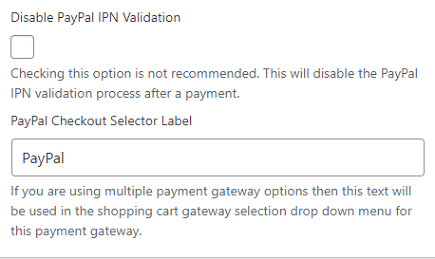
Step 3-b ) The following image allows you to set up the following options.
PayPal Settings Options Part 3
- Disable PayPal IPN Validation
- PayPal Checkout Selector Label
Manual / Off-line Checkout Settings
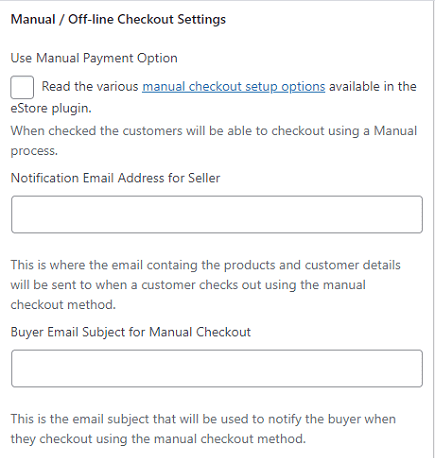
Step 4 ) The following image Manual / Off-line Checkout Settings allows you to set up the following
Important: Please read the manual checkout setup for more information.
Manual / Off-line Checkout Settings Options Part 1
- Use Manual Payment Option
- Notification Email Address for Seller
- Buyer Email Subject for Manual Checkout
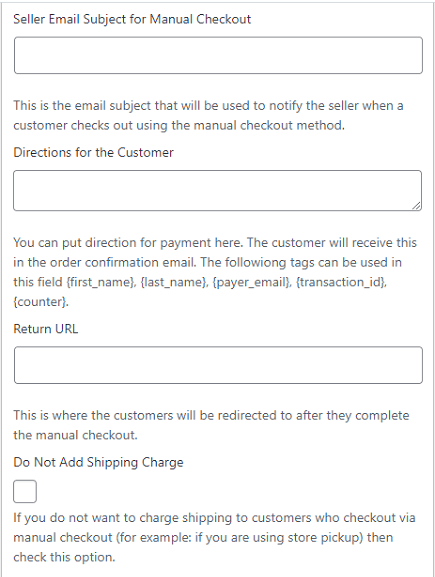
- Seller Email Subject for Manual Checkout
- Directions for the Customer
Step 4-a ) The following image allows you to set up the following options.
Manual / Off-line Checkout Settings Options Part 2
- Seller Email Subject for Manual Checkout
- Directions for the Customer
- Return URL
- Do not Add Shipping Charge
Step 4-b ) The following image allows you to set up the following options.
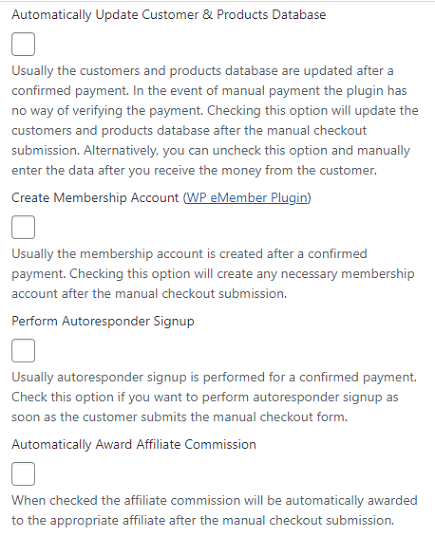
Manual / Off-line Checkout Settings Options Part 3
- Automatically Update Customer & Products Database
- Create Membership Account (WP eMember Plugin)
- Perform Autoresponder Signup
- Automatically Award Affiliate Commission
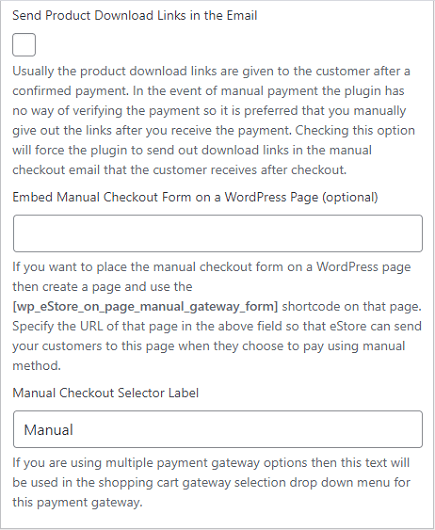
Step 4-c ) The following image allows you to set up the following options.
Manual / Off-line Checkout Settings Options Part 4
- Send Product Download Links in the Email
- Embed Manual Checkout Form on a WordPress Page (Optional)
- Manual Checkout Selector Label
2Checkout Settings
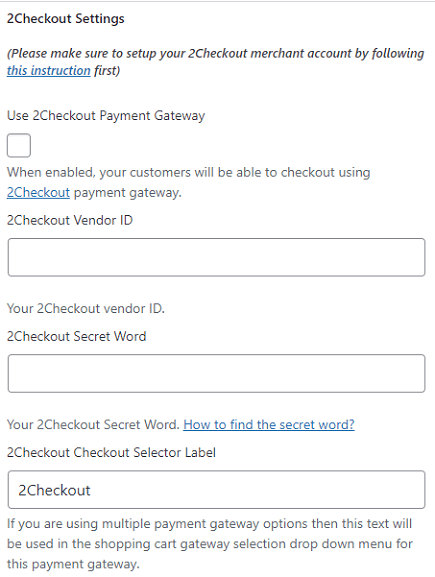
Step 5 ) The following image 2Checkout Settings allows you to set up the following options.
2Checkout Settings Options
- 2Checkout Payment Gateway
- 2Checkout Vendor ID
- 2Checkout Secret Word
- 2Checkout Checkout Selector Label
Authorize.net Settings
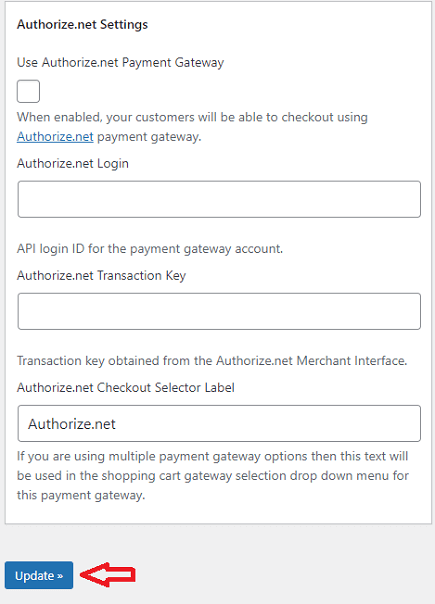
Step 6 ) The following image Authorize.net Settings allows you to set up the following options.
Authorize.net Settings Options
- Use Authorize.net Payment Gateway
- Authorize.net Login
- Authorize.net Transaction Key
- Authorize.net Checkout Selector Label
- Click on Update button when you complete your settings.
==================================
Click on the following link Email Settings to complete the tutorial.
I will be updating this post from time to time. So keep coming back for more. If you have any questions please let me know.
Enjoy.
WordPress eStore Plugin Tutorial List: