WordPress Discussion Setup will show you how to set up the discussion and comments options in your blog.
Last Updated: February 19, 2018
Latest News: I have updated a link.
This set up is important to get it right from the beginning to prevent spam and or too many comments being displayed in every post. Still today I see too many bloggers using WordPress platforms for their websites and not set up this option correctly. Many forget to implement the Comment Moderation and Comment Blacklist.
WordPress Discussion Setup Steps
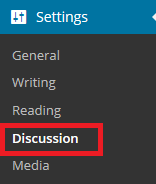
Step 1 ) Go to Settings -> Discussion menu. See image below.
Step 2 ) The following image allows you to set up the following options.
Default article settings
- Attempt to notify any blogs linked to from the article
- Allow link notifications from other blogs (pingbacks and trackbacks)
- Allow people to post comments on new articles
(These settings may be overridden for individual articles.)
Other comment settings
- Comment author must fill out name and e-mail
- Users must be registered and logged in to comment
- Automatically close comments on articles older than days
- Enable threaded (nested) comments levels deep
- Break comments into pages with Enter a number here top level comments per page and the last or first page displayed by default
Comments should be displayed with the older or newer comments at the top of each page

Step 3 ) The following image allows you to set up the following options.
Email me when ever
- Anyone posts a comment
- A comment is held for moderation
Before a comment appears
- Comment must be manually approved
- Comment author must have a previously approved comment

Step 4 ) The following image Comment Moderation allows you to set up how you want to hold a comment in queue if it contains x number of links. (Remember add a number here to prevent your comments from having too many links or none what so ever.)

Step 5 ) The following image Comment Blacklist allows you to add words, numbers, combination of words, characters etc to blacklist any comment that contains any of the aforementioned. (Remember using this feature will help you control your spam in comments. This in return helps you to block the IP address using a plugin or other means.)

Step 6 ) The following image Avatars allows you to set up the following options.
Avatar Display
- Show Avatars
Other comment settings
- G — Suitable for all audiences
- PG — Possibly offensive, usually for audiences 13 and above
- R — Intended for adult audiences above 17
- X — Even more mature than above
![]()
Step 7 ) The following image Default Avatar allows you to set up the following options.
- Mystery Person
- Blank
- Gravatar Logo
- Identicon (Generated)
- Wavatar (Generated)
- MonsterID (Generated)
- Retro (Generated)
- Click on Save Changes button when you finish with the set up
![]()
That is how simple it is to set up your blog discussion settings and comments in WordPress.
I will be updating this tutorial from time to time so keep coming back for the latest. If you have any questions please let me know.
Enjoy.
WordPress Setup Tutorial List: