Last Updated: December 06, 2014
Suffusion Google Custom Search Engine Control Panel Basics post shows you how to add the search engine name, description, keywords and more.
Latest News: I have added another link to the menu below.
Suffusion Google Custom Search Engine Tutorials:
- Create New
- Control Panel Basics
- Website Text Widget
- Responsive
Suffusion Google Custom Search Engine Control Panel Basics Steps
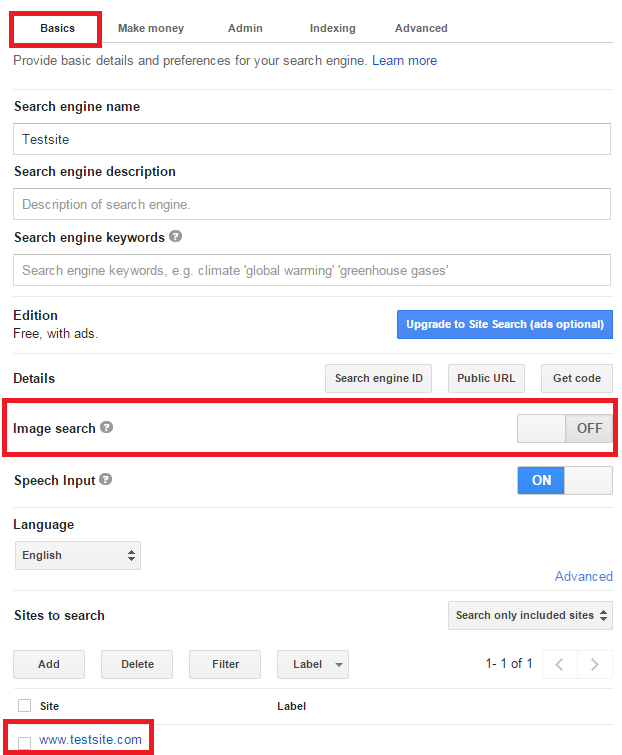
5 ) Click on Setup -> Basics to set up the following options.
Note: Enter the details you wish to add for your custom search engine. (Each header title below is self explanatory)
- Search engine name
- Search engine description
- Search engine keywords
- Edition = Upgrade to Site Search (Ads optional)
- Details = Search engine ID, Public URL and Get code
- Image search = (I have highlighted this option because you might choose to enable it)
- Speech Input
- Language
- Sites to search

6 ) The following image Make money allows you to enable Search Engine Monetization. I have enabled this in my websites you might like to enable as well. (This is optional )
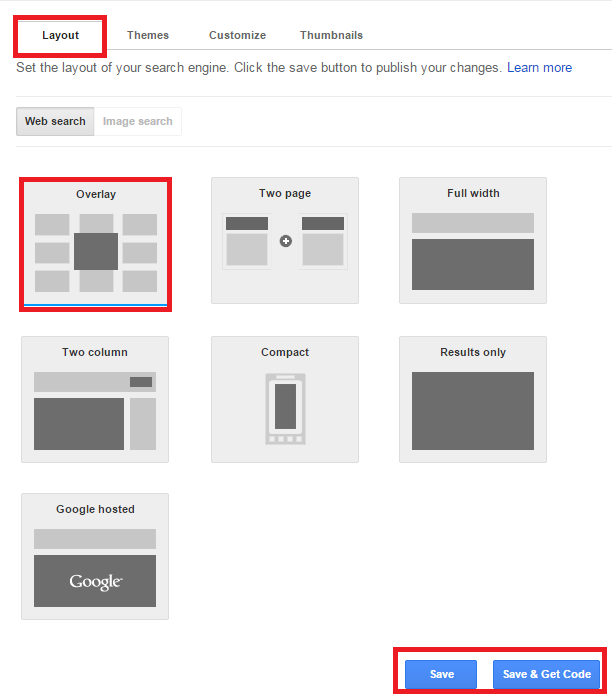
 7 ) Go to Look and feel -> Layout to set up the following options.
Web search
- Overlay = (You will click here because this is the layout used for this tutorial)
- Two page
- Full width
- Two column
- Compact
- Results only
- Google hosted
- Once you have finished you can click on Save button or Save & Get Code button. (For this tutorial I clicked on Save & Get Code button)
Important: The Layout below Overlay does not function correctly in a responsive environment like mobile devices. I have created another tutorial above named Responsive.

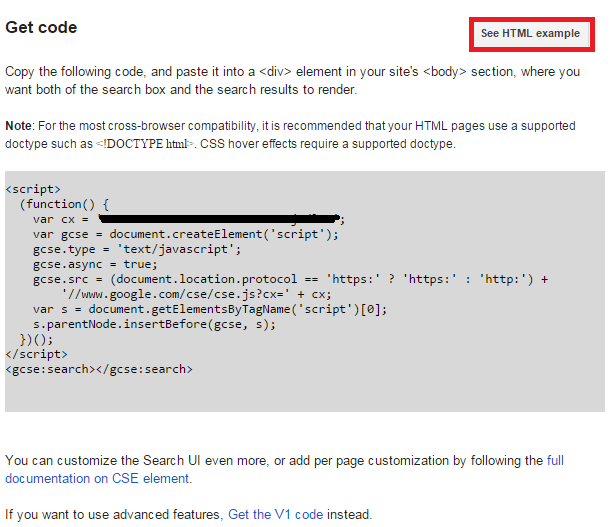
8 ) The following image Get code displays the code you need to select, copy and paste into your website text widget. It also has a See HTML example button for you to view how to add the code.

Click on the following URL Website Text Widget to continue with the tutorial.
If you have any questions please let me know. I will be updating this from time to time. So keep coming back for the latest post.
Enjoy
Other links you might want to read:
- Before You Publish A Website Revision Update This URL is a check list and a guide to developing website and blogs.
- First Time Blogging Revision Update This URL helps you understand all that you require to run a secured website or blog.
- Suffusion Theme Tutorials to learn more about Suffusion.