The following Selling Products Using Stripe Payments tutorial shows you how to add a product to your post or page using a shortcode and more.
Last Updated: September 10, 2021
Latest News: Updated the documentation.
Once you create your product, you will need to add it to a WordPress post or page so that your customers can click the ‘Buy Now’ button and complete the easy Stripe payment process. This will allow them to pay with a credit card via Stripe payment gateway on your WordPress site. Using their credit card they will be able to make a payment for the goods or services you are offering in your site. Adding your product’s ‘Buy Now‘ button to your WordPress website is as simple as copying and pasting a shortcode. Follow the instructions below to easily add a product’s ‘Buy Now’ button to your website.
What You Need:
- Stripe Payments
- Addons available.
Selling Products Using Stripe Payments
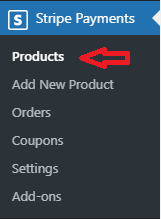
Step 1 ) Click on Stripe Payments -> Products admin menu as illustrated in the image below.
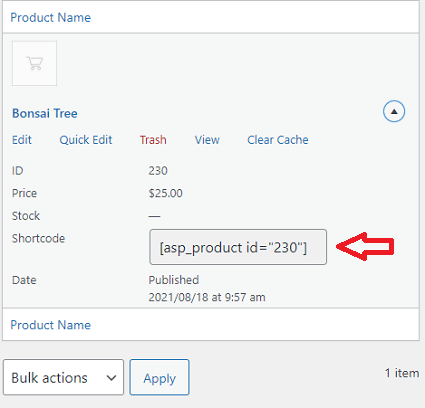
Step 2 ) Copy and paste the shortcode for the product that you wish to display a ‘Buy Now’ button for on your website as illustrated in the image below.
Step 3 ) Create a new WordPress ‘Post‘ or ‘Page‘. Ensure you add a title tp your page or post. Paste the shortcode that you have copied from the previous step and Publish your page or post when you are ready.
Viewing The Buy Now Button
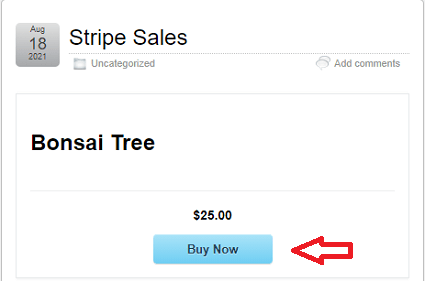
Step 4 ) Once you have added your product’s shortcode to a WordPress page or post and you have published out that page, you should now see a ‘Buy Now’ button on the front end of your website as illustrated in the image below. This is just a simple buy now button with a title, nothing fancy and no image added to the product.
Note: The display of your buy now button and product title will appear differently in your site based on your settings and theme.
Product Information
- Product Title
- Product Cost
- Buy Now button
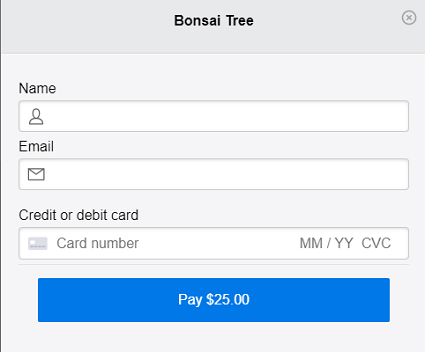
Step 5 ) When you click on the Buy Now button above, you should see a popup window displayed as illustrated in the image below.
Product Window Popup Information
- Product Title
- Name
- Credit or debit card
- Pay $25.00 button
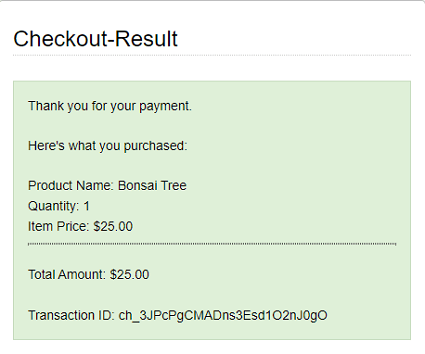
Checkout-Result Page
Step 6 ) When you click on the Pay $25.00 button above, the following Checkout-Result page is displayed as illustrated in the image below. The customer will know exactly what they paid for from the information displayed below.
Displaying A Product With More Information
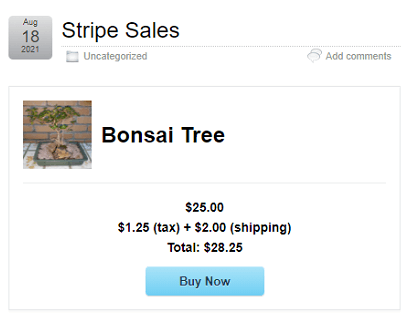
Step 7 ) Using the basic shortcode will only add the product’s Buy Now button to your WordPress Post or Page. The following product has more details displayed based on the extra settings you can enable in the product’s page as illustrated below.
The image below displays the following extra details for the product.
Product Extra Information
- Thumbnail Image
- Product Title
- Product Cost
- Tax
- Shipping
- Total
- Buy Now button
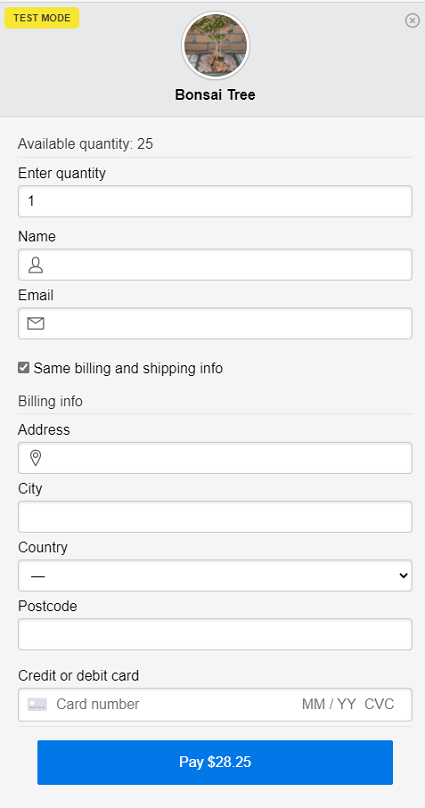
Step 8 ) When you click on the Buy Now button above, you should see a popup window displayed. In this window you will see more information about the product based on your settings as illustrated in the image below.
Product Window Popup Extra Information
- Test Mode
- Thumbnail Image
- Product Title
- Available quantity
- Enter quantity
- Name
- Same billing and shipping info
- Billing info
- Address
- City
- Country
- Postcode
- Credit or debit card
- Pay $28.25 button
Troubleshooting
Q1 I get a 404 error message when someone clicks a product’s payment button. How do I fix this issue?
Solution: In the above error message the user had index.php part of the URL. By changing the permalink structure the issue was resolved. Also they had to change the following feature AllowOverride was set to None not All in Apache server. Check the following link forum post to learn more.
============================
That is all you need to do to sell products in your site using Stripe Payments plugin.
I will be updating this post from time to time. So keep coming back for more.
Enjoy.
Stripe Payments Plugin Tutorials: