MailPoet Wizard Setup shows you how to setup the basic settings in the plugin before you configure the rest options in the plugin.
In this post you will learn how to setup the basic settings in MailPoet before you can begin to configure the rest of the settings. These steps are optional and you can always configure them later on. The instructions are very simple and straight forward. Also, you will not see other settings in the plugins admin panel until you go first through the wizard.
What you need:
- MailPoet plugin
- (Optional) This is an e-mail testing tool Mail Tester.
MailPoet Wizard Setup
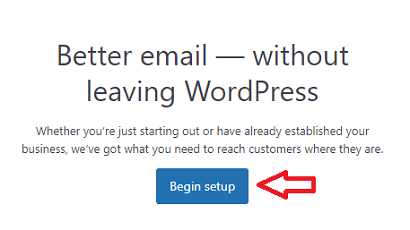
Step 1 ) Click on Begin setup button as illustrated in the image below. This will begin the process of setting up the basic settings (Which are optional) before you can begin to configure the rest of the plugin.
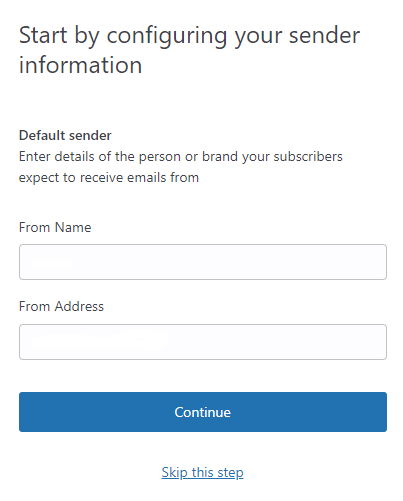
 Step 2 ) The following image allows you to set up the following options.
Sender Information Options:
- From Name
- From Address
- Click on Continue button or on skip this step link as illustrated in the image below.
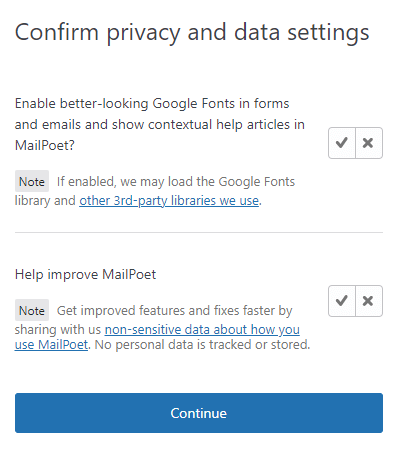
Step 3 ) The following image allows you to enable or disable the following options.
Confirm Privacy and Data Settings:
- Enable better-looking Google Fonts in forms and emails and show contextual help articles in MailPoet.
- Help improve MailPoet
- Click on Continue button as illustrated in the image below.
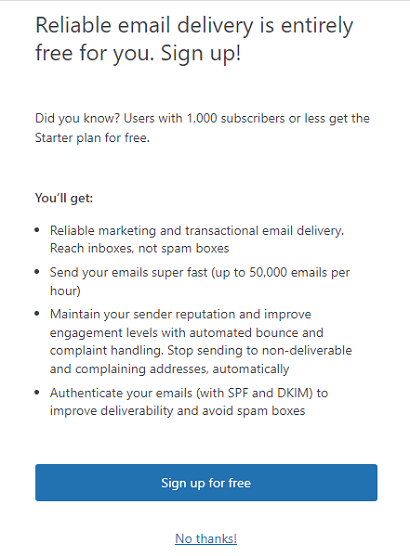
Step 4 ) The following image allows you to sign up for free. Of course this is optional.
Sign up for free:
- Click on Sign up for free button if you want to sign up or click on No thanks! link if you are not interested as illustrated in the image below.
============================
I will be updating this tutorial from time to time so keep coming back for the latest. If you have any questions please let me know.
Enjoy.
Go Back To MailPoet Tutorial List.