Edit Simple Membership Default English Strings post shows you how to edit the English language default strings in a few steps.
Last Updated: January 25, 2023
Latest News: Updated the documentation.
The default English language for SMP “Simple Membership Plugin” strings are simple and easy to read. However there might be times when you might want to edit the English language default strings to suit your needs. This post will show you how to achieve this.
This documentation focuses on the login widget as a guide. You can also use the following documentation to edit the widget if you are comfortable editing PHP and CSS files.
Note: These steps can be used as a guide to edit strings in any plugin or theme in your site.
What You Need:
- Simple Membership plugin.
- Loco Translate plugin.
- (Optional: The following documentation custom-translations shows you how to customize existing translations.)
Edit Simple Membership Default English Strings
Step 1 ) Install and activate Loco Translate plugin.
Note: This post assumes you have already installed and activate Simple Membership plugin.
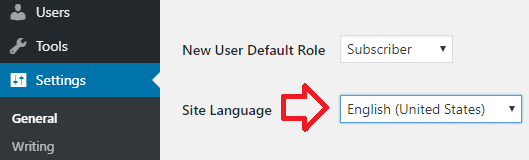
Step 2 ) Find out what English language is set up in your site. Remember there are different English languages available to set up WordPress.
Go to Settings -> General -> Site Language as illustrated in the image below to find out which English language is your site set up with. The following image is showing English (United States) language. That means the po and mo English (United States) language files will be created for this site.
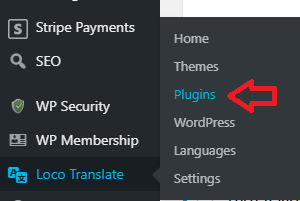
Step 3 ) Go to Loco Translate -> Plugins as illustrated in the following image.
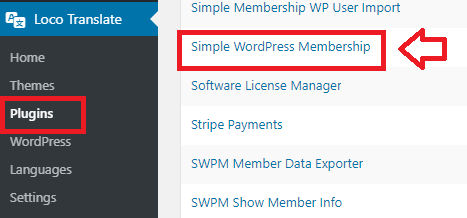
Step 4 ) Click on Simple WordPress Membership link as illustrated in the following image.
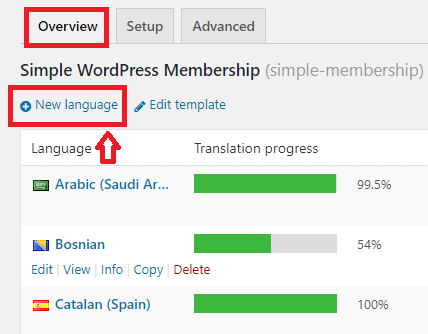
Step 5 ) Click on Overview tab as illustrated in the image below. Select the language you want to edit. If you can’t find the language, click on New language link as illustrated in the image below to add a new language.
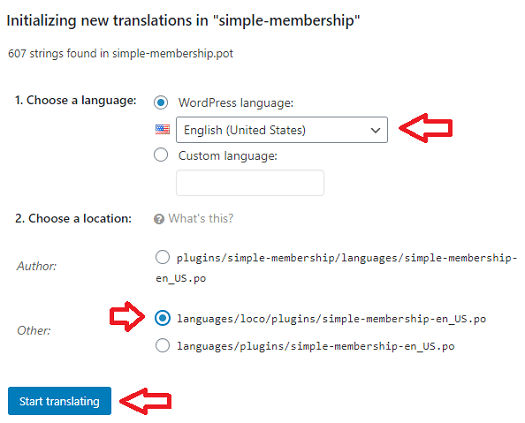
Initializing new translations in “simple-membership”
Step 6 ) The following image displays the following information and options selected.
New translation steps
- Choose a language: = English (United States) language selected.
- Choose a location: = Other:languages/loco/plugins/simple-membership-en_US.po is selected. Note: The following documentation locations explains why this selection is important.
- Click on Start translating button when you have completed your editing.
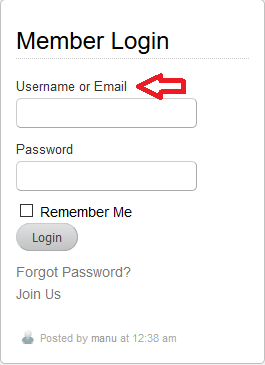
Step 7 ) The following image Member Login displays the login widget in the site. In this example the Username or Email string will be edited.
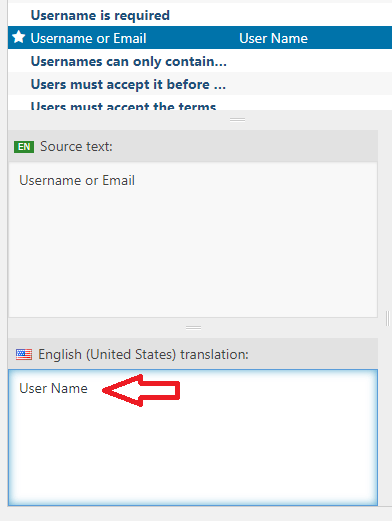
Step 8 ) The following image shows you the new edited string User Name added. Click on Save button when you finish translating.
Note: Because this is an English site, you don’t have to edit all the strings. You just need to edit the strings you want to make changes too.
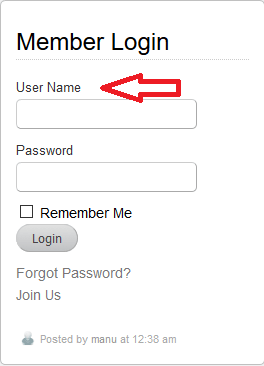
Step 9 ) The following image displays the new edited string User Name in the login widget.
Backup New Language Files
Step 10 ) If you are not using a child theme, and you intend to uninstall Loco Translate plugin, then make sure you copy locally to your computer/laptop the new po and mo language files created. If you don’t then you will lose the translated strings.
The following are the language files created for this example. These files will be downloaded locally to your computer/ laptop. Every time you update the plugin you will need to upload these files to yoursite.com/wp-content/plugins/simple-membership/languages/.
Language Files:
- simple-membership-en_US.po
- simple-membership-en_US.mo
Language Files Location:
- yoursite.com/wp-content/languages/loco/plugins/ = This is setup in Step 6 ) above.
FAQ
Q1 How do I change Registration Successful. Please Login. Message?
Solution: You can edit the message using the following add-on Simple Membership Custom Messages.
================
Q2 How do I edit the messages that pop up when you enter the wrong information and or forget to fill in a form field?
Solution: You can edit those texts in the following file: simple-membershp/js/jquery.validationEngine-en.js.
================
Q3 How to customize the following messages that appear in the thank you page?
- Click on the following link to complete the registration.
- Click here to complete your paid registration.
Answer: To edit the above two messages you have to edit the Po translated file in the plugin. The following URL Translate Simple Membership Plugin can help you further.
================
Q4 How do I edit the account deletion message?
Solution: To edit the message while you are logged in, go to Plugins -> Plugin File Editor. Select plugin to edit Simple WordPress Membership. Look for the following file simple-membership/views/account_delete_warning.php.
Simply edit the message, you can even add some HTML tags but make sure you don’t edit the password form code.
================
Q5 How do I customize the wording that is output when using [swpm_thank_you_page_registration] shortcode? Currently it reads: Click on the following link to complete the registration.
Solution: You can customize the message using the following method Edit Simple Membership Default English Strings.
===================================
That is all you need to do to edit default strings in the plugin.
If you have any questions please let me know.
Enjoy.
Simple Membership Plugin Tutorial List: