Add Google Photos Using WP Photonic Plugin shows you how to setup Google photos in your site to display your albums, photos and more.
Last Updated: February 9, 2022
Latest News: Updated the documentation.
The following instructions shows you how to add Google photos or albums into your post or pages in your WordPress site. These steps are very easy to follow. I have also included an error message that some of you might run into when you first setup your Google API in your Google account.
Important: If you are reading this tutorial is because you have a Google account set up.
What You Need:
Add Google Photos Using WP Photonic Plugin
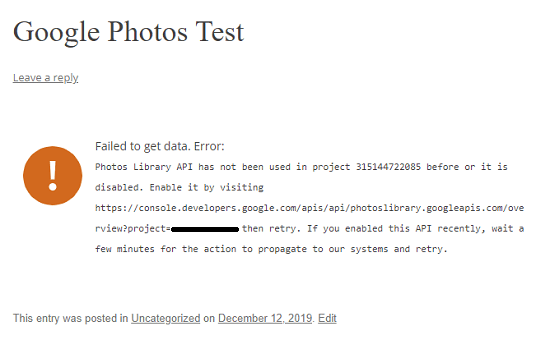
Step 1 ) If you see the following error message, it means you have not yet enabled photos library API in your Google account.
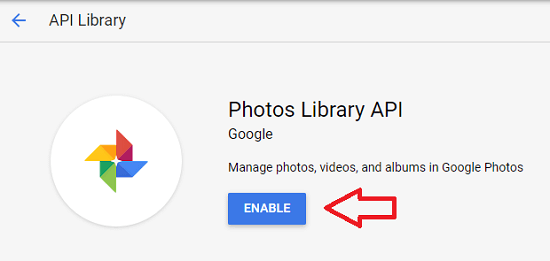
Step 2 ) Visit the link shared above and click on Enable button as illustrated in the image below.
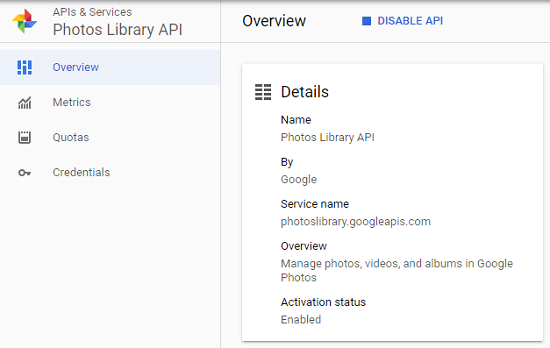
Step 3 ) The following image shows you Photos Library API enabled. You can choose to disable the API when ever you want. It also allows you to view the following settings/options in your Google account.
Photos Library API
- Overview
- Metrics
- Quotas
- Credentials
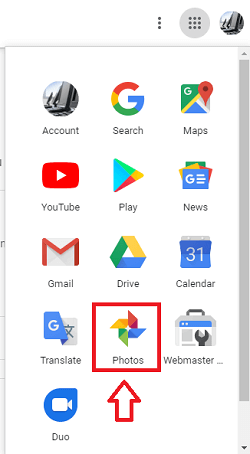
Step 4 ) Before you begin adding photos and albums to your site, check your photos and albums in your Google account first. While you are still logged into your Google account from carrying out the steps above, click on Photos app as illustrated in the image below. This can be found in Google Chrome browser.
Start Adding Google Photos / Albums
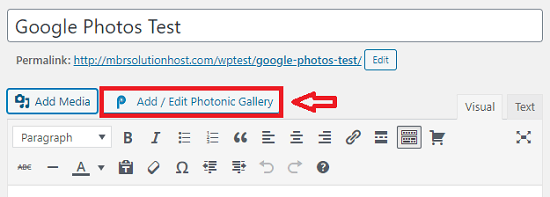
Step 5 ) Click on Add / Edit Photonic Gallery button as illustrated in the image below to start the process of adding photos to your post.
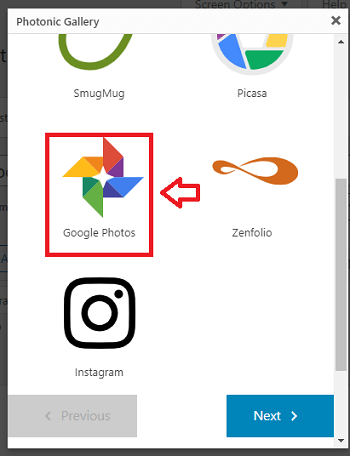
Step 6 ) Click on Google Photos button and then click on Next button as illustrated in the image below.
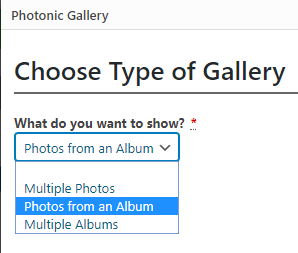
Step 7 ) The following image Choose Type Of Gallery allows you to choose the type of gallery you want to use to display your photos or albums.
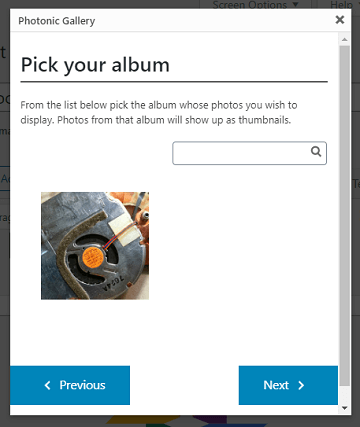
Step 8 ) The following image Pick your album allows you to choose the album you want to share in your site.
Note: This option is displayed because on the previous step above Photos from an Album was selected.
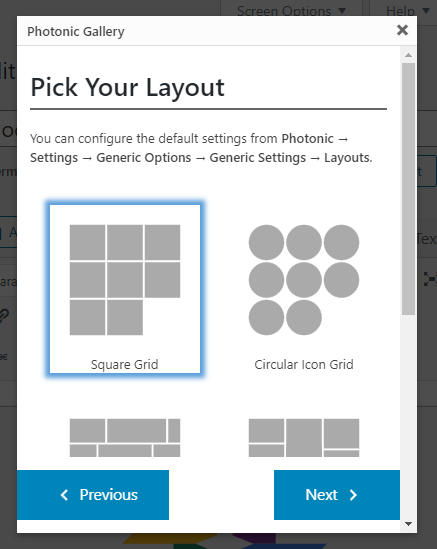
Step 9 ) The following image Pick Your Layout allows you to choose the layout you want to use to display your photos. The are many different layouts you can choose from. It is up to you to select the best one for your site. Below is a list of layouts for you to choose from.
Note: You can also configure this settings in Photonic -> Settings -> Generic Options -> Generic Settings -> Layouts.
Available Layouts
- Square Grid
- Circular Icon Grid
- Justified Grid
- Masonry
- Mosaic
- Slideshow
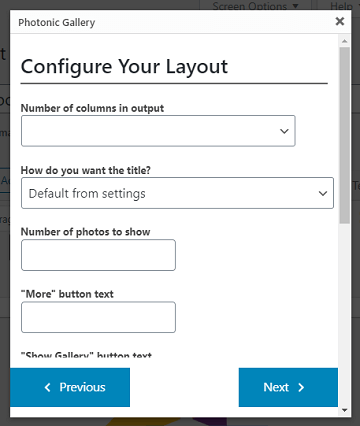
Step 10 ) The following image Configure Your Layout allows you to setup your layout options. The following is list of layout features for you to play with. Make sure you keep viewing the outcome before you make a final decision.
Layout Configuration Options
- Number of columns in output
- How do you want the title?
- Number of photos to show
- “More” button text
- “Show Gallery” button text
- Main image size
- Thumbnail size
- Crop Thumbnail
- Media to Show
- Photo titles and captions
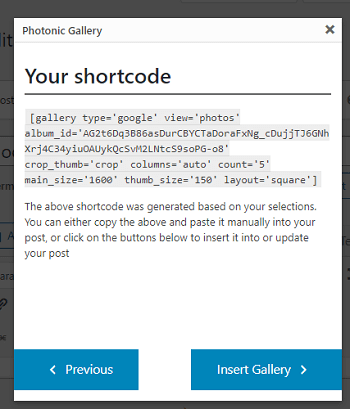
Step 11 ) The following image Your shortcode displays the shortcode created by Photonic based on the previous step configuration options.
Click on Insert Gallery button as illustrated in the image below and the shortcode will be inserted into your post.
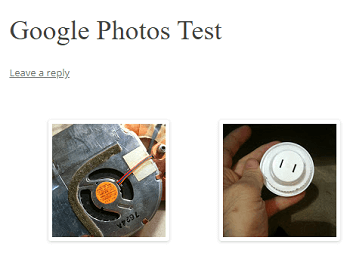
Step 12 ) The following image displays two images from an album in the post.
Troubleshooting Tips
Q1 I am using classic mode, I added a custom parameter “gallery” to the shortcode and I see the following error message. How do I fix this?
“There are no photos with those IDs or post 1151 does not have any attached images!”
Answer: That’s because another plugin is using the gallery shortcode parameter and is preventing a display of Photonic’s gallery. Change the custom shortcode to something like photonic and use that for your gallery. Check the following forum post for more information.
FAQ
Q1 Can I cache Google photos links?
Answer: Google Photos’s URLs cannot be cached – the URLs expires after around 30 minutes. You need to disable caching on pages with Google photos for the thumbnails to show up. Check the following forum post for more information.
=====================
Q2 What is the tile_size option in the shortcode used for?
Answer: The tile_size attribute is meant for optimization of image loads – it has very little bearing on your layout. Check the following forum post for more information.
=========================================
That is how simple it is to share your Google Photos albums or photos in your WordPress site.
I will be updating this tutorial from time to time. So keep coming back for the latest update.
If you have any question please let me know.
Enjoy.
Photonic Plugin Tutorial List:
I don’t understand the instructions. I don’t understand what adding shortcode to a page is, nor what a slug is.
Hi Michael, thank you for your question. I have sent you a private e-mail to ask you a few questions.
Regards
Hi Manuel,
Thanks for the excellent tutorial – I found it to be very clear. MY problem, however, is that the album I am trying pull photos from has been converted to Google+. The album slug is now a numeric string but the bigger problem is probably that the root is not PicasaWeb but plus.google.com. I tried putting the numeric slug into the shortcode but it didn’t work; neither did using the full path. I would be grateful for any suggestions you might have.
Theron
Hi Theron, thank you for your question. I have replied privately to your e-mail address.
Regards
Manuel, before I consider using Photonic again, I’d like to know if alums still must be set to ‘public’? If so, do you know if there are any plans to change this so that you can include an authkey and have acess to albums with limited access?
Hi Craig, thank you for your question. Please refer to the following URL
https://mbrsolution.com/wordpress/display-picasa-private-photos-using-photonic.php. Let me know if that is what you mean.Regards