Clipper WordPress Theme Admin Settings post will show you how to setup and manage the dashboard admin settings and more.
In this post you will learn how to set up Clipper admin menu dashboard and other settings. You will also learn about security, system info and more. There are some tutorials found under Clipper -> Dashboard tab.
Clipper WordPress Theme Admin Settings
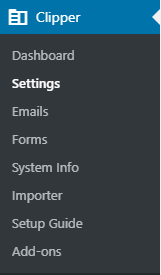
Step 1 ) The following image Clipper admin menu displays different tabs that allow you to manage, enable and activate different options in the theme. The following list of tabs will help you get started.
Clipper Admin Menu
- Dashboard
- Settings
- Emails
- Forms
- System Info
- Importer
- Setup Guide
- Add-ons
Dashboard
Step 2 ) Go to Clipper -> Dashboard to check up on the following information. This information helps you keep track of what is happening in your site and much more. It is a good idea to check the dashboard every time you log into your site.
Dashboard
- Overview
- News
- Forums
- Last 30 Days
- Market Place
- Tutorials
Settings
Step 3 ) Go to Clipper -> Settings to set up the following options.
Settings
- General
- Users
- Coupons
- Stores
- Security
- Advertising
- Advanced
- Notifications
- Reports
General Settings
Step 3-a ) The following Settings -> General tab allows you to set up the following options.
Registration
- Share Roles Capabilities
- Registration Box Title
- Registration Box Text
Appearance
- Scheme
- Slider
- Feedburner URL
- Twitter ID
- Facebook Page ID
- Analytics Code
Search
- Pages
- Search Stats
- Click on Save Changes button when you are finished with the settings.
Users Settings
Step 3-b ) The following Settings -> Users tab allows you to set up the following options.
Templage
- Content Template
- Click on Save Changes button when you are finished with the settings.
Coupons Settings
Step 3-c ) The following Settings -> Coupons tab allows you to set up the following options.
General
- Prune Coupons
- Registration
Coupons Page
- Coupon Code
- Unreliable Coupons
- Unreliable Featured Coupons
- Views Counter
- Link to Page
- Cloak Links
- Direct Links
- Default Listing Plan
- Plan Description
- Paragraph
Default Listing Plan
- Plan Description
- Bypass Default Plan step
Pricing
- Charge for Items
Moderation
- Moderate Items
Permissions
- Allow Edit Published Listings
- Allow Renew Expired Listings
Templates
- Content Template
Extra Features
- Activation
- Click on Save Changes button when you are finished with the settings.
Stores Settings
Step 3-d ) The following Settings -> Stores tab allows you to set up the following options.
Moderation
- Moderate Stores
Templates
- Content Template
- Click on Save Changes button when you are finished with the settings.
Security Settings
Step 3-e ) The following Settings -> Security tab allows you to set up the following options.
General
- WP-Admin
reCaptcha
- Enable
- Site Key
- Secret Key
- Theme
- Click on Save Changes button when you are finished with the settings.
Advertising Settings
Step 3-f ) The following Settings -> Advertising tab allows you to set up the following options.
Content Ad (336×280)
- Enable
- Code
- Image
- Destination
- Click on Save Changes button when you are finished with the settings.
Advanced Settings
Step 3-g ) The following Settings -> Advanced tab allows you to set up the following options.
Maintenance
- Prune Coupons
- Reset Votes
- Reset Stats
- Reset Search
User
- Disable Login Page
Developer
- Enable Debug Mode
- Hide Version
Custom URLs
- Coupon Listing
- Coupon Category
- Coupon Store
- Coupon Type
- Coupon Tag
- Coupon Redirect
- Store Redirect
- Click on Save Changes button when you are finished with the settings.
Notifications Settings
Step 3-h ) The following Settings -> Notifications tab allows you to set up the following options.
Coupons
- New Items
- Pending Items
- Notify User About Pending Item
- Renew Items
- Click on Save Changes button when you are finished with the settings.
Reports Settings
Step 3-i ) The following Settings -> Reports tab allows you to set up the following options.
Reports
- Registered Users Only
- Notification Email
- Report Post Values
- Click on Save Changes button when you are finished with the settings.
Email Settings
Step 4 ) Go to Clipper -> Emails to set up the following options.
Emails Settings
- General
- New User
- New Coupon
Emails General Settings
Step 4-a ) The following Emails -> General tab allows you to set up the following options.
Admin
- Recipient
- Pruned Coupons
- New User
- Click on Save Changes button when you are finished with the settings.
Emails New User Settings
Step 4-b ) The following Emails -> New User tab allows you to set up the following options.
New User
- Enable
- Name
- Subject
- Allow HTML
- Body
- Click on Save Changes button when you are finished with the settings.
Emails New Coupon Settings
Step 4-c ) The following Emails -> New Coupon tab allows you to set up the following options.
New Coupon
- Enable
- Name
- Subject
- Allow HTML
- Body
- Click on Save Changes button when you are finished with the settings.
Forms Settings
Step 5 ) Go to Clipper -> Forms to set up the following options.
Forms Settings
- Stores
- Coupons
- Users
Forms Stores Settings
Step 5-a ) The following Forms -> Stores tab allows you to set up the following options.
Default Stores Fields
- Text Field #new_store_name
- File Upload #clpr_store_image-id
- URL #clpr_store_url
- Text Area #description
- Click on Save Changes button when you are finished with the settings.
Forms Coupons Settings
Step 5-b ) The following Forms -> Coupons tab allows you to set up the following options.
Default Coupons Fields
- Text Field #post_title
- Taxonomy #tax_input[stores]
- Taxonomy #tax_input[coupon_category]
- Taxonomy #tax_input[coupon_type]
- URL #clpr_coupon_aff_url
- Text Field #clpr_expire_date
- Taxonomy #tax_input[coupon_tag]
- Text Area #post_content
- Click on Save Changes button when you are finished with the settings.
Forms Users Settings
Step 5-c ) The following Forms -> Users tab allows you to set up the following options.
Default Users Fields
- Text Field #user_login
- Text Field #first_name
- Text Field #last_name
- Text Field #nickname
- Text Field #display_name
- Email #user_email
- URL #user_url
- Text Area #description
- Text Field #twitter_id
- Text Field #facebook_id
- Click on Save Changes button when you are finished with the settings.
System Info
Step 6 ) Go to Clipper -> System Info to set up the following options.
System Info
- System Info
- Cron Jobs
- Advanced
- Search Index
System Info
Step 6-a ) The following System Info -> System Info tab displays information about the theme settings, your site specification and more. This can help you troubleshoot some of the issues you might run into.
System Info
- Theme Info
- Required Pages
- Default Widgets
- WordPress Info
- Server Info
- Image Support
- Other Checks
- Active Plugins
- You can click on Download Report button if you want to keep a report of your system information locally in your computer.
Cron Jobs
Step 6-b ) The following System Info -> Cron Jobs tab list information about all the cron jobs running in your site.
You can click on Download Report button if you need to keep a report of the cron jobs running in your site.
Advanced
Step 6-c ) The following System Info -> Advanced tab displays information about the theme settings, your site specification and more. This can help you troubleshoot some of the issues you might run into.
Uninstall Theme
- Database Tables
- Config Options
Search Index
Step 6-d ) The following System Info -> Search Index tab displays information about the theme settings, your site specification and more. This can help you troubleshoot some of the issues you might run into.
Search Index Info
- Status
- Search Index
Importer
Step 7 ) Go to Clipper -> Importer to set up the following options.
Importer Options
- Select a file
- Download example csv file:
- Upload file and import
Setup Guide
Step 8 ) Go to Clipper -> Setup Guide to set up the following options. You can also click on View Documentation button.
Getting Started Options
- General Settings
- Look and Feel
- Payment Settings
- Automatic Updates
- Marketplace Add-ons
- Get Support
Get Involved
- Developers
- Translators
Addons
Step 9 ) The Addons tab provides you with a huge list of addons for different functionalities for your site. I am sure you will find an addon that suits your needs.
That is how simple it is to setup and manage Clipper admin menu settings.
If you have any questions or suggestions please leave a comment.
There will be more tutorials coming soon. So make sure you keep coming back for the latest.
Enjoy.
Clipper Theme Tutorials List: