Last Updated: November 29, 2013
Install Joomla Locally Part Two tutorial follows on from my previous Part 1 tutorial. This shows you step by step how to install Joomla.
Please read the Part 1 first before you continue reading this tutorial. Click on the following URL install-joomla-locally-using-xampp
Hint: This tutorial is based on the latest version of Joomla 3.4.5. But it can be applied to any Joomla version.
Important: Any version of Joomla 3.1.5 and above requires the latest PHP and MySQL database. Please read more about the Joomla requirements.
This is Part 2 which follows on from Part 1.
Step 1 ) Type the following on your web browser http://localhost/your joomla foler/ in my tutorial I typed my folder name joomla3 which is added in the previous tutorial Part 1. Joomla will begin to install. See image below.

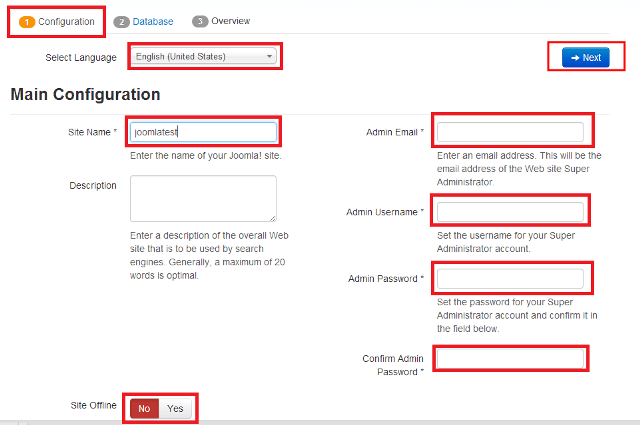
Step 2 ) Step 1 is about Configuration. Select your preferred language, site name, Admin Email, Admin Username, Admin Password and confirm the password, select whether you want the Site Ofline. Once you are happy with your choice click Next. See image below.
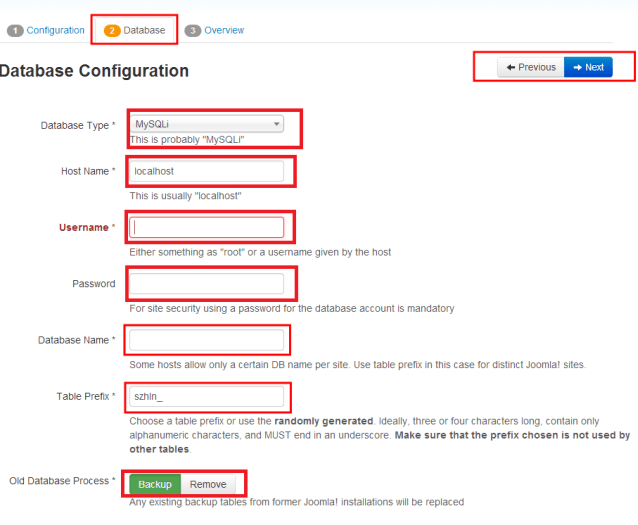
Step 3 ) Step 2 is about the Database. Select the Database Type, Host Name, Username, Password, Database Name, Table Prefix. If you have an old database you might want to create a backup before you go ahead. Click on Next or Previous if you remember something you forgot. See image below.
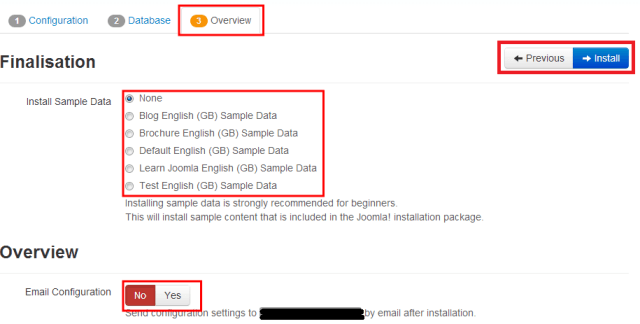
Step 4 ) Step 3 is about the Overview. Select whether you want to install some data or not. You can select to e-mail the configuration. Once you are happy then click on Install. Remember to make sure you are happy with your settings. See images below.
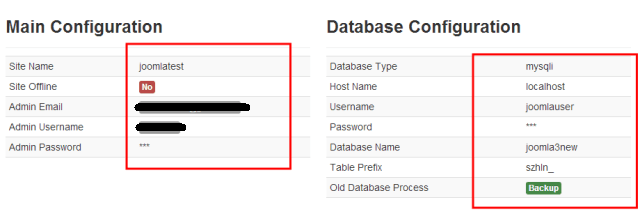
Check your Main Configuration and Database Configuration.
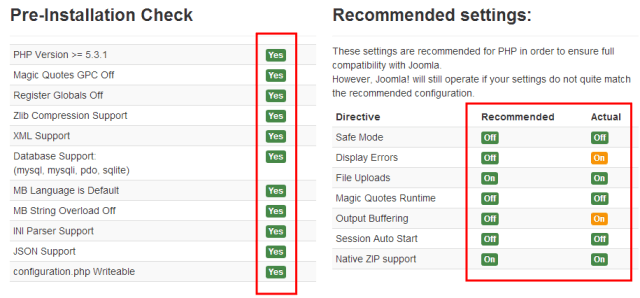
The following image illustrates Pre-Installation Check and Recommended settings, which are very important if you want your Joomla to function properly or to be able to install the current version.
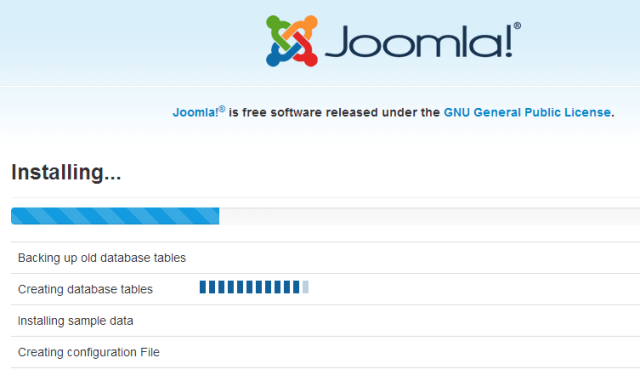
Step 5 ) Joomla is now installing. See image below.
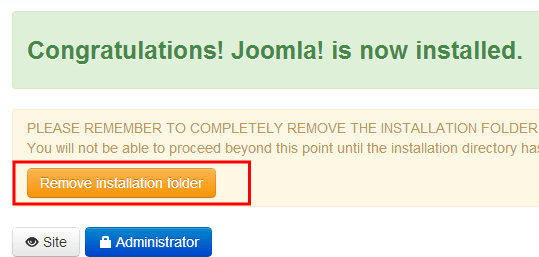
Step 6 ) If all goes well you will see the following images.
Select to Remove installation folder or see the other two images below for extra information.
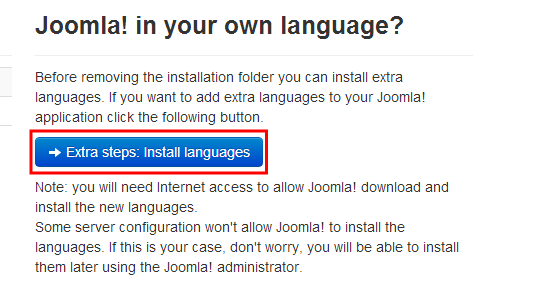
Before you remove the Installation folder you might want to install a different language package.
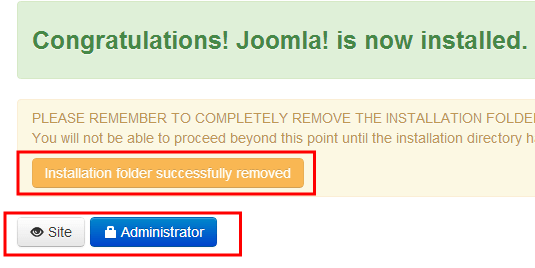
Once the Installation folder is removed you will see the following message. Now you can view your new Joomla website or log in as Administrator.
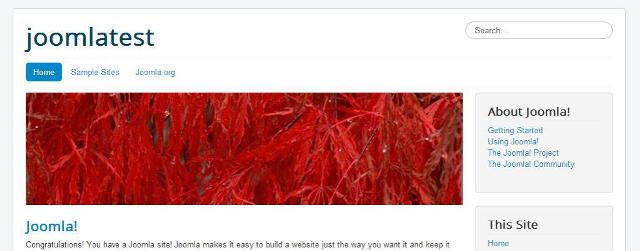
Step 7 ) I chose to view my site online. See image below.
Xampp Security Joomla
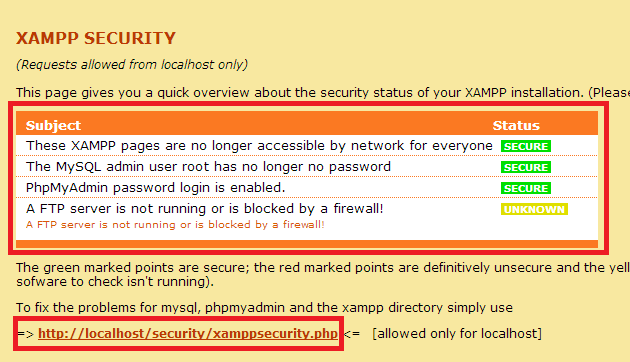
Before we complete this tutorial, you might want to set up some minimal security. See images below.
Type localhost/security/ on your browser.

You can see might installation is secured now, if your’s isn’t then you need to click on the link http://localhost/security/xamppsecurity.php to secure your installation.
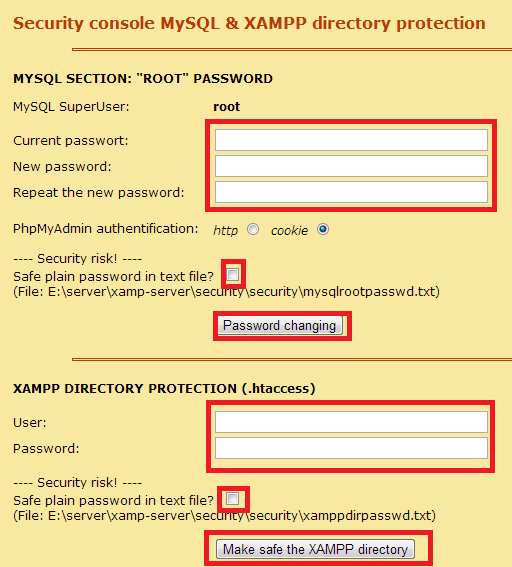
The following image shows you what fields need to be completed in order to secure your installation. Make sure that you select Save plain password in text file just in case you forget your password.
That is it, you have now installed Joomla 3.1.5 locally using Xampp.
I hope this tutorial helped.
Enjoy