WordPress WooCommerce Plugin Checkout Settings post will show you how to configure the checkout and payment gateways for your online store.
Last Updated: December 4, 2019
Latest News: Updated the link in the footer.
WooCommerce checkout settings is simple and straight forward to set up. Some of these settings have a question mark on the side to help you understand more about the options you are about to enable and or configure. There are drop-down menus available for some of the options. Make sure your payment gateways are set up correctly before going live or else you will not receive any payments for your products.
Important: It is always important to make sure to test all the options you enable before going live.
Note: Some of the steps below are enabled when you first install the plugin.
WordPress WooCommerce Plugin Checkout Settings
Step 1 ) Go to WooCommerce -> Settings -> Checkout to start configuring the checkout settings. The checkout settings menu is divided into the following options. See image below.
- Checkout options
- BACS
- Check payments
- Cash on delivery
- PayPal

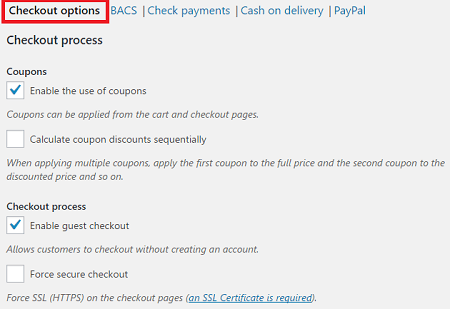
Step 2 ) The following image Checkout options allows you to set up the following options.
Checkout process
- Coupons = Enable the use of coupons / Calculate coupon discounts sequentially
- Checkout process = Enable guest checkout / Force secure checkout
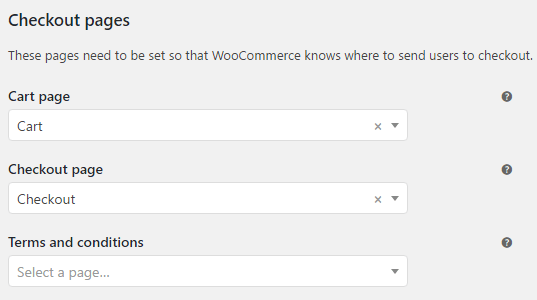
Step 2-a ) The following image Checkout options -> Checkout pages allows you to select from the following options.
Checkout pages
- Cart page
- Checkout page
- Terms and conditions
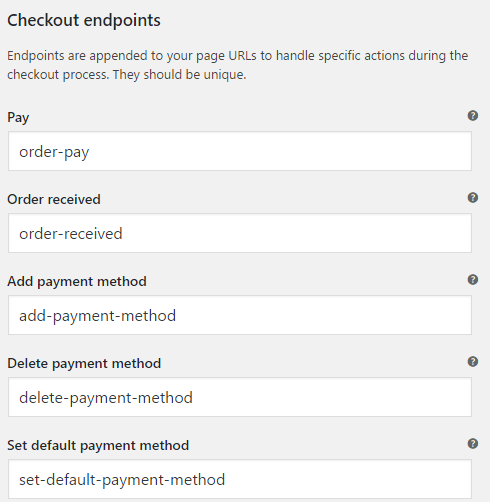
Step 2-b ) The following image Checkout options -> Checkout endpoints allows you to select from the following options.
Checkout endpoints
- Pay
- Order received
- Add payment method
- Delete payment method
- Set default payment method
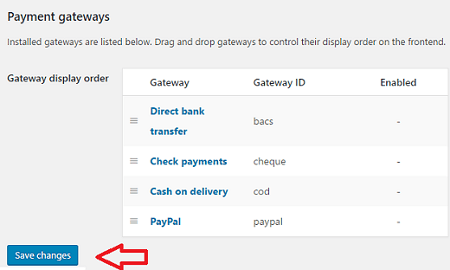
Step 2-c ) The following image Checkout options -> Payment gateways allows you to select and set up the following options.
Payment gateways
- Gateway display order = Direct bank transfer = bacs / Check payments = cheque / Cash on delivery = cod / PayPal = paypal
- Click on Save changes button after you finish configuring your settings.
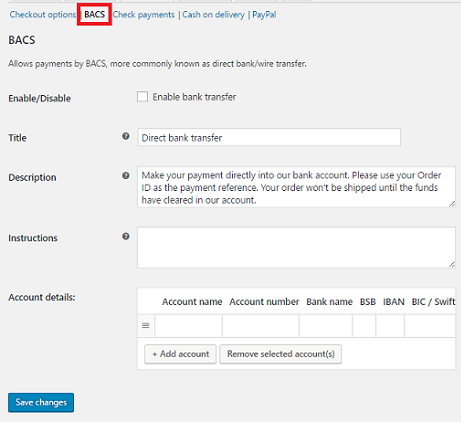
BACS
Step 3 ) The following image BACS allows you to select from the following options.
BACS
- Enable/Disable
- Title
- Description
- Instructions
- Account details:
- Click on Save changes button after you finish configuring your settings.
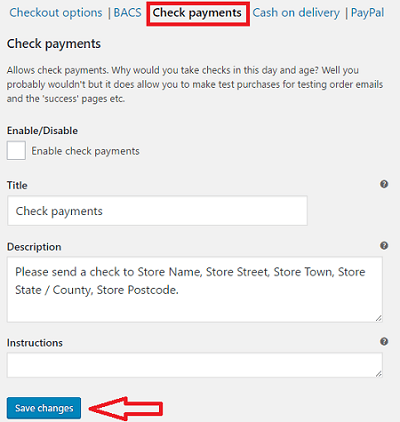
Check payments
Step 4 ) The following image Check payments allows you to set up the following options.
Check payments
- Enable/Disable
- Title
- Description
- Instructions
- Click on Save changes button after you finish configuring your settings.
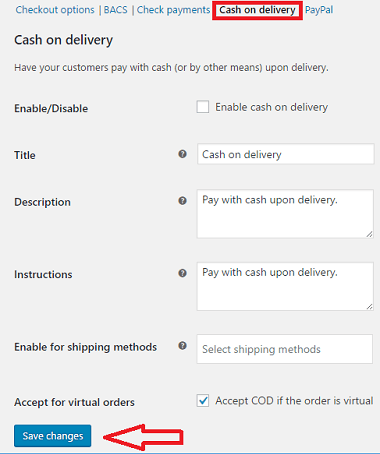
Cash on delivery
Step 5 ) The following image Cash on delivery allows you to set up the following options.
Cash on delivery
- Enable/Disable
- Title
- Description
- Instructions
- Enable for shipping methods
- Accept for virtual orders
- Click on Save changes button after you finish configuring your settings.
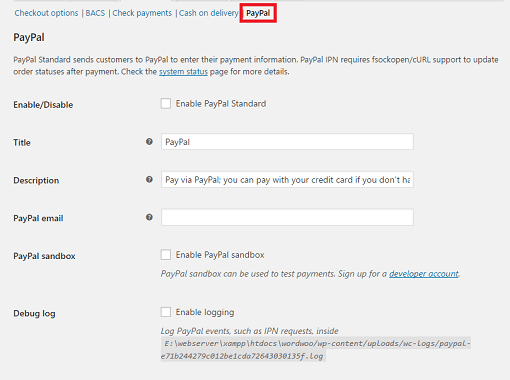
PayPal
Step 6 ) The following image PayPal allows you to set up the following options.
PayPal
- Enable/Disable
- Title
- Description
- PayPal email
- PayPal sandbox
- Debug log
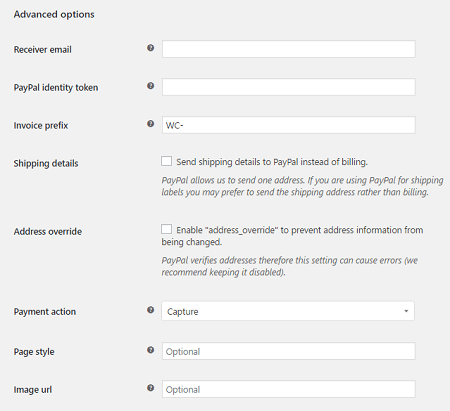
Step 6-a ) The following image PayPal -> Advanced options allows you to set up the following options.
Advanced options
- Receiver email
- PayPal identity token
- Invoice prefix
- Shipping details
- Address override
- Payment action
- Page style
- Image url
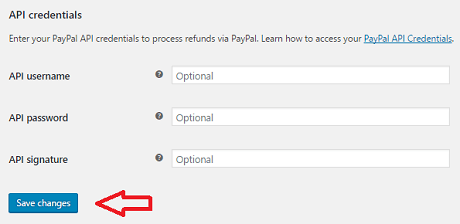
Step 6-b ) The following image PayPal -> API credentials allows you to set up the following options.
API credentials
- API username
- API password
- API signature
The above instructions are simple and easy to follow.
Click on the following URL Accounts Settings to learn more.
If you have any questions please let me know.
I will be updating this tutorial from time to time so make sure you come back for the latest.
Enjoy.
WooCommerce Plugin Tutorial List: