WP Simple Download Monitor Plugin Settings shows you how to set up and configure the plugins settings for all your download files.
Last Updated: March 4, 2024
Latest News: Updated the documentation.
The following instructions shows you how to manage and set up the general settings in the admin panel. You have the option to set up security, redirect to download page and more.
What you need:
Premium Addons: (Optional)
- Squeeze Form Addon (Email Lock)
- Amazon S3 Integration
- Hidden/Private Downloads Addon
- Allow Other File Types to be Uploaded
- Email Notification on Download Addon
WP Simple Download Monitor Plugin Settings
Step 1 ) Go to Downloads -> Settings to setup the following options. The plugin admin panel is divided into 5 different admin areas.
- General Options
- Admin Options
- Color
- Debug
- Delete Plugin Data
General Options
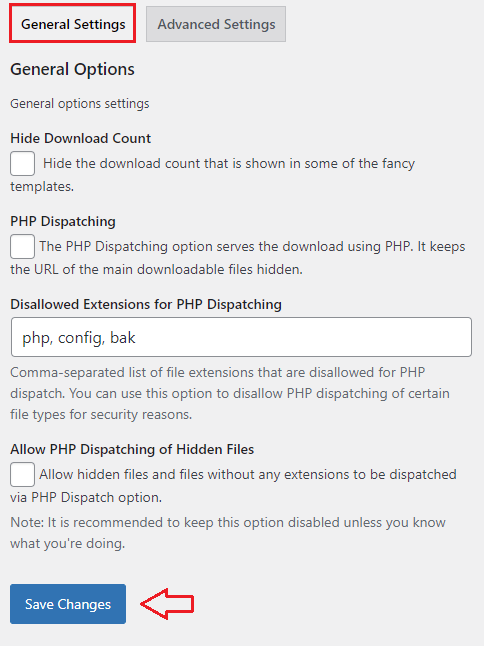
Step 2 ) The following image General Options, allows you to select from of the following options.
General Options
- Hide Download Count
- PHP Dispatching
- Disallowed Extensions for PHP Dispatching
- Allow PHP Dispatching of Hidden Files
- Click on Save Changes button when you finish with the settings.
User Login Related
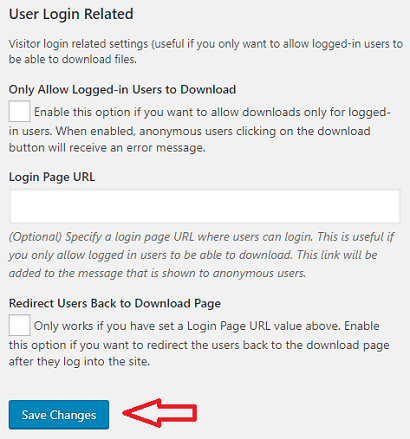
Step 3 ) The following image User Login Related, allows you to select from of the following options.
User Login Related Options
- Only Allow Logged-in Users to Download
- Login Page URL
- Redirect Users Back To Download Page
- Click on Save Changes button when you finish with the settings.
Admin Options
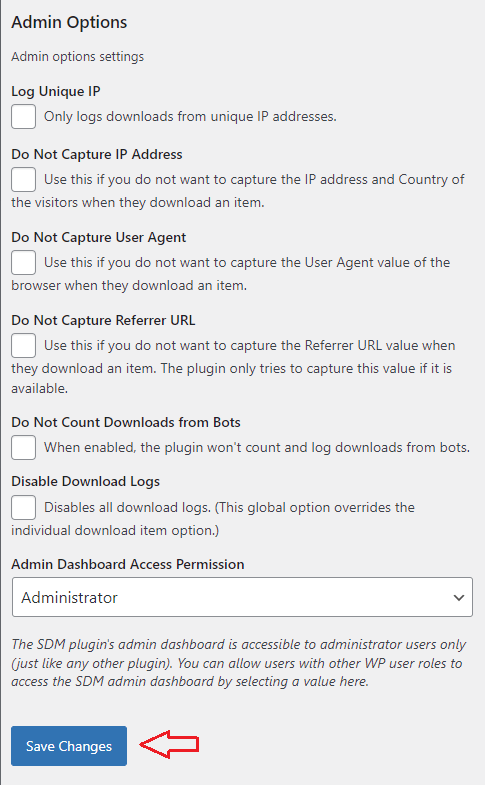
Step 4 ) The Admin Options, allows you to enable one or more from the following options.
Admin Options
- Log Unique IP = Only logs downloads from unique IP addresses.
- Do Not Capture IP Address = Use this if you do not want to capture the IP address and Country of the visitors when they download an item. Note: This is helpful for GDPR.
- Do Not Capture User Agent = Use this if you do not want to capture the User Agent value of the browser when they download an item.
- Do Not Capture Referrer URL = Use this if you do not want to capture the Referrer URL value when they download an item. The plugin only tries to capture this value if it is available.
- Do Not Count Downloads from Bots = When enabled, the plugin won’t count and log downloads from bots.
- Disable Download Logs = Disables all download logs. (This global option overrides the individual download item option.)
- Admin Dashboard Access Permission = The SDM plugin’s admin dashboard is accessible to administrator users only (just like any other plugin). You can allow users with other WP user roles to access the SDM admin dashboard by selecting a value here.
- Click on Save Changes button when you finish with the settings.
Color Options
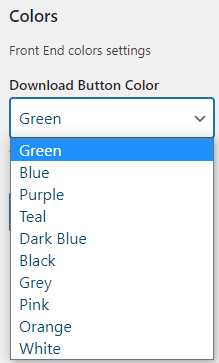
Step 5 ) The following image Color Options allows you to select from one of the following colors.
Color Options
- Green
- Blue
- Purple
- Teal
- Dark Blue
- Black
- Grey
- Pink
- Orange
- White
- Click on Save Changes button when you finish with the settings.
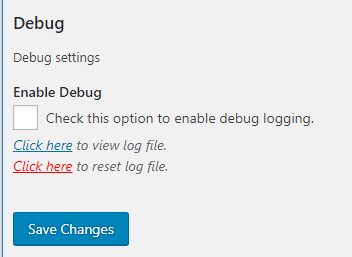
Debug
Step 6 ) The following image Debug allows you to enable debug mode.
Debug Option
- Check this option to enable debug logging.
- You can view and clear the log file.
- Click on Save Changes button when you finish with the settings.
Delete Plugin Data
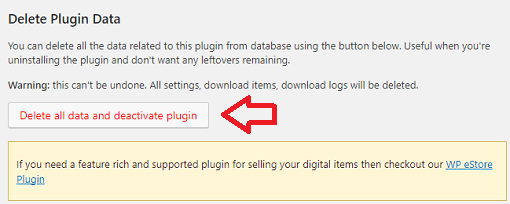
Step 7 ) The following image Delete Plugin Data allows you to click on the following button Delete all data and deactivate plugin to delete all data and traces of the plugin.
That is all you need to do to manage the general settings for Simple Download Monitor plugin.
Click on the following URL Advanced Settings to learn how to create a new download file.
I will be updating this tutorial from time to time. Make sure you come back for the latest updates.
If you have any questions please let me know.
Enjoy.
WordPress Simple Download Monitor Tutorials