WordPress How To Install WooCommerce Plugin post will show you how to install WooCommerce for the first time in WordPress using the default theme.
Last Updated: May 2, 2023
Latest News: Updated the link in the footer.
The following instructions will guide you and show you how to set up the plugin for the first time in a bare WordPress installation using the default theme. In this setup the default WordPress theme is Twenty Sixteen.
What You Need:
- WooCommerce wordpress plugin.
- WooCommerce website with access to all their products. (Note: This is an affiliated link. I get a small commission if you make a purchase.)
WordPress How To Install WooCommerce Plugin
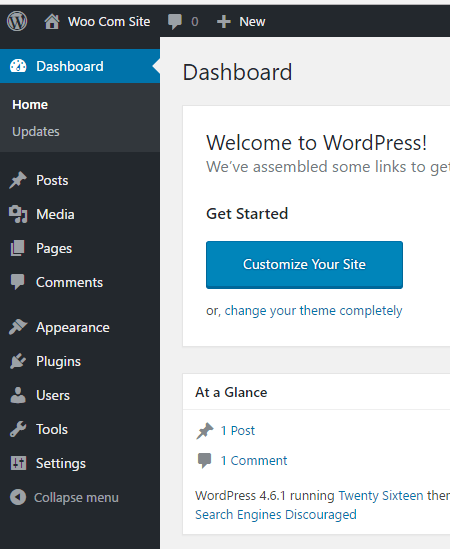
Step 1 ) The following image shows you WordPress admin menu without WooCommerce plugin installed.
Note: The following screens are optional and if you are not ready to set up your shopping cart, you can skip this wizard and come back later on.
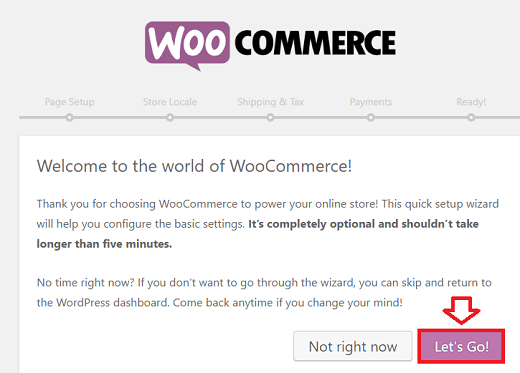
Step 2 ) When you install WooCommerce Plugin for the first time you will see the following screen. Click on Let’s Go! button to begin.
Page Setup
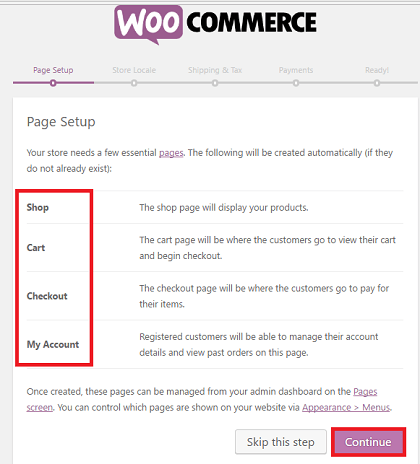
Step 3 ) Once you click Let’s Go! button above you will see the following image Page Setup. In this step the plugin will set up the following pages for you.
- Shop
- Cart
- Checkout
- My Account
- Click on Continue button once you are ready.
Store Locale
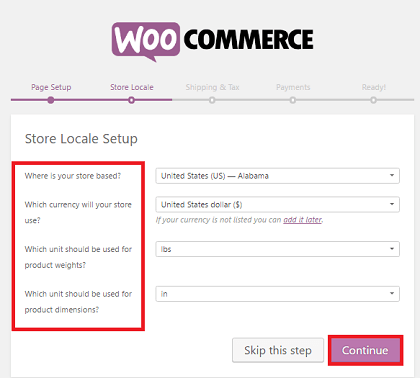
Step 4 ) Next you will see the following image Store Locale. In this step you can setup and configure the following options.
- Where is your store based?
- Which currency will your store use?
- Which unit should be used for product weight?
- Which unit should be used for product dimensions?
- Click on Continue button once you are ready.
Shipping & Tax
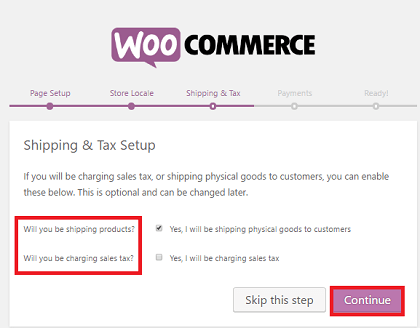
Step 5 ) Next you will see the following image Shipping & Tax. This allows you to enable and set up the following features.
- Will you be shipping products?
- Will you be charging sales tax?
- Click on Continue button once you are ready.
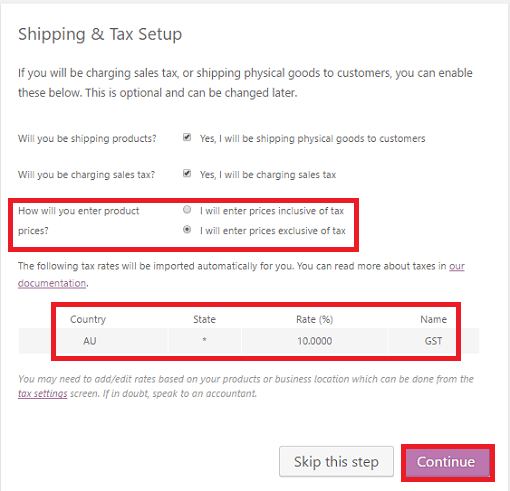
Step 5-a ) The next image is displayed if you selected Will you be charging sales tax? from above.
Note: The information displayed in your screen will be different based on the Country your store is located.
Payments
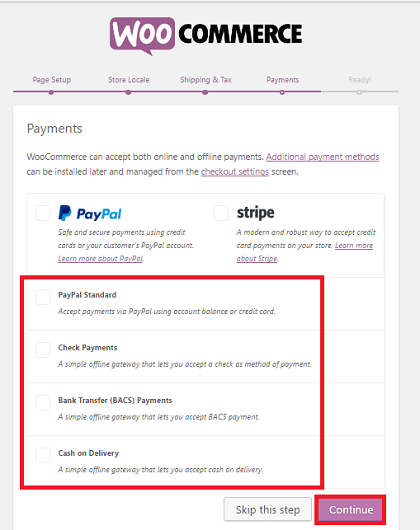
Step 6 ) Next you will see the following image Payments. This steps allows you select from the following options.
- PayPal
- stripe
- PayPal Standard
- Check Payments
- Bank Transfer (BACS) Payments
- Cash on delivery
- Click on Continue button once you are ready.
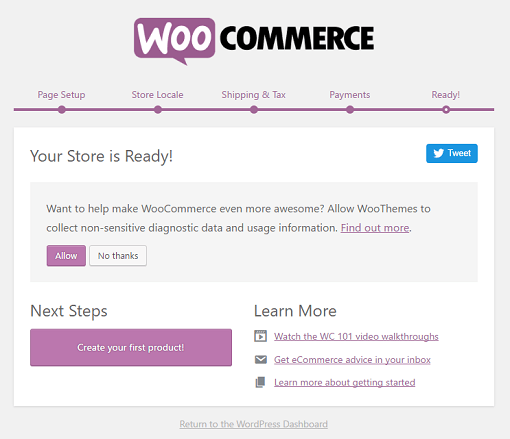
Step 7 ) Next you will see the following image Ready!. That is all, now you can begin to set up the plugin, select your theme and more.
You have a few options that you can enable and start if you want.
- You can click on Allow button to allow WooCommerce to collect non-sensitive data to help them troubleshoot the plugin.
- You can click on Create your first product! button to start adding products to your store.
- Click on the few links to start learning how to manage and setup the plugin.
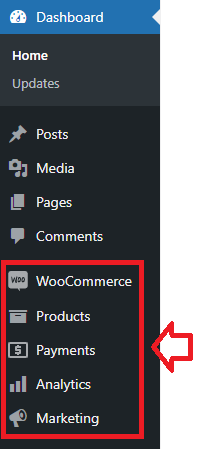
Step 8 ) The following image shows you WordPress admin menu with WooCommerce plugin installed and configured completely with the payment gateway also configured.
Note: There are many more addons you can add. Installing more addons, might add more menus to your WordPress admin sidebar.
WooCommerce admin menus
- WooCommerce
- Products
- Payments
- Analytics
- Marketing
=======================
That is all you need to do to install WooCommerce plugin. The above steps are very easy and simple to follow.
Click on the following URL Understand System Status Report to learn more.
If you have any questions please let me know.
I will be updating this tutorial from time to time so make sure you come back for the latest.
Enjoy.
WooCommerce Plugin Tutorial List: