WordPress eStore Plugin Manage Customers tutorial shows you how to add, manage and search for customers and more.
Last Updated: June 2, 2023
Latest News: Updated the information below.
Once you have your online store running you will have many sales. All these sales represent a custom. This plugin has a great set of tools to help you manage all your customers from one admin area.
The following tutorial shows you a search facility, you can use to quickly and easily search for a particular customer. Remember online stores that produce large amount of sales on a weekly, monthly or yearly basis will have a large number of registered clients in no time. You can even export your customers data to a CSV file.
What You Need:
- WordPress eStore (Note: This is an affiliated link = I get a small commission if you make a purchase.)
Remember: Check all your options before you save them. Run the sandbox settings for further testing before you publish your online store. This plugin has many features to setup.
WordPress eStore Plugin Manage Customers
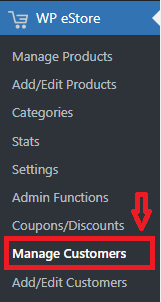
Step 1 ) Go to WP eStore -> Manage Customers as illustrated in the image below to begin managing your customers.
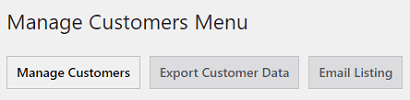
Step 2 ) The following image Manage Customers Menus as illustrated in the image below allows you to manage the following admin tabs.
Manage Customers Tabs Options
- Manage Customers
- Export Customers Data
- Email Listing
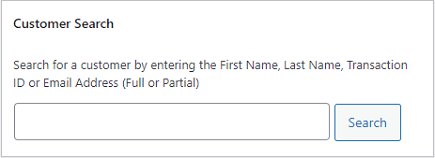
Customer Search
Step 3 ) The following image Customer Search allows you to search for your customers using the following options.
Customer Search Options
- Search for a customer and click on the Search button.
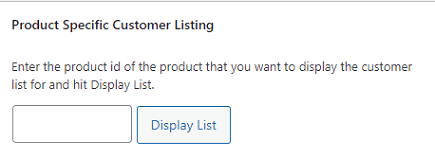
Product Specific Customer Listing
Step 4 ) The following image Product Specific Customer Listing allows you to search for your customers using the following options.
Product Specific Customer Listing Option
- Enter the product id of the product that you want to display and click on the Display List button.
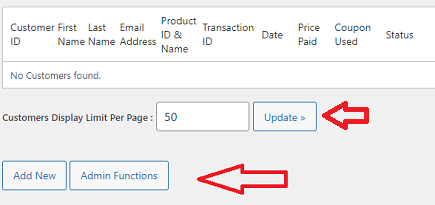
Step 4-a ) The following image shows a list of your online customers. The following is a list of fields available to display details for each customer signed up to your site.
Note: As your customer list gets bigger you might want to adjust the customer display limit.
Customer List Options
- Customer ID
- First Name
- Last Name
- Email Address
- Product ID & Name
- Transaction ID
- Date
- Price Paid
- Coupon Used
- Status
- Customers Display Limit Per Page = Default is set to 50.
- Click on Add New button when you want to add a new member to your site.
- Click on Admin Functions button.
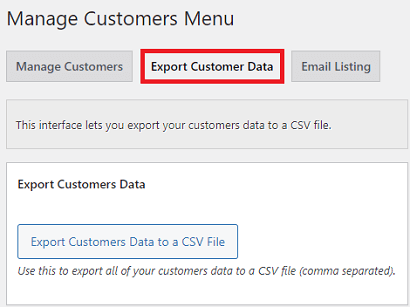
Export Customer Data
Step 5 ) Go to WP eStore -> Manage Customers -> Export Customer Data as illustrated in the image below to manage the following options.
Export Customer Data Option Part 1
- Click on Export Customers Data to a CSV File button.
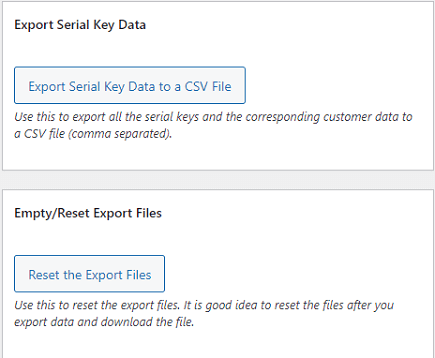
Step 5-a ) The following image Export Customer Data allows you to manage the following options.
Export Customer Data Options Part 2
- Click on Export Serial Key Data to a CSV File button.
- Click on Reset the Export Files button.
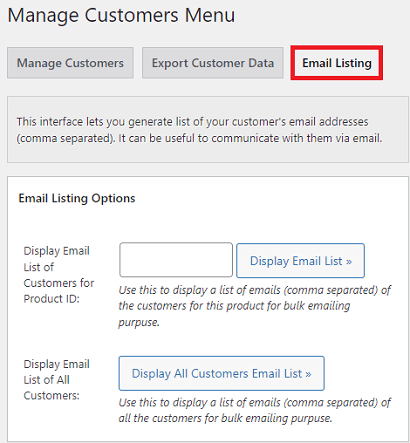
Email Listing
Step 6 ) Go to WP eStore -> Manage Customers -> Email Listing as illustrated in the image below to manage the following options.
Email Listing Options
- Display Email List of Customers for Product ID:
- Display Email List of All Customers:
==================================
Click on the following link Add Products to continue with the set up.
I will be updating this post from time to time. So keep coming back for more. If you have any questions please let me know.
Enjoy.
WordPress eStore Plugin Tutorial List: