The following Stripe Payments Plugin CAPTCHA Settings tutorial shows you how to enable and setup reCAPTCHA in your site and more.
Last Updated: October 20, 2022
Latest News: Updated the documentation.
This tutorial shows you how to enable reCAPTCHA, Enterprise reCAPTCHA (Beta) or hCaptcha settings in the plugin. When you enable one of these options, the settings option will appear when customers click a Stripe payment button. They need to check a box that confirms they are human. This prevents robots from abusing the payment button on your site.
Note: It is recommended that you enable one of the two Captcha options. The following notice has been added to the plugin.
Accept Stripe Payments: the captcha feature is not enabled. It is strongly recommended that you enable the captcha feature from the captcha settings tab to prevent bots trying to do card testing.
What You Need:
- Stripe Payments
- Addons available.
Stripe Payments Plugin reCAPTCHA Settings
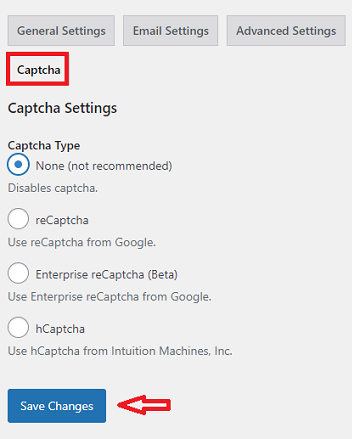
Step 1 ) Go to Stripe Payments -> Settings -> Captcha tab as illustrated in the following image to start configuring the following options.
Captcha Settings
- Captcha Type
- None (not recommended)
- reCaptcha
- Enterprise reCaptcha (Beta)
- hCaptcha
- Click on Save Changes button when you complete your settings.
reCaptcha
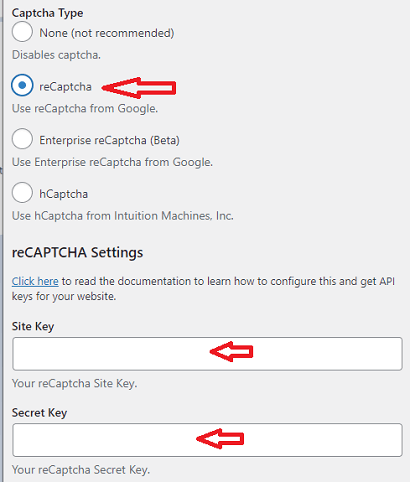
Step 2 ) The following image reCaptcha allows you to set up the following options. Remember to first select reCAPTCHA option as illustrated in the image below.
Note: Click here to read the documentation to learn how to configure reCaptcha and get your API keys for your website.
reCAPTCHA Settings
- Captcha Type
- None (not recommended)
- reCaptcha
- Enterprise reCaptcha (Beta)
- hCaptcha
- Site Key
- Secret Key
- Click on Save Changes button when you complete your settings.
Enterprise reCaptcha (Beta)
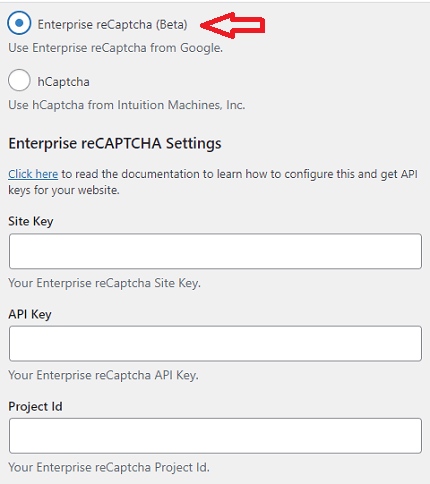
Step 3 ) The following image Enterprise reCaptcha (Beta) allows you to set up the following options.
Note: Click here to read the documentation to learn how to configure Enterprise reCaptcha (Beta) and get your API keys for your website.
Enterprise reCAPTCHA (Beta) Settings
- Use Invisible reCAPTCHA Badge
- Site Key
- API Key
- Project ID
- Click on Save Changes button when you complete your settings.
hCaptcha
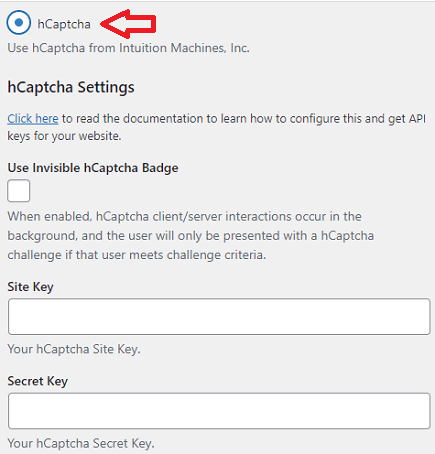
Step 4 ) The following image hCaptcha allows you to set up the following options.
Note: Click here to read the documentation to learn how to configure hCaptcha and get your API keys for your website.
hCAPTCHA Settings
- Use Invisible reCaptcha Badge
- Site Key
- Secret Key
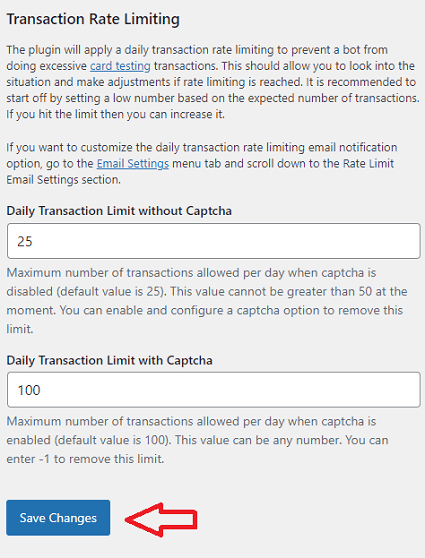
Transaction Rate Limiting
Step 5 ) The following image Transaction Rate Limiting allows you to set up the following options.
Note: Click here to read the documentation on how to protect your site from card testing.
Transaction Rate Limiting Options
- Daily Transaction Limit without Captcha
- Daily Transaction Limit with Captcha
- Click on Save Changes button when you complete your settings.
Troubleshooting
Q1 We’ve had hundreds of small fake charges to random people made by our Stripe account. How do I fix this issue?
Answer 1: Card testing is a type of fraudulent activity where someone tries to determine whether stolen card information is valid so that they can use it to make purchases. A fraudster may do this by purchasing stolen credit card information, and then attempting to validate or make purchases with those cards to determine which cards are still valid. Other common terms for card testing are “carding”, “account testing”, and “card checking.” The following link https://docs.stripe.com/disputes/prevention/card-testing has more information that can help you.
This issue was also mentioned in the following support thread.
==============================
That is all you need to do to set up reCAPTCHA, Enterprise reCAPTCHA (Beta) or hCaptcha settings in the plugin.
I will be updating this post from time to time. So keep coming back for more.
Enjoy.
Stripe Payments Plugin Tutorials: