All In One Security Allow Unlock Request helps you understand how to set up and allow a subscriber or member unlock their account.
Last Updated: November 6, 2023
Latest News: Updated the documentation.
All In One WP Security & Firewall Login Lockdown feature helps you control who logs into the website and stops anyone who is not authorized from login into the website. The Unlock Request allows the user “member” who is allowed to log into the website unlock their account if they accidentally lock themselves out. For example the user has forgotten their password and typed the wrong password more times than the number allowed, set in the settings. This comes in handy for both the member and the administrator, especially if you are running a membership site and have hundreds or thousands of users “members”. It would be time consuming if 10% of members logging in kept locking themselves out.
What you need:
All In One Security Allow Unlock Request
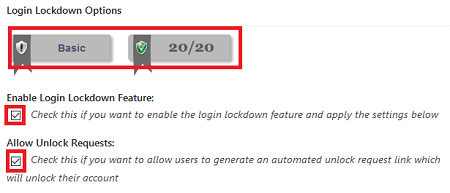
Step 1 ) Click on WP Security -> User Login -> Login Lockdown to activate and configure the following security settings.
- First you must enable Enable Login Lockdown Feature:
- Then enable Allow Unlock Request:
Once you enable the above the plugin will add another 20 points to your overall score. This feature is classified as Basic security.

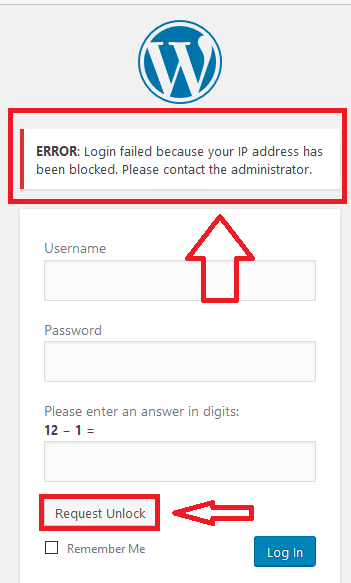
Step 2 ) If a user is locked out of their account, they will receive the following error message.
ERROR: Login failed because your IP address has been blocked. Please contact the administrator.
The above error message is a positive sign, meaning the plugin security feature is working correctly.
The person trying to log in will see the following screen with a Request Unlock button allowing them to receive instructions on how to unlock their account.

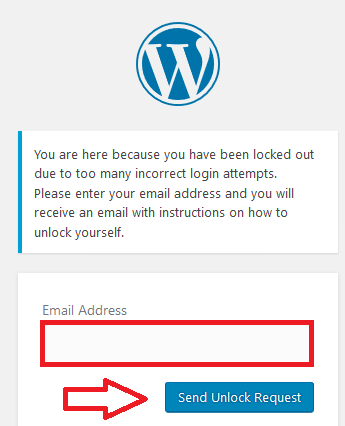
Step 3 ) Once the Request Unlock button is clicked, the following information will be displayed.
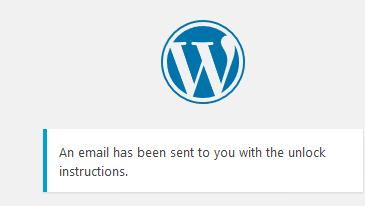
If the e-mail entered is correct the following message is displayed. If the member has forgotten the e-mail address, then the account will be locked out for the period set out in the settings. That means the IP address will be locked out from logging into the account.
Note: The default is 60 minutes lock out period. This can be increased or decrease depending on how you set up your site.

Step 4 ) The member will receive an e-mail with a link that allows them to unlock their account. That is how simple it is to set the unlock account feature in the plugin.
Notify By Email
If you have enabled the following feature Notify By Email:, the following e-mail will be sent.
Note: The following is a fictitious account just for you to see the e-mail that is sent to the administrator or person in charge of accounts.
A lockdown event has occurred due to too many failed login attempts or invalid username:
Username: bo
IP Address: 125.125.125.125

IP Range: 125.125.125.*

Log into your site's WordPress administration panel to see the duration of the lockout
or to unlock the user.
=============================
I hope the above guidance helps you understand how to enable your members to unlock their account.
Click on the following link Troubleshooting to continue configuring the plugins settings.
If you have any questions please let me know. I will be updating this post from time to time. So keep coming back for the latest.
Enjoy.
All In One Security (AIOS) Plugin Tutorial List
