WP Clipper Theme Header Area post shows you how to customize and edit the header area in your site and much more.
Last Updated: February 26, 2019
Latest News: I updated the documentation.
In this tutorial you will learn how to manage the header area in your site. Clipper theme allows you to manage different areas of the header. For example: you can edit the header image, site title, tagline, menus and site icon. This gives you a lot of control without needing any coding knowledge.
WP Clipper Theme Header Area
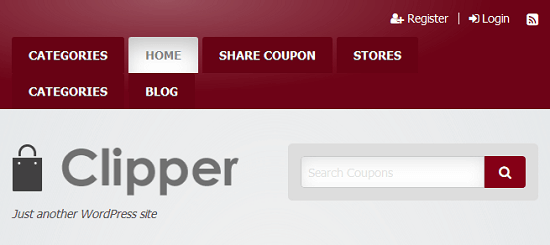
Step 1 ) The following image shows you the Header Area in the site. Clipper theme allows you to edit and manage the header area which includes the image, title and menus.
Header Area
- Header Image
- Site Title
- Tag Line
- Top Menu
- Site Icon
Customize The Header
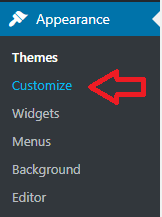
Step 2 ) Click on Appearance -> Customize as illustrated in the image below to edit the header area.
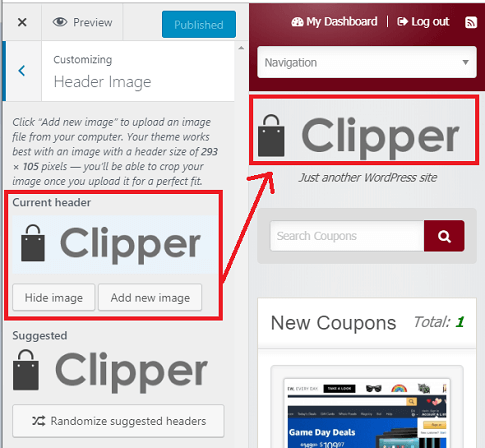
Step 3 ) The image below shows you the header settings in customizer. To customize the header area go to Appearance -> Customize -> Header Image. This allows you to manage the following options.
Customizing Site Header Image
- Click on Hide Image button to remove the header image.
- Click on Add New Image button to add a new header image.
- Click on Randomize suggested headers button to display different images.
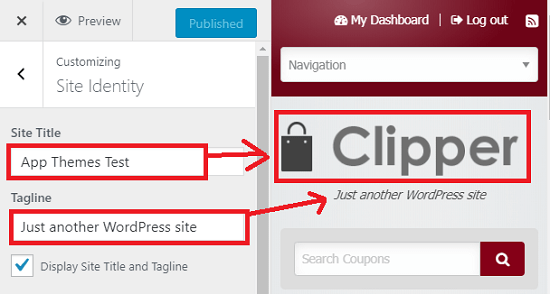
Step 4 ) The following image allows you to customize the following area. To customize this area go to Appearance -> Customize -> Site Identity. This allows you to manage the following options.
Customizing Site Title / Tagline
- Site Title = Note: The site title wording will not display if you add a header image as illustrated in step 3 ) above.
- Tagline
- Display Site Title and Tagline
Step 4-a ) The following image allows you to customize Site Icon in the header area.
Customizing Site Icon
- Click on Remove button to remove the site icon.
- Click on Change image button to change the site icon image.
Note: To learn more about site icon “favicon”, click on the following URL Creating_a_Favicon.
![]()
That is how simple it is to customize and mange the header area in Clipper theme.
If you have any questions or suggestions please leave a comment.
There will be more tutorials coming soon. So make sure you keep coming back for the latest.
Enjoy.
Clipper Theme Tutorials List:
Very useful. I am looking for codding understanding of clipper theme.
Hi, what type of code understanding are you looking for?