Manage WordPress Vantage Theme Listings Forms shows you how to add, edit and manage listings forms in your admin panel and much more.
Last Updated: January 15, 2019
Latest News: I have repaired a broken link.
In this post you will learn how to add new forms for your listings. There are different fields you can add to each form. Depending on the field you add, you will have different options. Vantage makes it very easy to add as many listings forms as you need for your site.
Manage WordPress Vantage Theme Listings Forms
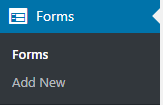
Step 1 ) The following image Forms allows you to manage and add new forms for your listings.
Forms Menu
- Forms
- Add New
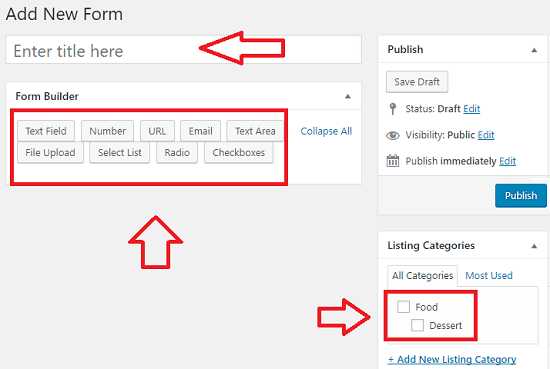
Step 2 ) The following image Add New Form allows you to add new listings forms. These forms will appear in each listing depending on the Listing Categories you assigned to each form. The following is a list of form fields available for you to use in each form you add.
Form Builder Fields
- Text Field
- Number
- URL
- Text Area
- File Upload
- Select List
- Radio
- Checkboxes
Publish
- Status
- Visibility
- Publish immediately
Listing Categories
- Food is the parent of Desert
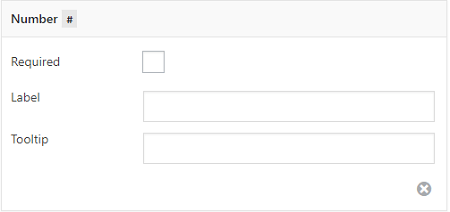
Step 3 ) The following image shows you the fields available for each form field in the list below.
Form Fields
- Text Field
- Number
- URL
- Text Area
Step 3-a ) Each of the above fields provides you with the following options to select.
Field Options
- Required
- Label
- Tooltip
- Click on the x button to delete the field.
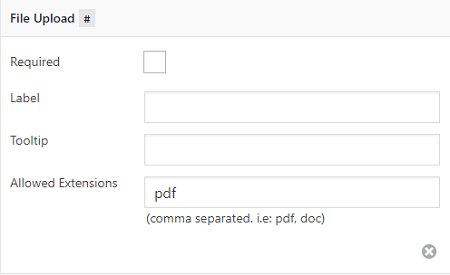
Step 4 ) The following image shows you the fields available for the form field below.
Form Field
- File Upload
Step 4-a ) The field above provides you with the following options to select.
Field Options
- Required
- Label
- Tooltip
- Allowed Extensions = In this example I added a pdf extension. You can add as many extensions allowed for your site. Remember to add a comma after each extension.
- Click on the x button to delete the field.
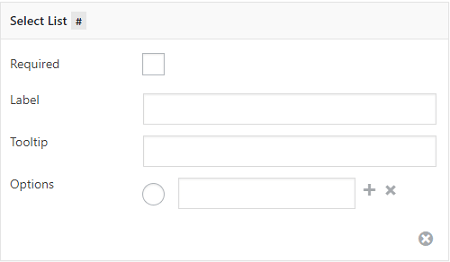
Step 5 ) The following image shows you the fields available for each form field in the list below.
Form Fields
- Select List
- Radio
Step 5-a ) Each of the above fields provides you with the following options to select.
Field Options
- Required
- Label
- Tooltip
- Options = Click on the plus symbol to add more option fields. Add as many as needed for your form. If you make a mistake and need to delete the field, click on the x symbol to remove the field.
- Click on the x button to delete the field.
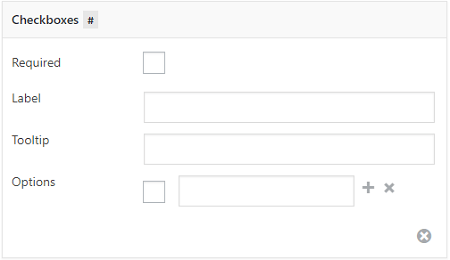
Step 6 ) The following image shows you the fields available for the form field below.
Form Field
- Checkboxes
Step 6-a ) The field above provides you with the following options to select.
Field Options
- Required
- Label
- Tooltip
- Options = Click on the plus symbol to add more option fields. Add as many as needed for your form. If you make a mistake and need to delete the field, click on the x symbol to remove the field.
- Click on the x button to delete the field.
The instructions above shows you how simple it is to add listings forms in Vantage theme.
If you have any questions or suggestions please leave a comment.
There will be more tutorials coming soon. So make sure you keep coming back for the latest.
Enjoy.
Vantage Theme Tutorial List: