ClassiPress WordPress Theme Emails Settings tutorial will show you how to setup the e-mail system, ads in classipress and more.
Last Updated: January 12, 2019
Latest Update: I have changed a link.
In this tutorial you will learn how to set up and enable the e-mail system in ClassiPress. It also covers enabling the sending an e-mail when adding new users, pruning ads, new ad submission and allowing HTML in the e-mail body and more.
Note: Remember to use the correct variables when editing the e-mail body.
ClassiPress WordPress Theme Emails Settings
Step 1 ) Go to ClassiPress -> Emails to start setting up classipress emails settings.
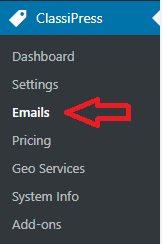
Emails General Settings
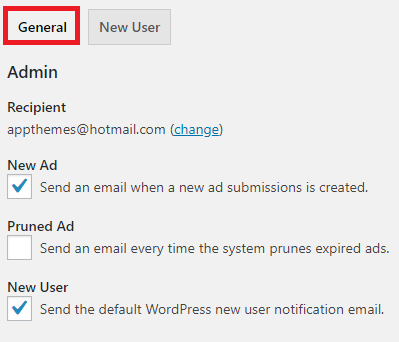
Step 2 ) Go to ClassiPress -> Emails -> General to begin setting up the following options as illustrated in the following image.
Emails General Settings
- Recipient = You can change the recipient e-mail by clicking on the change link.
- New Ad
- Pruned Ad
- New User
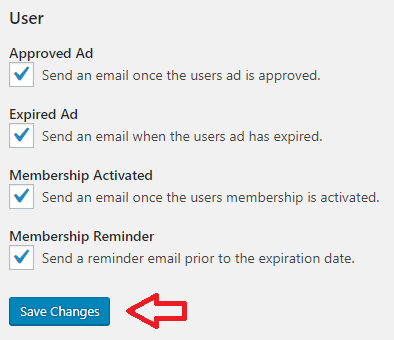
Step 2-a ) The following image allows you to set up the following options.
User Emails Settings
- Approved Ad
- Expired Ad
- Membership Activated
- Membership Reminder
- Click on Save Changes button when you finish with your settings.
Emails New User
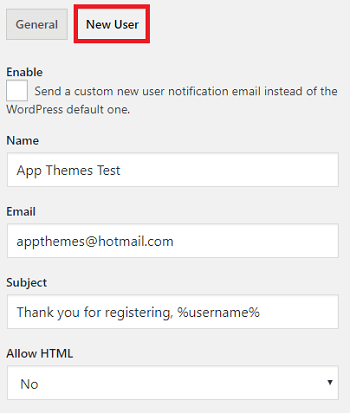
Step 3 ) Go to ClassiPress -> Emails -> New User to begin setting up the following options as illustrated in the following image.
Emails New User
- Enable
- Name
- Subject = Note: You can use variables in the e-mail subject.
- Allow HTML = Disable this option if you have issues with your e-mail body when sent.
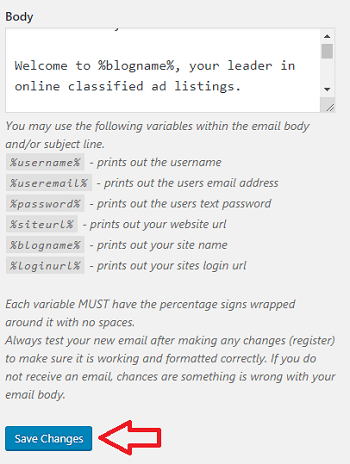
Step 3-a ) The following image allows you to set up the following options.
Emails Body Settings
- Body = Note: You can use variables in the e-mail body.
- Click on Save Changes button when you finish with your settings.
That is how simple it is to setup ClassiPress emails settings.
If you have any questions or suggestions please leave a comment.
Enjoy.
ClassiPress Theme Tutorial List: