Install Lets Encrypt In A VPS Server Using WHM, shows you how to setup and install Free Let’s Encrypt in your vps server.
Last Updated: October 7, 2020
Latest News: Moved the post from mbrsolutionhost to mbrsolution.
The following instructions shows you how to setup and install Free Let’s Encrypt in your vps server using WHM. It also advice’s you to set up SSL in the sites hosted in your server. These instructions are based on Justhost VPS server (Note: This is an affiliate link. I get a small commission if you make a purchase). However they should work for most linux servers.
Information: Click on the following URL Let’s Encrypt to learn more.
Install Lets Encrypt In A VPS Server
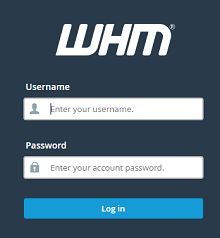
Step 1 ) Log into WHM (Web Host Manager) as illustrated in the image below. Make sure your login has https in the URL address. The following URL is an example of a secured login.
Note: Your servers login URL address might be different.
Example URL Address
https://yoursite.com:2087/
If you see the “Feature Showcase” scroll to the bottom and click the Exit to WHM button.
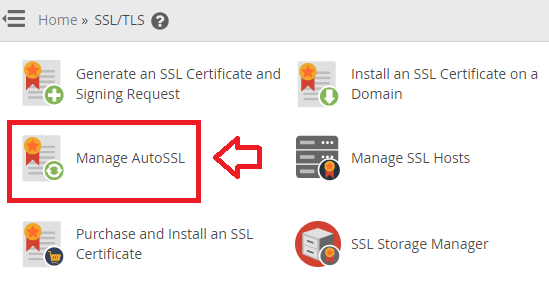
Manage AutoSSL
Step 2 ) Go to SSL/TLS and click on Manage AutoSSL as illustrated in the image below.
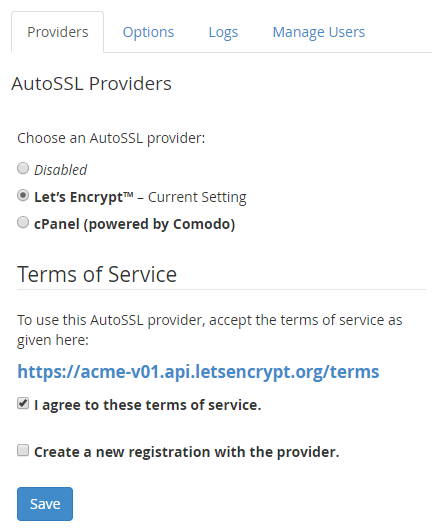
AutoSSL Providers
Step 3 ) Click on Providers tab as illustrated in the image below. This allows you to select from the following options. For this tutorial I have selected Let’s Encrypt.
AutoSSL Providers
- Disabled
- Let’s Encrypt = This is the option selected for this tutorial.
- cPanel (powered by Comodo)
Required Options To Select
- I agree to these terms of services.
- Create a new registration with the provider.
- Click on Save button once you have finished with the settings.
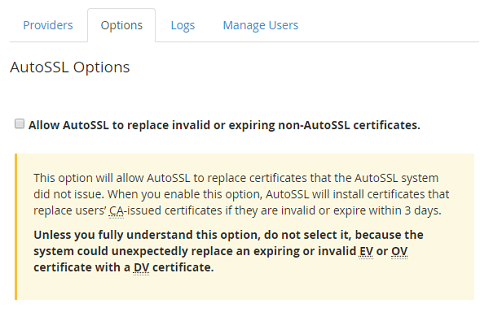
AutoSSL Options
Step 4 ) The following image Options allows you to select the following option.
AutoSSL Options Part 1
- Allow AutoSSL to replace invalid or expiring non-AutoSSL certificates = (Note: If you are not sure about this option, I suggest that you don’t enable it. By default this option is disabled. Read the message carefully.)
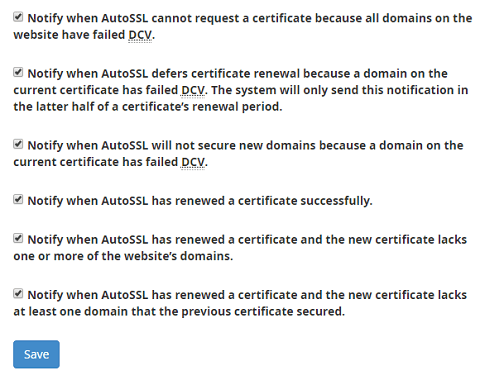
Step 4-a ) The following image allows you to select from the following options. By default all these options are selected. So in my option just leave them selected.
AutoSSL Options Part 2
- Notify when AutoSSL cannot request a certificate because all domains on the website have failed DCV.
- Notify when AutoSSL defers certificate renewal because a domain on the current certificate has failed DCV. The system will only send this notification in the latter half of a certificate’s renewal period.
- Notify when AutoSSL will not secure new domains because a domain on the current certificate has failed DCV.
- Notify when AutoSSL has renewed a certificate successfully.
- Notify when AutoSSL has renewed a certificate and the new certificate lacks one or more of the website’s domains.
- Notify when AutoSSL has renewed a certificate and the new certificate lacks at least one domain that the previous certificate secured.
Manage VPS Users
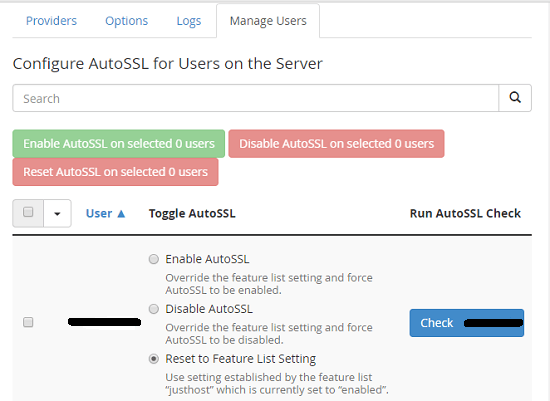
Step 5 ) The following image Manage Users allows you to select from the following options.
Configure AutoSSL For Users Buttons
- Enable AutoSSL on selected 0 users
- Disable AutoSSL on selected 0 users
- Reset AutoSSL on selected 0 users
AutoSSL User Options
- Enable AutoSSL
- Disable AutoSSL
- Reset to Feature List Settings = (Note: The reason I selected this option is because my VPS server is hosted at Justhost and I have more than one site active.)
- Click on Check button once you are ready.
Setup SSL In Your Sites
Step 6 ) Once the above has been completed in your server, you need to set up your site or sites in your vps server. You can either edit your .htaccess file or use a plugin. If you decide to use a plugin, the following URL WordPress SSL Checking Plugins has a list of plugins I recommend.
Note: If you have a website hosted in JustHost, you can check the following documentation manage-autossl for more instructions.
That is all it takes to install free Lets Encrypt in a vps server.
If you have any questions please let me know. I will be updating this tutorial from time to time. Come back to read the latest updates.
Enjoy.