WordPress WooCommerce How To Add Products post will show you how to start adding products to your online store in a few simple steps.
Last Updated: December 4, 2019
Latest News: Updated the link in the footer.
WooCommerce makes it very simple to add products to your online store. There are a few settings you need to configure and enable when you start adding products. The following steps will show you how simple it is to add products to your online store.
This post is simple and easy to follow. Only the general and basic features have been enabled and configured for this product. In your case, you might want to enable the rest of the features for your online store.
Note: Remember the theme used for this online store is WooCommerce Free Storefront.
WordPress WooCommerce How To Add Products
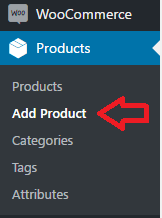
Step 1 ) The following image shows you the Products menu. Click on Add Product to start adding your online store products.
Note: The following list shows you the options and settings enabled and the options and settings not enabled for this product.
Step 2 ) The following is a list of options available for each product you add to your online store.
- Product Data
- Virtual = Not added to this product.
- Downloadable = Not added to this product.
- General
- Inventory
- Shipping = Not added to this product.
- Linked Products = Not added to this product.
- Attributes = Not added to this product.
- Advanced
- Product Categories
- Product Tags
- Product Image
- Product Gallery
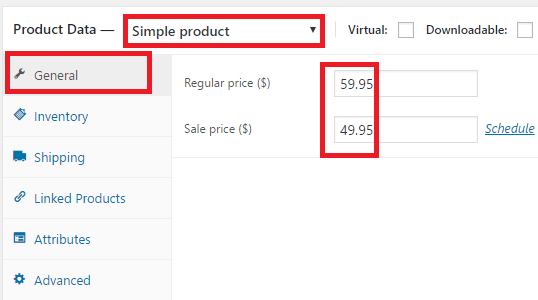
Step 3 ) The following image General allows you to set up the following options.
- Product Data
- Virtual
- Downloadable
- Regular price ($)
- Sale price ($)
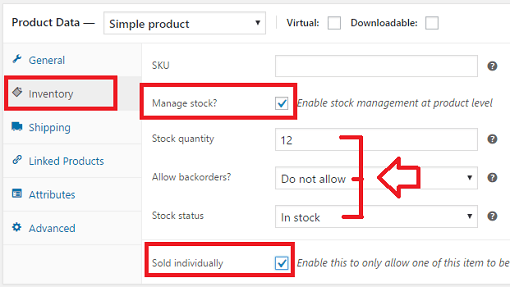
Step 4 ) The following image Inventory allows you to set up the following options.
- SKU
- Manage stock?
- Stock quantity
- Allow backorders?
- Stock status
- Sold individually
Advanced
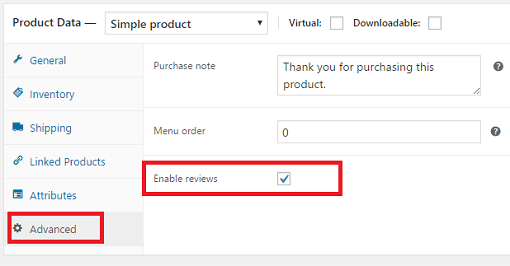
Step 5 ) The following image Advanced allows you to set up the following options.
- Purchase note
- Menu order
- Enable reviews
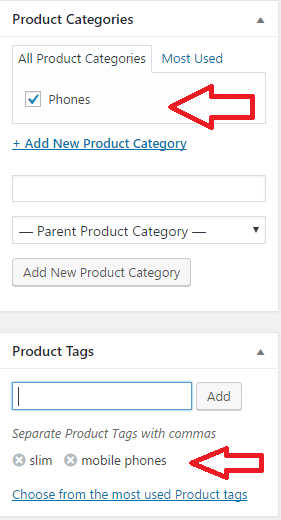
Step 6 ) The following image Product Categories and Product Tags allows you to select the product category and tags. These categories and tags are different to the categories and tags you add in your website for posts.
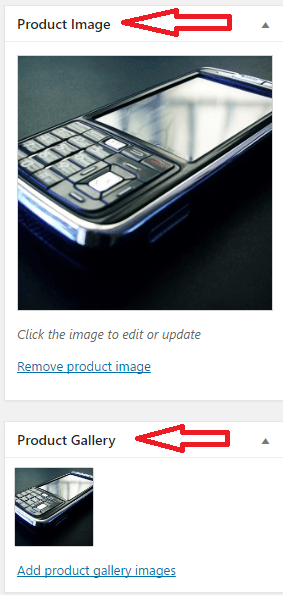
Step 7 ) The following image displays the image or images added for the product.
This options is very important and it is always a good idea to add clear and descriptive images for your products. The Product Gallery is also important, however this is not always necessary and needed. It depends on the product you are selling.
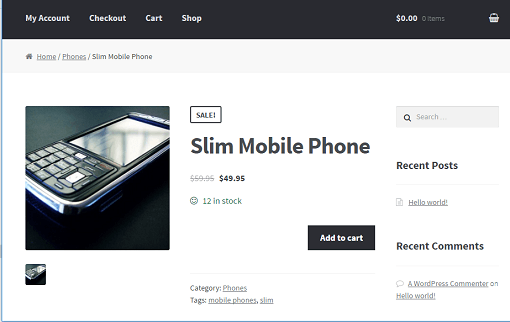
Step 8 ) The following image shows you the final result after adding the product.
Note: The following design is the default Storefront design without any customization.
The above instructions shows you how to add products to your online store.
If you have any questions please let me know.
I will be updating this tutorial from time to time so make sure you come back for the latest.
Enjoy.
WooCommerce Plugin Tutorial List: