WordPress Easy HTTPS Redirection Plugin tutorial shows you how to set up and configure your site for HTTPS security using this plugin.
Last Updated: April 25, 2025
Latest News: Updated the documentation.
Note: Before you begin you must make sure your server has the SSL certificate set up and configured correctly for your website before you begin using this plugin.

Easy HTTPS Redirection 2.0.0 changelog.
- The plugin has gone through significant updates and improvements in this version.
- If you have any issues after you upgrade to this version, please roll back to the previous version and contact us for support.
- Here is the download link for the previous version: https://downloads.wordpress.org/plugin/https-redirection.1.9.2.zip
- The plugin now has it’s own admin menu labeled “Easy HTTPS & SSL”.
- Added a new option to send SSL expiry notifications to a specific email address.
- Added a new option to specify how many days in advance the notification should be sent.
- Added debug logging feature.
- Updated the translation POT file.
In this post you will learn how to set up your site or some pages or post to run in HTTPS security mode using Easy HTTPS Redirect plugin. This is a simple and easy to use plugin that does a great job in securing your whole site or just some pages and post depending on your choice. Most people nowadays choose to secure the whole site, which makes sense. However some of you might only want to secure a few pages or post. For example: You might be running a shopping cart site and you wish to secure the shopping cart page and the contact form page.
What you need:
Easy HTTPS Redirection (SSL) Tutorials:
- General Settings
- Certificate Expiry
WordPress Easy HTTPS Redirection Plugin
Information:
The external links (outgoing links) are not touched by the plugin. It only forces the URLs (static resources) that are used in an EMBED in your web page. So let’s say for example, you have embedded an image in your blog post. This image is coming from an external source. If that image URL is not using HTTPS then your full post is going to show the SSL warning (meaning it’s no longer a secure page).
The way SSL works is that you can’t embed anything using non-https URLs if you want the page to be fully SSL secured. So things like images, JS files, CSS files etc that are embedded in your site must be in HTTPS. there is no other way.
However, if you have a simple outgoing link to another site (for example a link to a reference page, an amazon product page etc.) and that link is non-https, that is totally fine. That link has no bearing in your page being SSL secured. So the plugin won’t touch that.
====================================
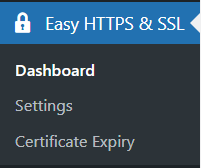
Step 1 ) Go to Easy HTTPS & SSL sidebar menu as illustrated in the image below to set up the following options and activate the plugin.
Easy HTTPS & SSL Options
- Dashboard
- Settings
- Certificate Expiry
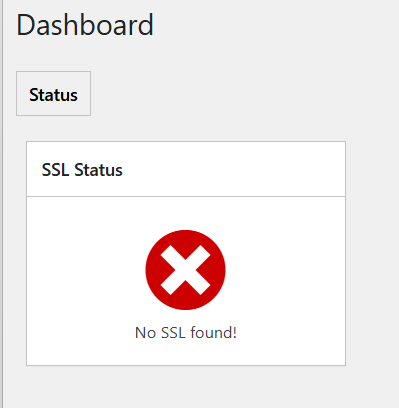
Step 2 ) The following image illustrates that no SSL certificate is currently active in the site.
Step 3 ) The following image General settings tab displays an important message. Please make sure you read this message before you activate the plugin.
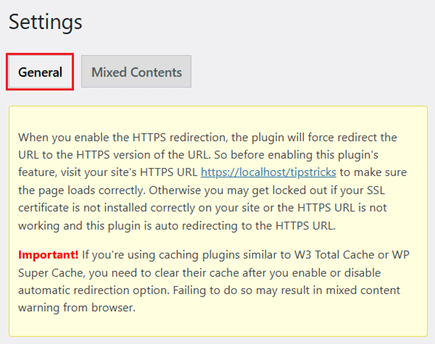
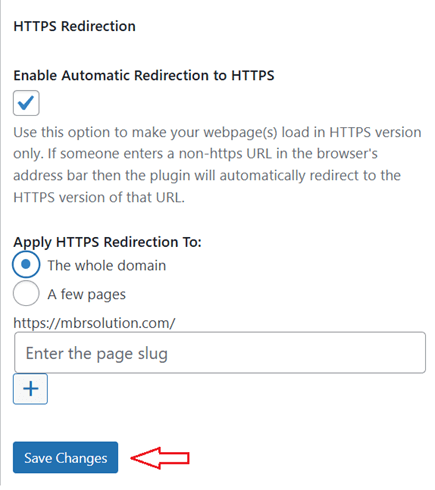
Step 4 ) Once you have read the message above then carry on with the settings as illustrated in the image below.
If there is no SSL certificate found in the site the plugin will not allow you to activate it. So, first you must make sure that your site has an SSL certificate active.
General Admin Options
- Enable automatic redirection to the HTTPS
- Apply HTTPS Redirection To:
- The whole domain
- A few pages
- Click on Save Changes button once you have completed your settings.
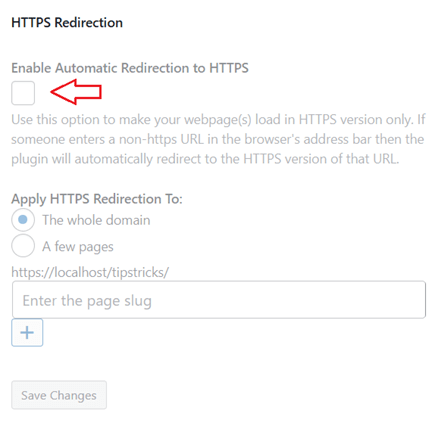
Step 4-a ) Once you checked Enable automatic redirection to HTTPS box the rest of the fields become active as illustrated in the image below.
Apply HTTPS redirection to:
- The whole domain = If you select this option, your whole site will become https secured
- A few pages = If you select this option, you can choose which pages or posts you wish to secure with https. For example: You might be running a shopping cart site and you wish to secure the shopping cart page and maybe your contact form page. Although nowadays most tend to secure the whole website.
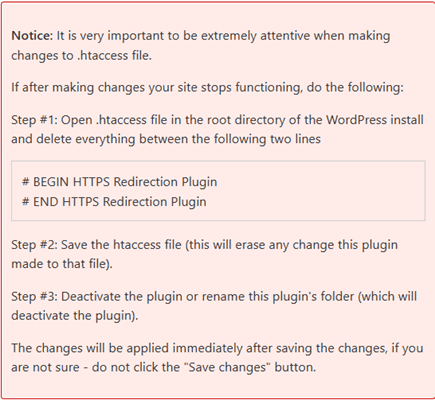
Step 5 ) The following image Notice provides information for you, that allows you to troubleshoot any issues after activating the plugin.
Debug Logging
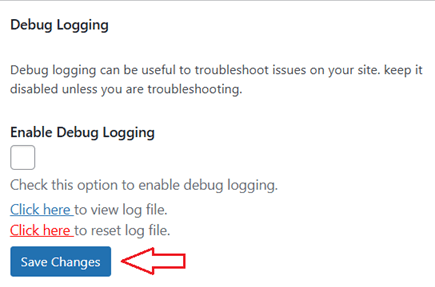
Step 6 ) The following image Debug Logging allows you to set up the following options.
- Enable Debug Logging
- Click on Click here link to view the log file.
- Click on Click here link to reset the log file.
- Click on Save Changes button when you finish setting up the general settings.
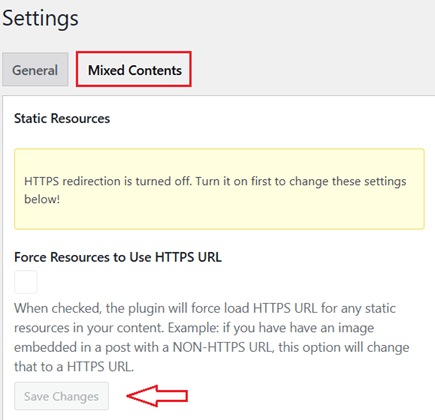
Mixed Contents
Step 7 ) The following image Mixed Contents tab allows you to activate the following option.
Mixed Contents Options
- Force Resources to Use HTTPS URL = When you check this box the plugin will force load HTTPS URL’s for any static resources in your content. Example: if you have have an image embedded in a post with a NON-HTTPS URL, this option will change that to a HTTPS URL. Note: Don’t check this box, if you selected A few pages option above.
- Click on Save Changes button once you have enabled this option.
==========================
Troubleshooting Tips
Q1 Images are not displaying after I installed the plugin?
Solution: Make sure you have enabled the following option Force resources to use HTTPS URL as illustrated in Step 1 ) above.
==========================
Q2 Some of my links are still showing as non secure in the browsers. How do I fix this issue?
Solution: You will have to check the URL address for the links that are broken in your site and make the necessary changes i.e. change http to https.
Note: This plugin does not control the URL address of a site. For example; www.yoursite.com or yoursite.com. This is done via your Host and you can also use Google Webmasters Tools.
==========================
Q3 I have a page with an external http link in an iframe. Because of this plugin it gives me the error.
Solution: In modern browsers you can’t have non-https iframe on https page. You can carry out a small test by creating this simple html file:
<iframe src="https://newtracking.post.ir">
Then save it as test.html on your website and then access it via your browser – e.g. https://example.com/test.html
You will see the iframe content is not displayed and a warning is shown in the address bar of the browser saying that insecure content has been blocked. Only when you click that warning and allow displaying of insecure content, you’ll see your iframe content. (Solution provided by @alexanderfoxc in the following forum post)
==========================
Q4 Could the plugin be updated to have an option to allow RewriteCond %{ENV:HTTPS} !^on$ [NC] to be used instead.
Solution: Enable the settings in the plugin then let it update the .htaccess file when you save the settings. Then you can manually update the .htacess file yourself and it will use whatever you have in your file. Remember when ever you click on save settings button, the .htaccess file will also get updated. This means you will loose your custom code, so make a note of this. You can read more about it in the following forum post.
=====================================
That is how simple it is to enable https security to your whole website, some pages or posts.
I will be updating this post from time to time. So keep coming back for the latest.
Enjoy.
My website is fully secure, no problem at all. My problem is I can’t make a few pages/posts as non-secure. I badly need that. Can I make non-secure URL for some selected pages/posts?
Thanks
Hi Mohsin, I have replied to your forum post.
Thank you
Great, ? I wish the developer can bring this option (except some pages/posts) in the next update. Please let me know further updates & feature releases here. Thank you so much.
Note: The idea of implement will look like this image:
https://i.imgur.com/EBDs0AW.png