WP eStore Plugin Add Edit Products Settings tutorial shows you how to manage and edit the product options available when adding products.
Last Updated: June 2, 2023
Latest News: Updated the documentation.
WP eStore has many options available for adding new products to your store. However the default settings can get you selling products in your store straight away.
Basic Usage Guide
Step 1. First add the product(s) to the database through the Add/Edit Products interface. Products can be modified through the Manage Products interface.
Step 2. To add the Add to Cart button simply add the following trigger text to a post or page next to the product.
[wp_eStore_add_to_cart id=PRODUCT-ID]
Replace PRODUCT-ID with the actual product id of the product (example, 1). Product IDs are unique numbers that are automatically created for you when you add a product to the database. All of your products IDs can be found in the Manage Products section.
Step 3. To add the shopping cart to a post, checkout page and/or sidebar simply add the following trigger text to a post or page in HTML view or use the sidebar widget. The shopping cart will only be visible when a customer adds a product in the post or page.
[wp_eStore_cart]
What You Need:
- WordPress eStore (Note: This is an affiliated link = I get a small commission if you make a purchase.)
Remember: Check all your options before you save them. Run the sandbox settings for further testing before you publish your online store. This plugin has many features to setup.
WP eStore Plugin Add Edit Products Settings
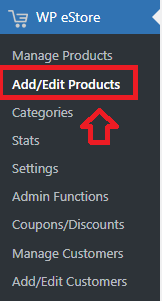
Step 1 ) Go to WP eStore -> Add/Edit Products as illustrated in the image below to begin adding new products for your store and or editing the existing products.
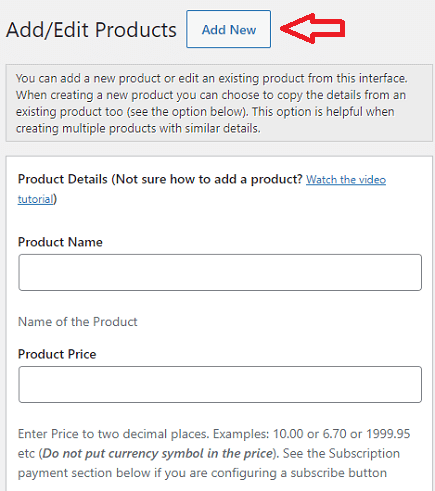
Step 2 ) The following image Add/Edit Products allows you to setup the following options.
Add/Edit Products Options
- Product Name
- Product Price
- You can also click on Add New button to begin adding a new product.
Important: Don’t enter a currency symbol in the product price field for (example: $, £, €). If you do it will create an error.
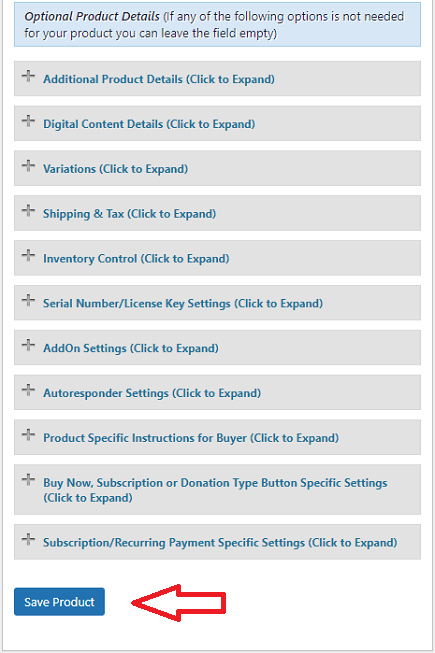
Optional Product Details
Step 3 ) The following image Optional Product Details displays the many options you can configure when adding products to your store.
Optional Product Details Options
- Additional Product Details
- Digital Content Details
- Variations
- Shipping & Tax
- Inventory Control
- Serial Number/License Key Settings
- AddOn Settings
- Autoresponder Settings
- Product Specific Instructions for Buyer
- Buy Now, Subscription or Donations Type Button Specific Settings
- Subscription/Recurring Payment Specific Settings
- Click on Save Product button when you complete entering the settings.
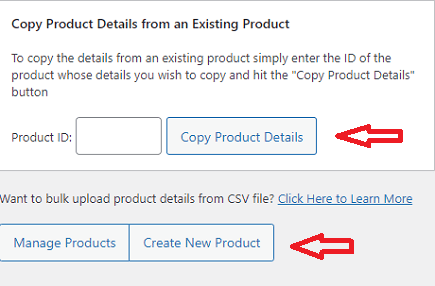
Copy Product Details from an Existing Product
Step 4 ) The following image Copy Product Details from an Existing Product allows you to manage the following options.
Copy Product Details from an Existing Product Options
- Product ID: then click on Copy Product Details button.
- Click on Manage Products button.
- Click on Create New Product button.
==================================
I will be updating this post from time to time. So keep coming back for more. If you have any questions please let me know.
Enjoy.
WordPress eStore Plugin Tutorial List: