WordPress Posts Settings Options post helps you understand all the different settings available when editing or adding new posts.
Last Updated: May 16, 2023
Latest News: I updated the documentation.
Post are very important in a website or blog. Adding the correct content in a post and formatting the post correctly can help and attract more visitors to your site. Remember when someone visits a post in your site, it is important that the information provided in the content is related to your site and post title. The extra options can also help you manage the content and administrate the post.
Note: I will be adding more information and links to other post. These post will cover more in depth some of the features mentioned.
Post Settings Tutorials
- WordPress Posts Settings Options
- WordPress Posts Settings Advanced Options
Understand WordPress Posts Settings
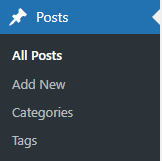
Step 1 ) Go to Posts to start adding or editing your posts. In the admin menu you will see the following options. with.
Posts
- All Posts
- Add New
- Categories
- Tags
Screen Options
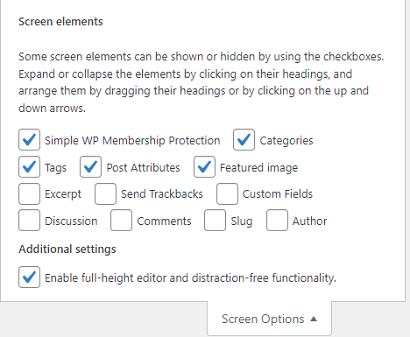
Step 2 ) The following image Screen Options allows you to adjust what you would like to see when creating and editing posts in your site. By enabling any of the features below you will have extra settings available that allows you to manage your posts even further.
Screen Options
- Additional Options for Suffusion = Note: This is optional and it is available if you install Suffusion theme. Each theme and plugin might have extra settings available for you when creating or editing posts.
- Excerpt
- Send Trackbacks
- Custom Fields
- Discussion
- Slug
- Author
- Format
- Categories
- Tags
- Featured Image
Layout
- 1 column
- 2 columns
Additional settings
- Enable full-height editor and distraction-free functionality.
Add a New Post
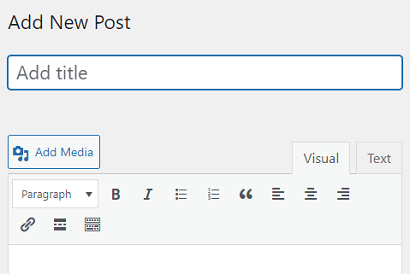
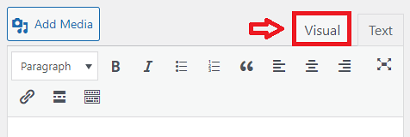
Step 3 ) The following image Add a New Post allows you to set up the following options when adding a new post to your site.
Add a New Post Settings
- Enter title here
- Add Media
- Visual
- Text
- Post Visual formatting options i.e Paragraph, bold, italic etc
Edit Post
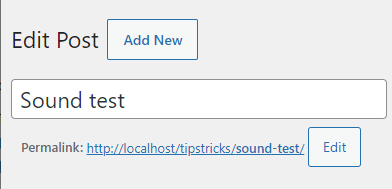
Step 4 ) The following image Edit Post displays the settings and options you will see if you are editing a post.
Editing Post
- Add New
- Post updated. View post link. = This message shows if you have made changes to the post and saved them. You can then click on view post link to view the post.
- Post title
- Permalink URL = You can also click on Edit button to change your Permalinks settings.
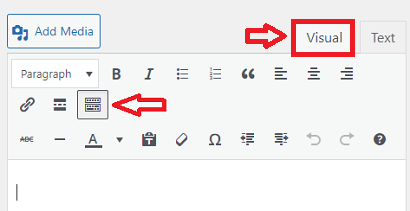
Visual Format
Step 5 ) The following image Visual format displays a WYSIWYG editor. This allows you to format your post just like a Word Editor i.e. Microsoft Word Processor. In the current window you see the following visual settings. You can play around with the settings until you are happy with the format of your post.
Note: I will be adding more information about this in another post.
Visual Formatting Settings
- Add Media
- Paragraph
- Bold
- Italic
- Bulleted List
- Numbered List
- Blockquote
- Align Left
- Align Centre
- Align Right
- Distraction-free writing mode
- Insert/edit link
- Remove link
- Insert Read More tag
- Toolbar Toggle
Toolbar Toggle
Step 6 ) The following image Toolbar Toggle displays an extra row on the menu. This provides more options for your WYSIWYG visual editor. These extra features will help you further to create stunning visual posts.
Toolbar Toggle Settings
- Strikethrough
- Horizontal line
- Text Colour
- Past as text
- Clear formatting
- Special Character
- Decrease indent
- Increase indent
- Undo
- Redo
- Keyboard Shortcuts
Text Format
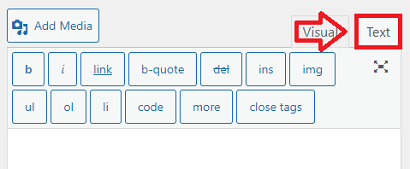
Step 7 ) The following image Text format is similar to the Visual format mentioned above but this is in raw text format. No visual style format is displayed.
Note: I will be adding more information about this in another post.
Text Formatting Settings
- Add Media
- bold
- italic
- link
- b-quote
- del
- ins
- image
- ul
- ol
- li
- code
- more
- close tags
Publish Box
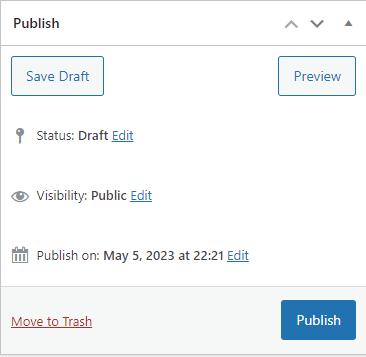
Step 8 ) The following image Publish allows you to set up the following options.
Note: You might like to read the following documentation How To Manage WordPress Post Publish Box to learn more about WordPress post publish box.
Publish Box Options
- Save Draft button
- Preview button
- Status: Draft Edit
- Visibility: Public Edit
- Publish immediately Edit
- Move to Trash link
- Publish button
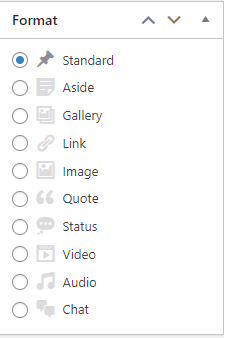
Format Box
Step 9 ) The following image Format Box allows you to set up the format for the post you are creating. Each format displays the posts content differently. Make sure you select the correct format for the post based on the content.
Note: The formats below are based on WordPress theme Suffusion. Each theme has different formats available. Make sure the theme you install has all the formats you require for your website.
Format Box Options
- Standard
- Aside
- Gallery
- Link
- Image
- Quote
- Status
- Video
- Audio
- Chat
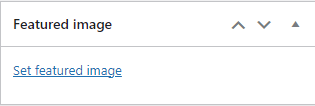
Featured image
Step 10 ) The following image Featured image allows you to select an image by clicking on Set featured image link. This plays a roll in social sharing via social medias like Twitter, Facebook, Instagram etc. It also allows you to display your post based on a featured image.
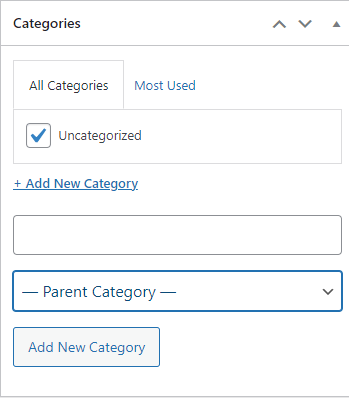
Categories
When adding categories and tags think of them in this manner. Categories represent the chapters in a book and tags represent the index in a book. If you keep this in mind it will help you to sort out categories from tags in your website.
Step 11 ) The following image Categories allows you to assign a category or categories to a post.
Note: You should spend some time planning how many categories are you going to have in your site. Understand how you will be assigning categories to each post is also important. You can also select if a category is going to be the parent of another category. The following link Category has more information.
Tags
Step 12 ) The following image Tags allows you to assign tags to a post. This is similar to categories, however one of the huge differences is that you can assign many tags to each post. In saying that you should not assign too many tags. Make sure the tags you are assign are related to the post content.
Note: You should spend some time planning how many tags you are going to have in your site. Remember you can add a large number of tags which is different to categories. The following link Tag has more information.

=======================
The above should help you understand how to add or edit a post. You might also be interested in the following YouTube video How To Add A New Post.
If you have any questions please let me know.
I will be updating this tutorial from time to time so make sure you come back for the latest.
Enjoy.
WordPress Setup Tutorial List: