Last Update: August 13, 2015
Create WordPress Simple Photo Gallery shows you how to create a gallery using Template 1, Template 2, Template 3 (Masonry), upload a few images and more.
Latest News: I have updated the details at the end of the post.
In the following steps you will learn how to create a gallery using Template 1, Template 2 and Template 3 (Masonry). There are only a few settings you need to set up. (Important: You can add or change any settings that you want. This is just an example to show you what this plugin can do)
WordPress Simple Photo Gallery Plugin Tutorials:
- Plugin Settings
- Gallery Management
- Albums Management
- Create Gallery
- Troubleshooting
Create WordPress Simple Photo Gallery Steps
Step 1 ) Go to Photo Gallery -> Gallery -> Add/Edit to create a new gallery. See image below.
- Gallery Name = I added Android since this gallery is about the Android Smartphone operating system
- Select a template = for this tutorial I selected all 3 Templates to show you the difference between them.
- I left the sorting as default
- I selected Preview Photo via Page.

Step 2 ) For this tutorial I did not set up a watermark so you don’t have to worry about the rest of the settings. (Note: You can choose to add a watermark if you want.)
I left Use Pagination and 20 Thumbs Per Page which is the default settings. Even though in this tutorial I only added 3 images so both settings above are really not needed.

Step 3 ) Click on Upload button to upload your images. (Important: Don’t use bmp or else you will get some errors. Your images should really be jpg file format, which is the best for websites.)
Once your images have been uploaded you will see a message letting you know that your images were selected to upload. Click on Save Gallery button. (Important: If you don’t click on save, your images will not be added to the gallery)

Step 4 ) You can see the 3 images that I added to Android Gallery.

Step 5 ) This is how it looks from the front of the website using the above settings and either of the following templates.
Template 1

Template 2
Template 3 (Masonry)
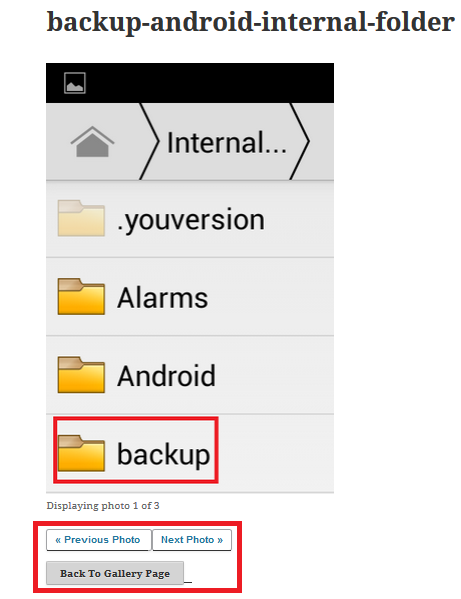
Step 6 ) This is how it looks when you click on one image.
You can see at the bottom of the image the following Previous Photo, Next Photo and Back To Gallery Page.
You have now created your first gallery. Click on the following URL Troubleshooting to continue.
If you have any questions please let me know. I will be updating this from time to time. So keep coming back for the latest post.
Enjoy