Last Updated: January 21, 2016
YouVersion Free Bible Study Settings tutorial will show you how to setup all the different areas in your account through the settings.
Latest News: I have updated the images to reflect the changes made to the website.
This post will cover all the different settings you can manage in your account. It is very important to set up all the settings correctly before you start. The settings is made up of a small list of different features you can configure straight away without any complications. It is very straight forward for anyone to complete.
YouVersion Free Bible Study Tutorials:
YouVersion Free Bible Study Settings Steps
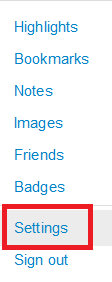
Step 1 ) Go to Settings to edit your current settings. See image below.
Step 2 ) The following image Settings allows you to set up and edit the following features in your account.
- Edit profile
- Manage notifications
- Change e-mail address
- Change password
- Change picture
- Connected accounts
- Verse of the day subscriptions
- Connected devices
- Delete account

Step 3 ) The following feature Edit profile allows you to edit the following profile fields.
- Edit profile
- First name
- Surname
- Bio
- Location
- Post code
- Website
- Country
- Time zone
- Click on Update profile button when you finish
Step 4 ) The following feature Manage Notifications allows you to set up the following notifications.
- Notify me about friends’ activity = select E-mail and or Mobile
- Notify me when a contact joins = select E-mail and or Mobile
- Notify me about comments on my activity = select E-mail and or Mobile
- Notify me about likes on my activity = select E-mail and or Mobile
- Notify me about friend requests = select E-mail and or Mobile
- Notify me about information for reading plans I’ve started. = select E-mail and or Mobile
- Notify me about badges I’ve earned. = select E-mail and or Mobile
- Keep me updated on YouVersion announcements. = select E-mail
- Click on Update Notifications button when you finish
Step 5 ) The following feature Change e-mail address allows you to change your current e-mail address. Make sure you click on Change e-mail address button when you finish.
Step 6 ) The following feature Change password allows you to change your current password by editing the following fields.
- Current password
- New password
- Confirm password
- Click on Change My Password button when you finish
Step 7 ) The following feature Change picture allows you to change your current picture by simply clicking on Browse button and uploading a new picture for your profile. I think this is important so people know who you are and what you look like. Click on Update My Picture button when you finish.
Step 8 ) The following feature Connected accounts allows you to add a Twitter and or Facebook account. Of course this is optional however you might like to share information and or Bible scriptures with all your family and friend through social media.
Step 9 ) The following feature Verse of the day subscriptions allows you to set up the following delivery services. For each service you can choose a verse from a Bible and the time to send it either AM or PM.
- Daily e-mail delivery
- Daily push notifications for mobile apps
Step 10 ) The following feature Connected devices displays all your devices that are connected to your account. You have the option to click on Remove button to remove any device.
Note: This is handy if you have lost, misplaced or your device was stolen.
You might also like to read the following URL Android Security Device Administrators. This link also provides information about Google Account Settings for Android devices.
The following image shows you two devices connected.
- Apple iPhone 3GS
- Kogan Agora HD+
- Acer Aspire E5-571

Step 11 ) The following feature Delete account allows you to delete your account.
Important: Before you take this step make sure that you are happy to delete your account. You might like to take a note of your friends and other activities that you have been involved in while your account was active.
I hope you enjoyed my little tutorial. The list will keep growing so make sure you come back for the latest.
If you have any request or would like to share some information please leave a message below or send me an e-mail through my contact form above.
Enjoy