Install Joomla Locally Using Xampp tutorial will show you how simple it is to set up Joomla on your laptop or desktop. Xampp can be installed on different platforms. I am using Windows 7 for this tutorial.
Last Updated: June 13, 2016
Important, this tutorial is set up in 2 parts:
- Part 1 focus on setting up xampp, create the database and user.
- Part 2 shows you how to install Joomla.
What you need:
Step 1 ) Install Xampp and follow the on screen instructions to set it up. This should be straight forward. I installed xampp on my second partition.
Troubleshooting xampp: Sometimes you might come across this error “mysql server has gone away” with error code 2006. This occurs because you are trying to import a large database and your settings are preventing this from happening. I will make the changes before I begin to install Joomla locally.
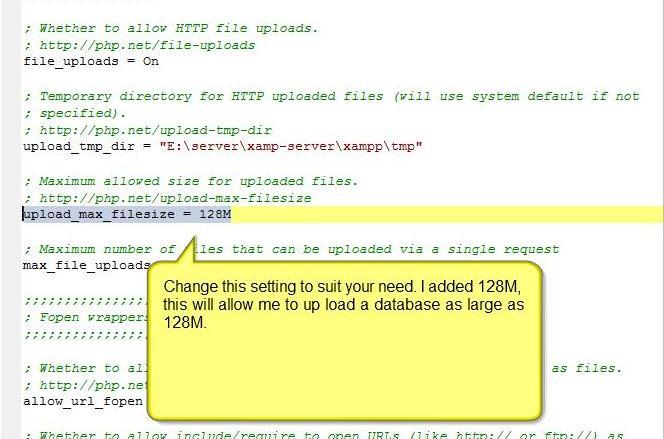
- Solution Make sure you change both “post_max_size” and “upload_max_filesize” in your “php.ini“ (which is located where your “php.exe” is). See Task 2 below.
Step 2 ) Run Xampp Control Panel and click on Apache -> Config -> PHP (php.ini). See images below.

Step 3 ) Change the following setting to suit your needs. I added 128M, this will allow me to up load a database as large as 128M. See images below.
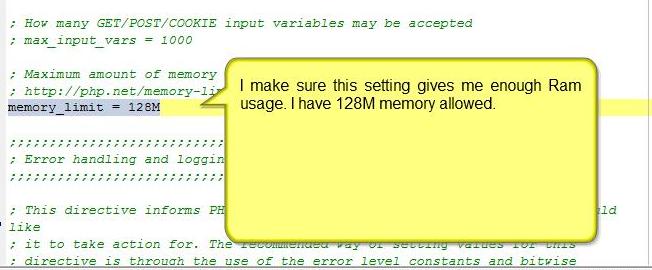
I make sure this setting gives me enough Ram usage. I have 128M memory allowed. See image below.
Important: Restart Apache and MySQL for the settings to be implemented.
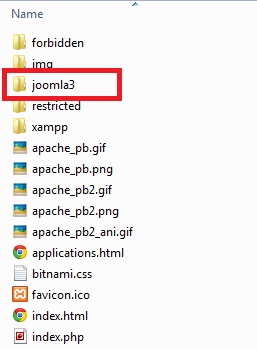
Step 4 ) I created a folder with the name joomla3. You can name your folder what ever makes you happy. Make sure you copy all the files from the joomla zip folder you downloaded from www.joomla.org site into joomla3. See image below.
Step 5 ) Start Apache and MySQL, if there are any problem they will appear on this screen. See images below.

Type localhost on your browser address bar and xampp will start.
![]()
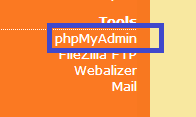
Step 6 ) Click on phpMyAdmin on the left hand bottom side to start creating a database and user. See image below.
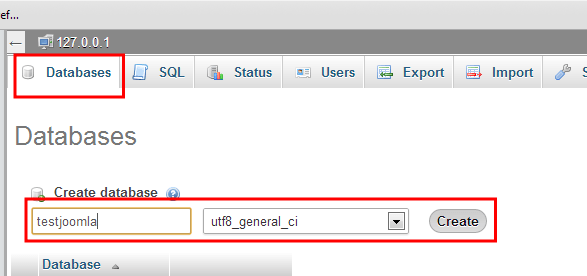
Step 7 ) Create a database, I created testjoomla database. Make sure you set it to utf8_general_ci, Click on Create. See image below.
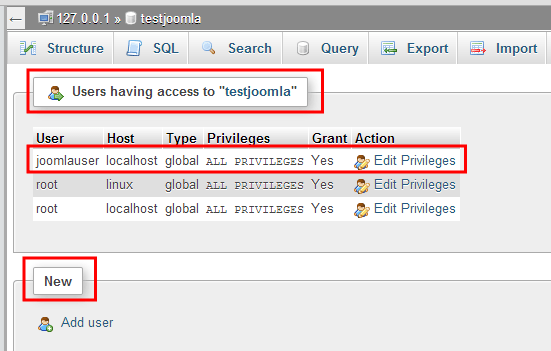
Step 8 ) Click on Add user. See image below.
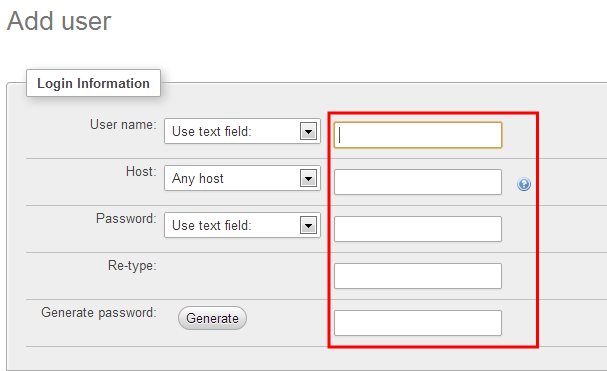
Step 9 ) Fill out the fields, I created a user with the name testjoomla. I added Localhost and added my password you can generate a password if you prefer. See image below.
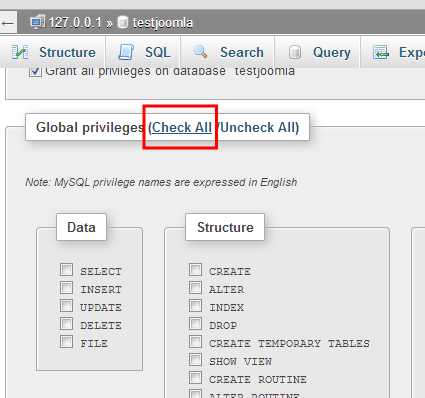
Step 10 ) Select Grant all privileges on database “your database name”. Click on Check All to select all privileges. This is very important or else you will have issues when working with your WordPress site. See images below.

Step 11 ) Next click on Go. See image below.

You have now completed Part 1 of a two part tutorial. This tutorial has illustrated how to setup Xampp, create a joomla database, add a new user and assign the new user to the database created.
Next tutorial install-joomla-locally-part-two will show you how to install Joomla 3.1.5 using the database and user created above.
I hope this tutorial has helped you